Cloud Backup
title: Cloud Backup - How to Set Up DreamHost for Cloud Backup created_at: 2016.03.12 updated_at: 2016.07.04 category: Cloud Backup --- :toc: macro :toc-title:

DreamHost DreamObjects is a cost-effective US-based cloud storage service for secure off-site data protection. Retrospect 11 for Windows and Retrospect 13 for Mac are certified for DreamHost DreamObjects. Follow these step-by-step instructions for setting up a DreamHost account, configuring a storage location (called a "bucket"), and creating a set of security credentials (an Access Key and a Secret Key, similar to a username and password).
Special Deal – 20% off on storage up to 2TB. See DreamHost DreamObjects for Retrospect.
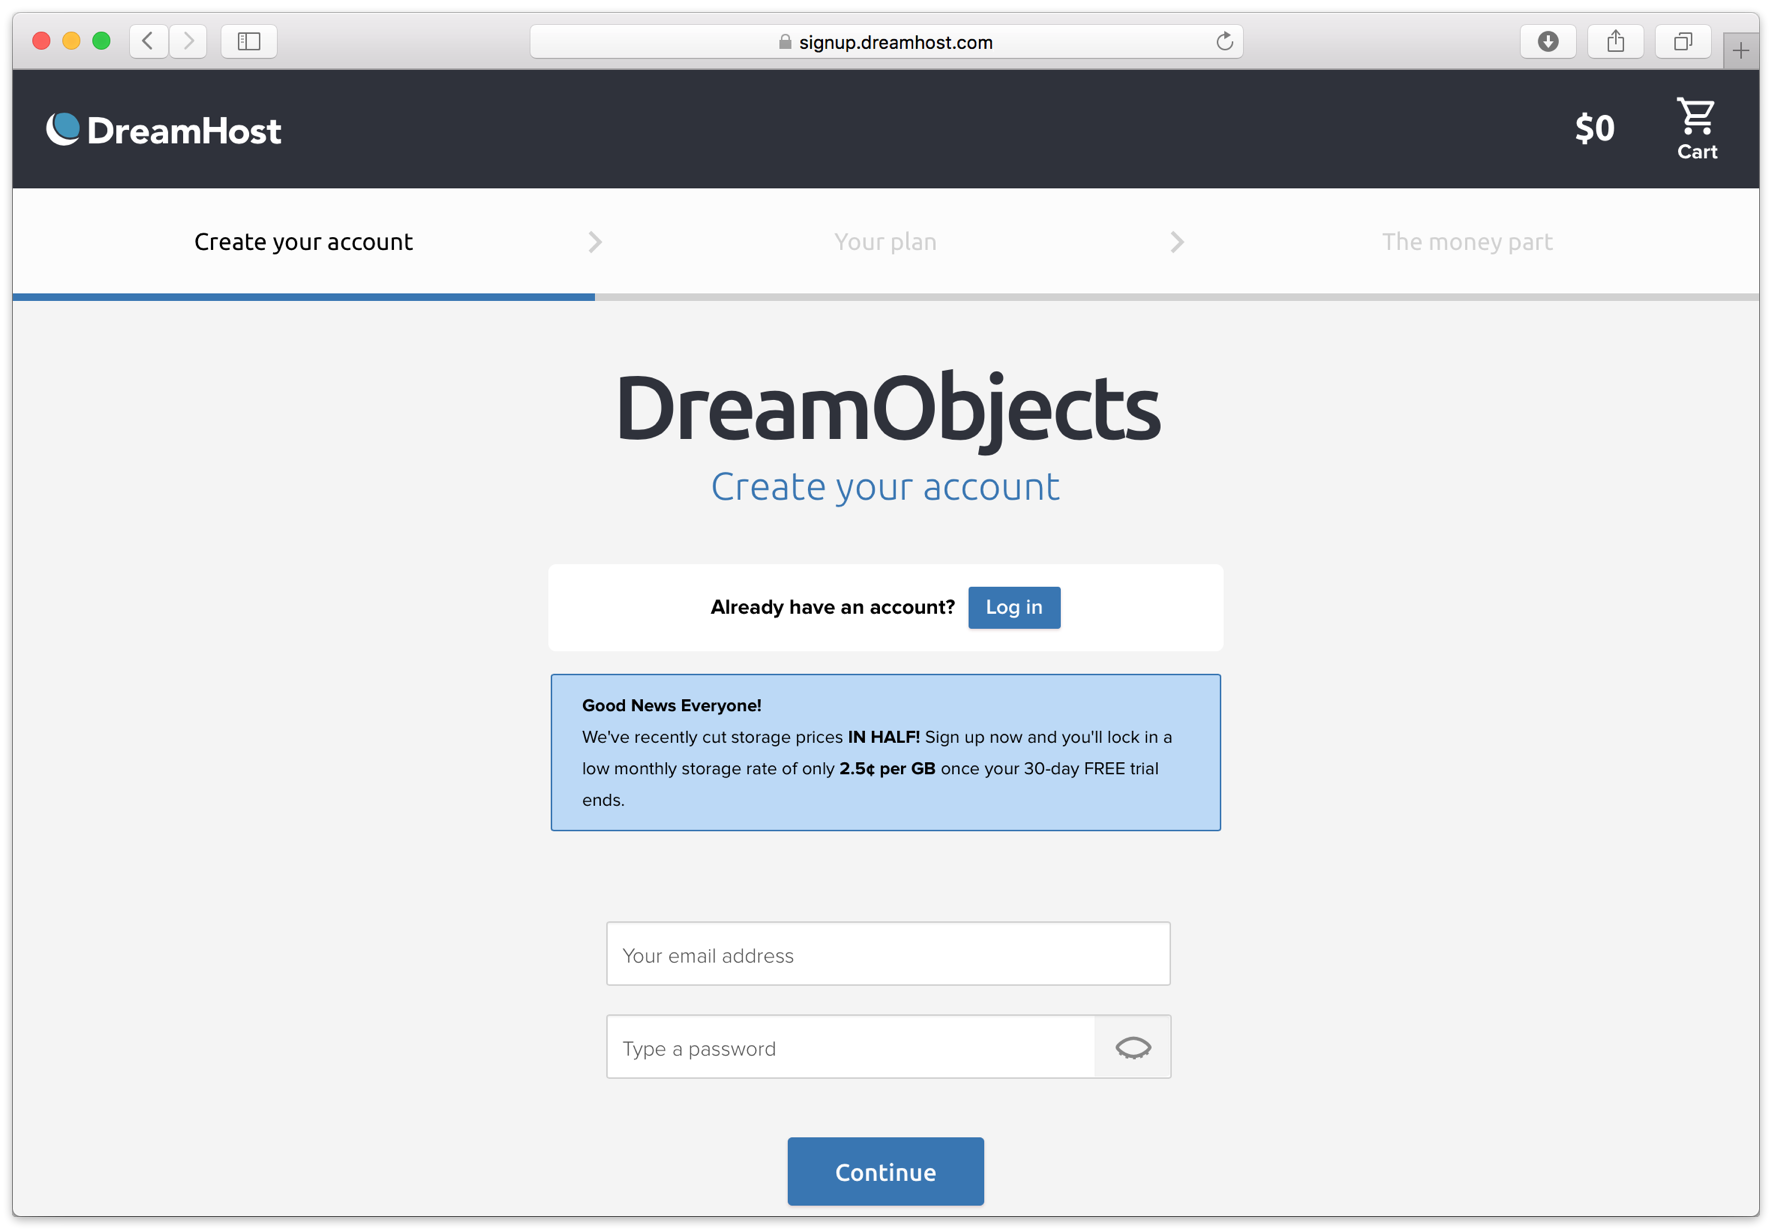
Visit DreamHost to start the account creation process and click "Try if Free for 30 Days".

Fill in an email address and a password.
Confirm the free trial plan.

Complete the contact details and billing details.

The new account is created. You’re ready to set up the storage location.

Now we will create a bucket that Retrospect can use to store backups.
Navigate to the DreamObjects section.
 2 . Click "Create New User". Type in a username, and click "Add User"

DreamHost will begin creating your new user. When it’s done, you’ll see it along with your new Access Key.

Click "Add Bucket". Type in a bucket name. Note that these are globally-unique names. Click "Add Bucket".

Your new bucket is now created and ready to use. In Retrospect, the "Path" is objects-us-west-1.dream.io/your_bucket_name.

You’re ready to use Retrospect. You now have a bucket location, an Access Key, and a Secret Key (shown when you click "Show Secret Key").

Retrospect needs three pieces of information to access DreamHost:
Path – objects-us-west-1.dream.io/your_bucket_name
Access Key – Use the Access Key from above.
Secret Key – Use the Secret Key from above.
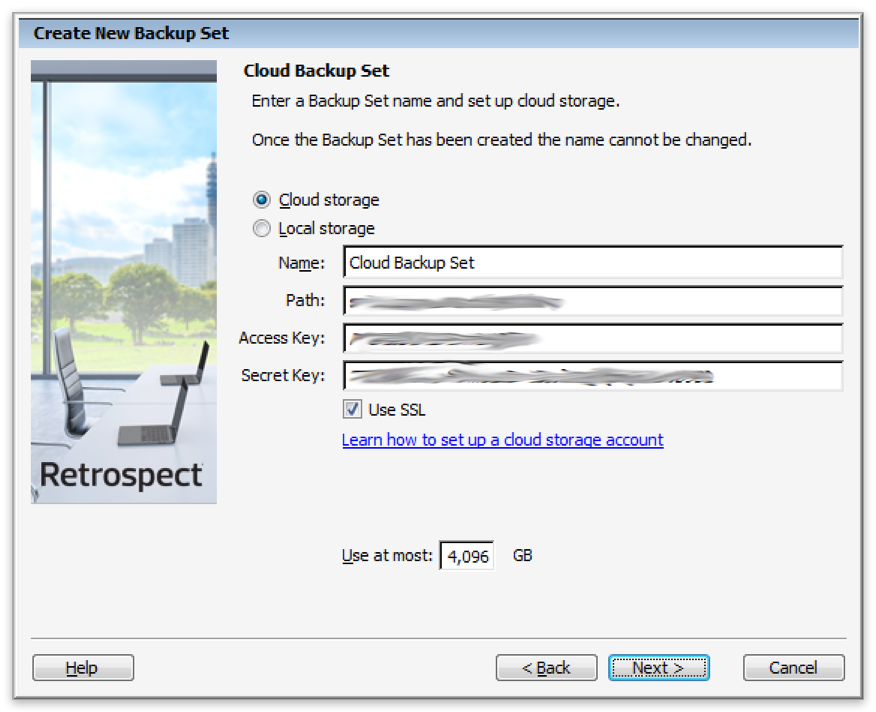
Einen Cloudspeicher als ein Backup-Ziel hinzuzufügen, ist ganz einfach. Retrospect hat einen neuen Set-Typus, der sich "Cloud" nennt. Richten Sie ein neues Backup-Set/Medien-Set ein und wählen Sie als Typus "Cloud".
Windows-Oberfläche

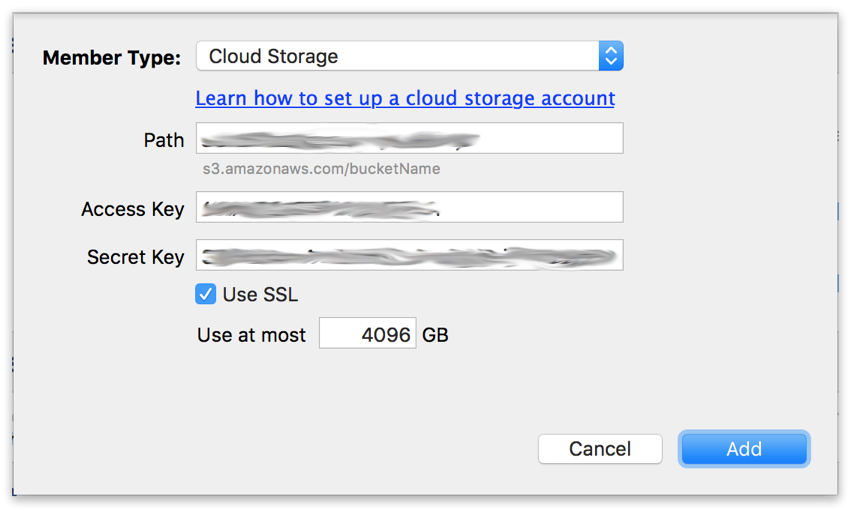
Mac-Oberfläche

Next you’ll need to enter your cloud storage credentials. Retrospect allows customers to enable or disable SSL encryption (HTTP or HTTPS) and to set the maximum storage usage, up to 8TB per cloud member.
Windows-Oberfläche
Mac-Oberfläche
Den Cloudspeicher können Sie ganz leicht nutzen. Nachdem Sie Ihr Cloud-Set erstellt haben, erstellen Sie ein neues Skript oder fügen es einem bereits vorhandenen hinzu und klicken auf „Ausführen“. Das Backup beginnt und die Inhalte Ihres Sets werden auf den Cloudspeicherplatz hochgeladen. Sie können den Fortschritt unter Ausführung/Aktivität verfolgen.
Windows-Oberfläche

Mac-Oberfläche

Eine Drosselung für das Cloud-Backup und die Cloud-Wiederherstellung lässt sich unter Einstellungen einrichten.
Windows-Oberfläche

Mac-Oberfläche

Below are a number of tips for using cloud storage in Retrospect:
Tool zur Messung der Bandbreite – Messen Sie Ihre Upload- und Download-Bandbreite mit diesem kostenlosen Tool: <a target="_blank" href="http://speedtest.net">Speedtest.net</a>.
Sicherungsüberprüfung deaktivieren – Die Überprüfung wird alle Daten herunterladen, die Sie hochladen. Erfahren Sie mehr darüber, warum Sie diese Funktion für die Cloud-Sicherungen in <a href="/de/support/kb/best_practices_for_cloud_storage#notes">Cloud-Backup – Die beste Art, Daten über einen Cloudspeicher zu schützen</a> deaktivieren sollten.
As a reference, we have confirmed the following bandwidth for DreamHost DreamObjects:
Verified Upload Bandwidth – 20 Mbps
Verified Download Bandwidth – 90 Mbps
DNS Name: DreamHost updated its DNS name from objects.dreamhost.comobjects-us-west-1.dream.io
Last Update: 04. Juli 2016

