How to Protect Microsoft Office Documents - Word, Excel, PowerPoint, Access, and Publisher
- 13 Nov 2023
- 2 Minutes to read
- Print
- DarkLight
- PDF
How to Protect Microsoft Office Documents - Word, Excel, PowerPoint, Access, and Publisher
- Updated on 13 Nov 2023
- 2 Minutes to read
- Print
- DarkLight
- PDF
Article Summary
Share feedback
Thanks for sharing your feedback!
White Papers
Retrospect protects your entire computer out of the box. To only protect Microsoft Office documents, we will walk through creating a rule to identify only Microsoft Office documents, creating a script for it, running a backup, restoring a file from the backup, and transferring to a different set.
We have included instructions for both Retrospect for Mac and Retrospect for Windows, as Windows and Mac systems run Microsoft Office.
Creating a Rule
We'll create a rule to identify only Microsoft Office documents.
Retrospect for Windows steps
- Open "Selectors".
- Click "New...", use "Microsoft Office" as the title, and click "OK".
- Add the following rules:
- Microsoft Word: File name ends with ".docx"
- Microsoft Excel: File name ends with ".xlsx"
- Microsoft PowerPoint: File name ends with ".pptx"
- Microsoft Access: File name ends with ".accdb"
- Microsoft Publisher: File name ends with ".pub"
- Click "Save".

Retrospect for Mac steps
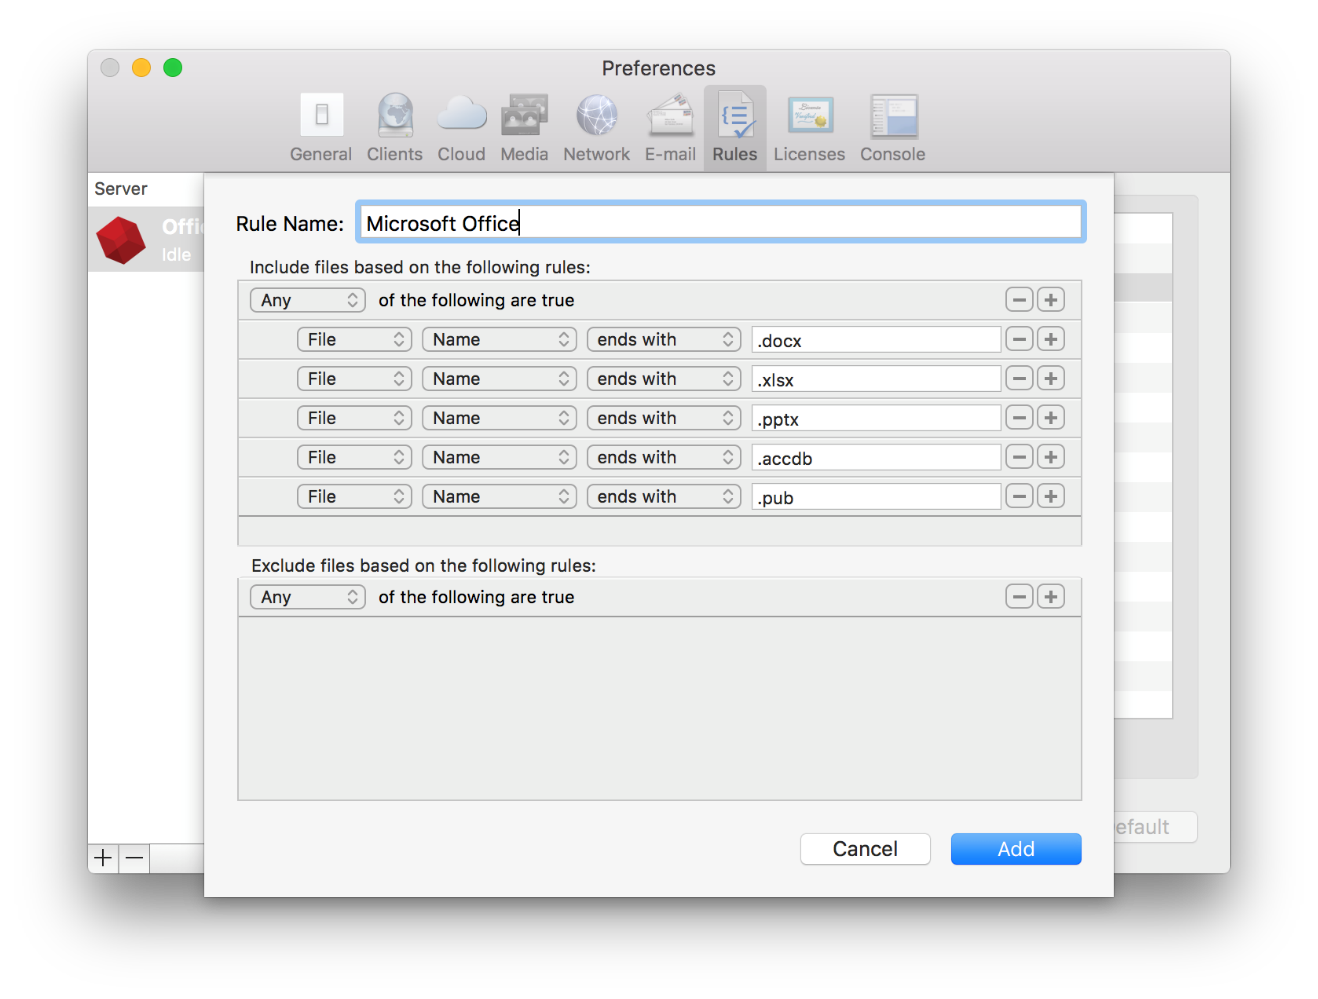
- Open "Preferences" and select "Rules".
- Click the "+" button to create a new rule, title it "Microsoft Office", and add the following rules:
- Microsoft Word: File name ends with ".docx"
- Microsoft Excel: File name ends with ".xlsx"
- Microsoft PowerPoint: File name ends with ".pptx"
- Microsoft Access: File name ends with ".accdb"
- Microsoft Publisher: File name ends with ".pub"
- Click "Add".
There are a number of other current extensions as well as legacy extensions. See Wikipedia for a complete list.
Backing up Microsoft Office documents
Retrospect for Windows steps
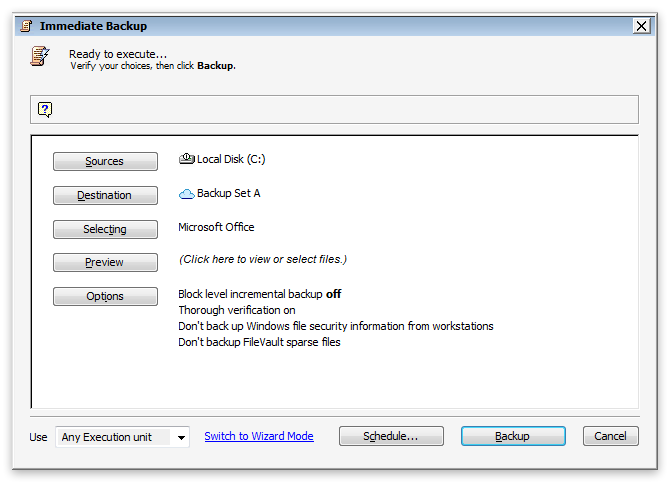
- Click "Backup".
- Select the appropriate source and destination.
- Click "Selecting" and select "Microsoft Office" then click "OK".
- Click "Backup".
Retrospect for Mac steps
- Select "Scripts" and click the "+" button.
- Select "Backup" and add an appropriate script name.
- In the script, select the appropriate source and media set.
- Finally, under "Rules", select "Microsoft Office".
- Click "Save".
- Click "Run".

Restoring Microsoft Office documents
Retrospect for Windows steps
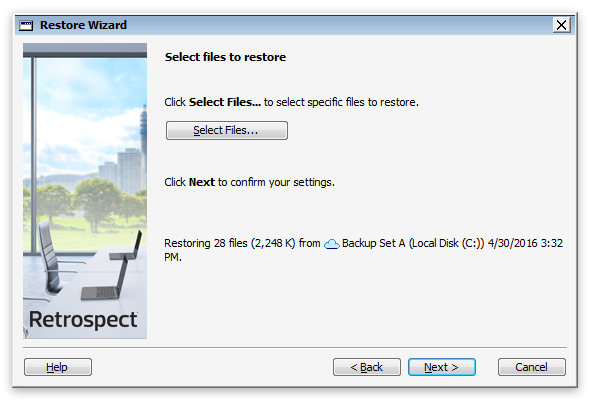
- Click "Restore".
- Select the appropriate backup set and snapshot.
- Step through the other options.
- On the final screen, select the files you want to restore.
- Click "Restore".
Retrospect for Mac steps
We will perform a quick restore with the Restore Assistant.
- Click "Restore Assistant".
- Click "Restore selected files and folders".
- Select the recent backup. Click "Browse" to select an individual document you want to restore.
- Select a destination for it. This can be its original location or inside a new folder.
- Select an appropriate policy for overwriting corresponding files.
- Click "Start Now".

Transferring Microsoft Office documents
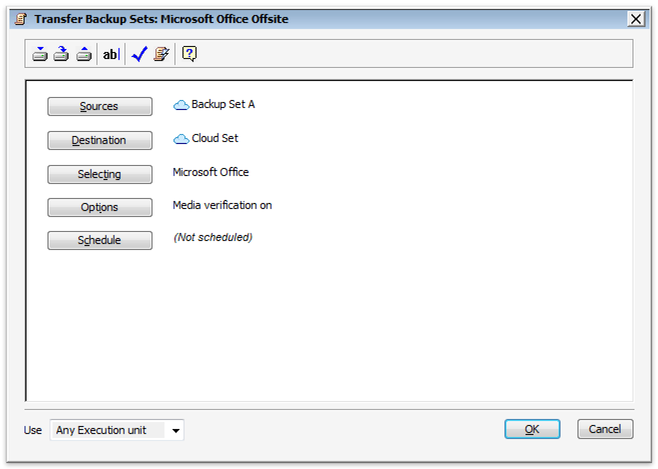
We will perform a backup set transfer to a cloud storage location but only including files matching our "Microsoft Office" rule. Please set up a cloud set beforehand, following our Cloud Backup - How to Set Up a Cloud Backup.
Retrospect for Windows steps
- Click "Manage Scripts" then "New..." then "Transfer Backup Set".
- Select the appropriate source and destination.
- Click "Selecting" and select "Microsoft Office" then click "OK".
- Click "OK".
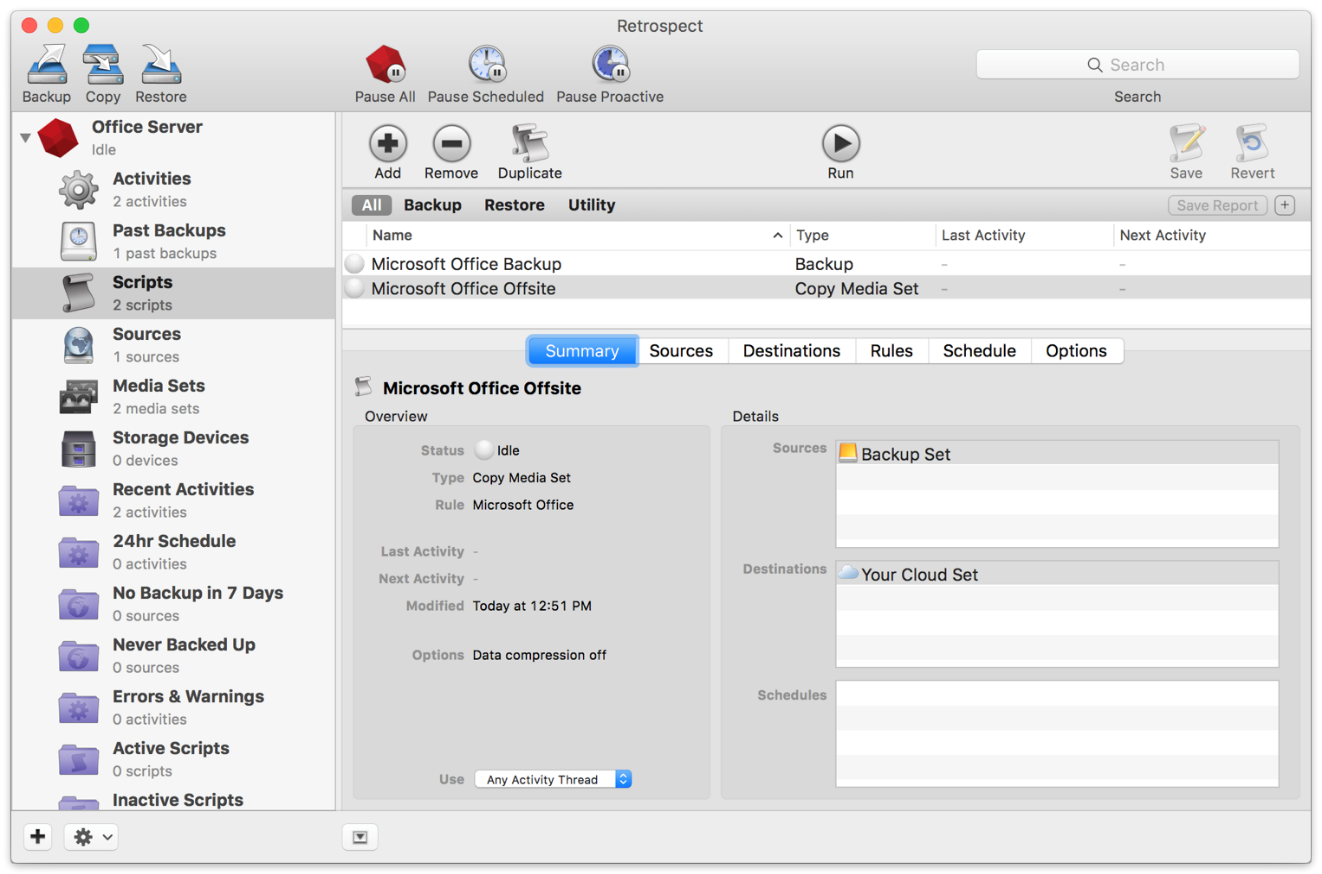
Retrospect for Mac steps
- Select "Scripts" and click the "+" button.
- Select "Copy Media Set" and add an appropriate name.
- In the script, select the appropriate source set and destination set.
- Finally, under "Rules", select "Microsoft Office".
- Click "Save".
- Click "Run".
Was this article helpful?