Cloud Backup - How to Set Up Microsoft Azure Blob Storage for Cloud Backup
- 24 Oct 2023
- 1 Minute to read
- Print
- DarkLight
- PDF
Cloud Backup - How to Set Up Microsoft Azure Blob Storage for Cloud Backup
- Updated on 24 Oct 2023
- 1 Minute to read
- Print
- DarkLight
- PDF
Article Summary
Share feedback
Thanks for sharing your feedback!
Cloud Backup
Microsoft Azure Blob Storage provides a low-cost, scalable cloud storage location for secure off-site data protection.
Account Setup Guide
Follow these steps to quickly create a Microsoft Azure Blob Storage Account. It requires an existing Microsoft Azure Account. If you do not already have one, create one for free at
Visit Microsoft Azure Blob Storage and click "Start free" then click "Start free" for the free Azure account. You’ll be able to connect Azure Blob Storage to your existing Azure subscription.
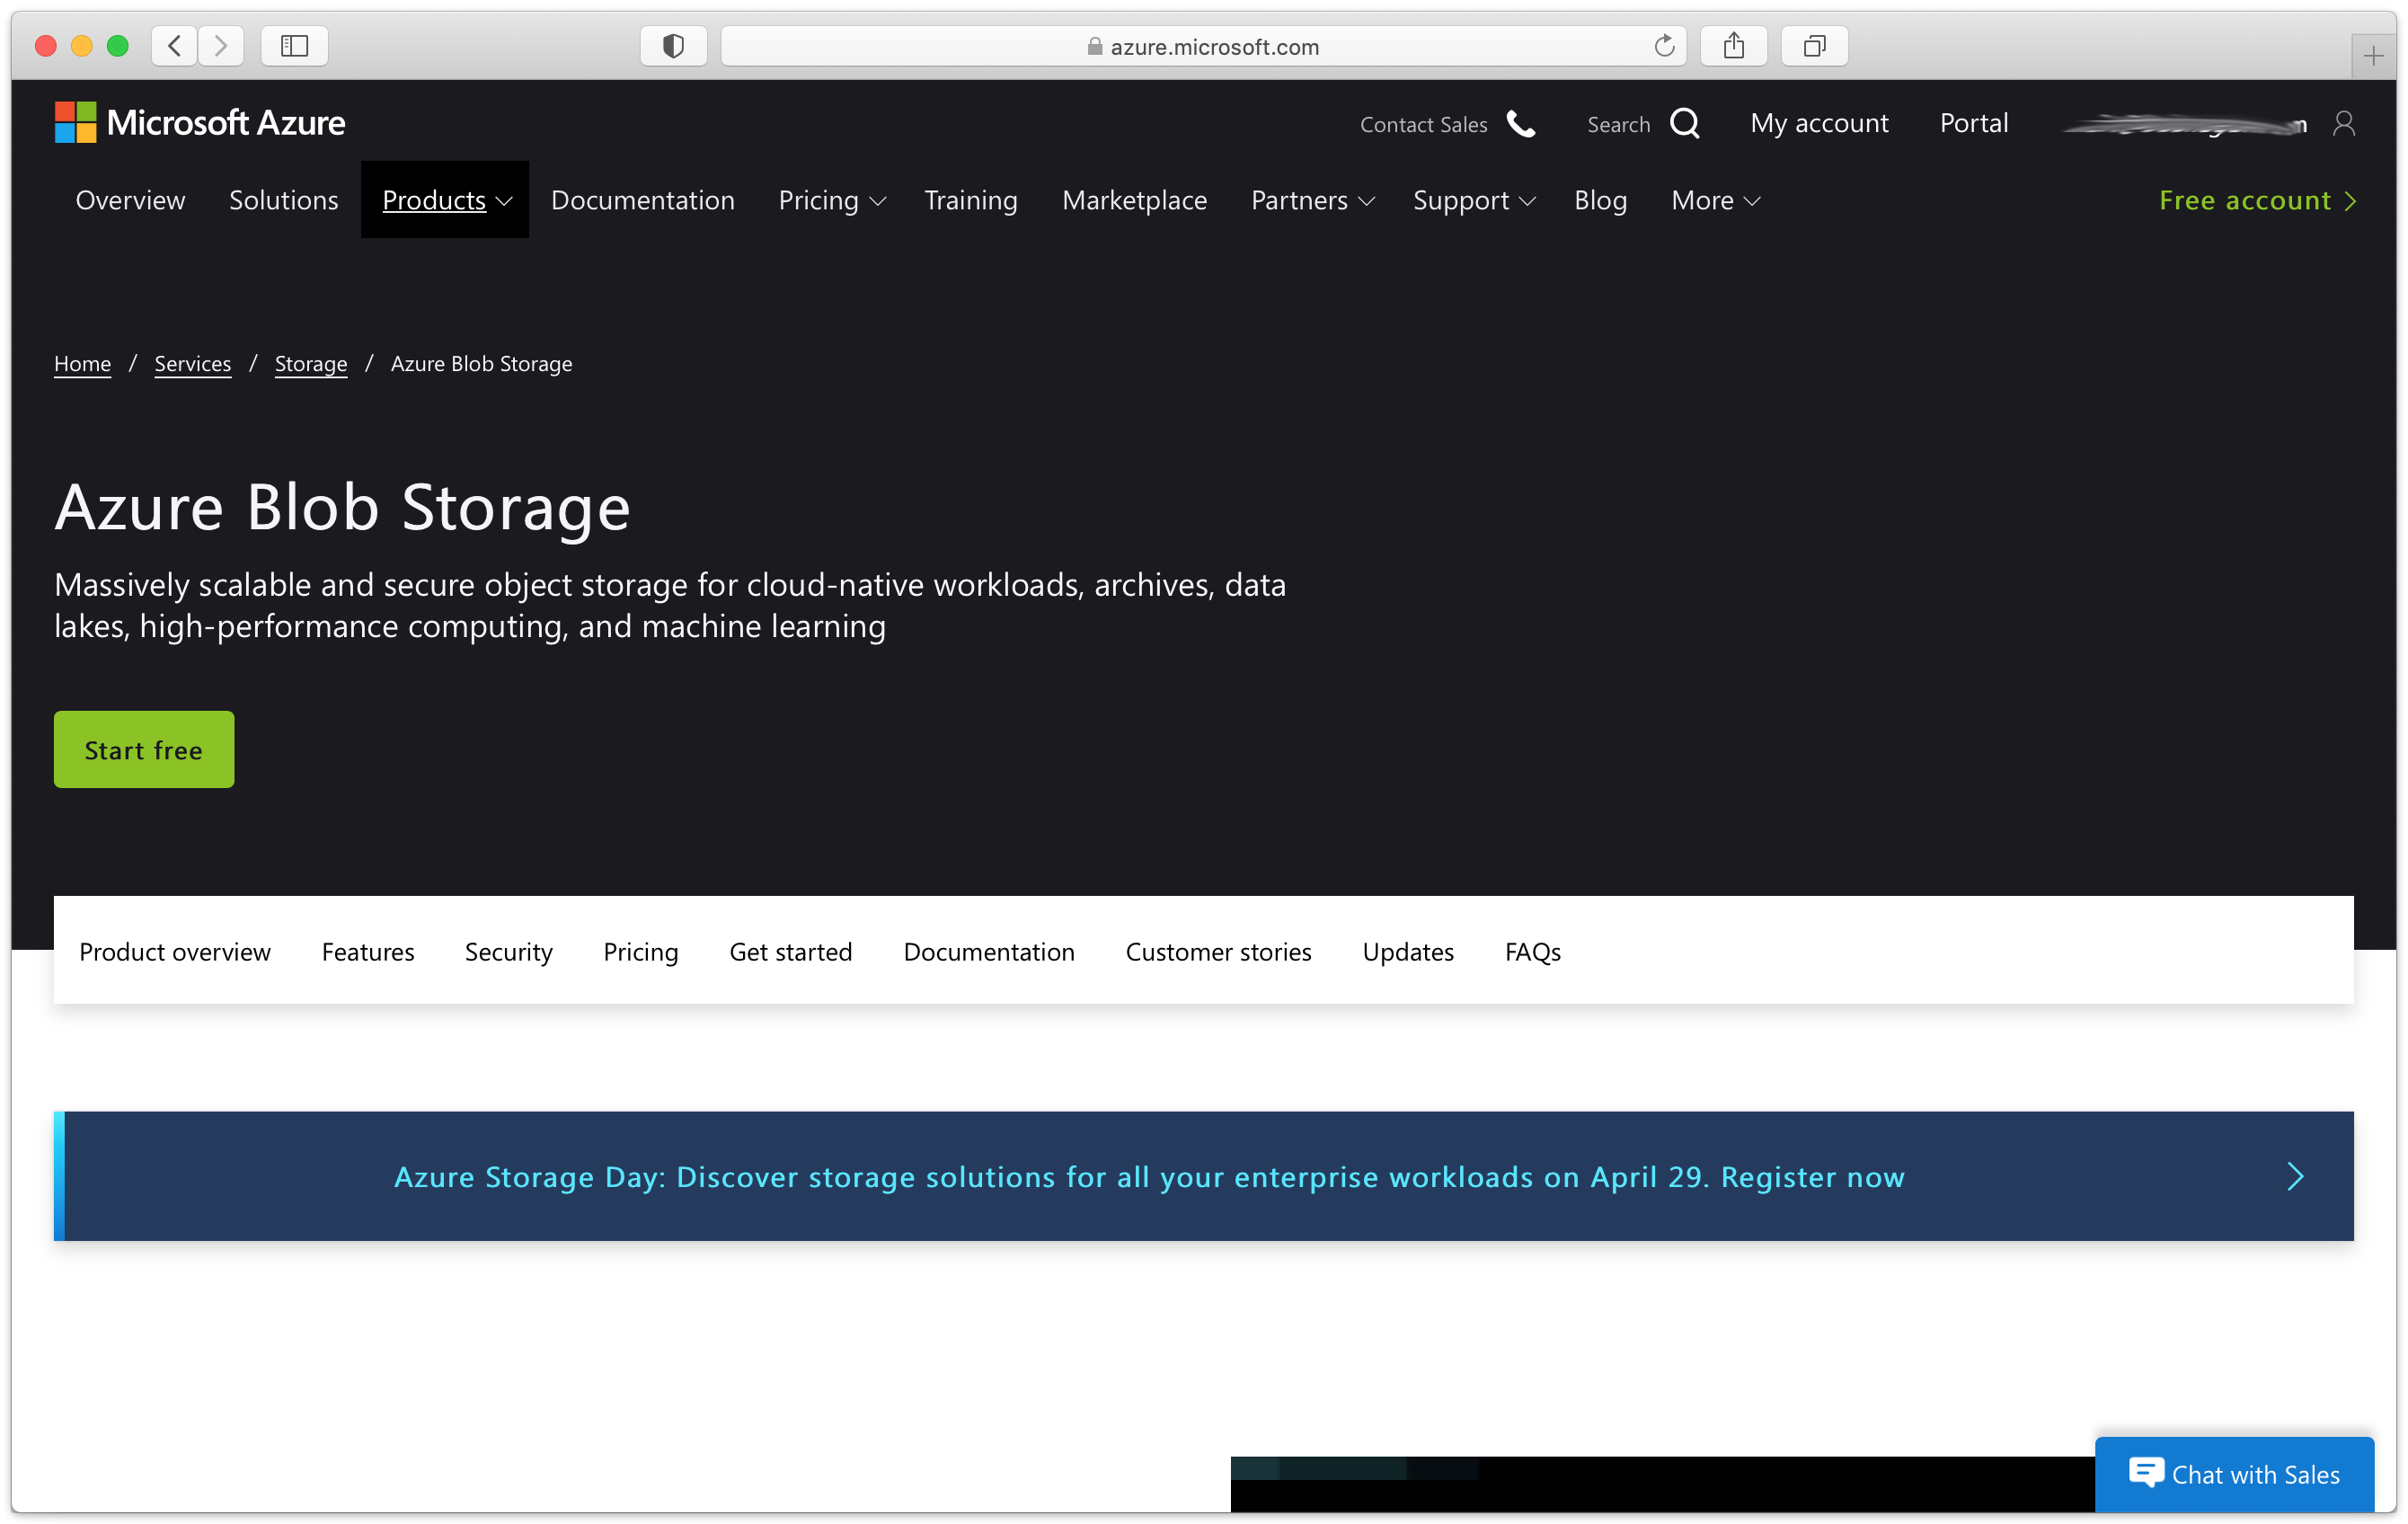
Visit Microsoft Azure to see your new account.
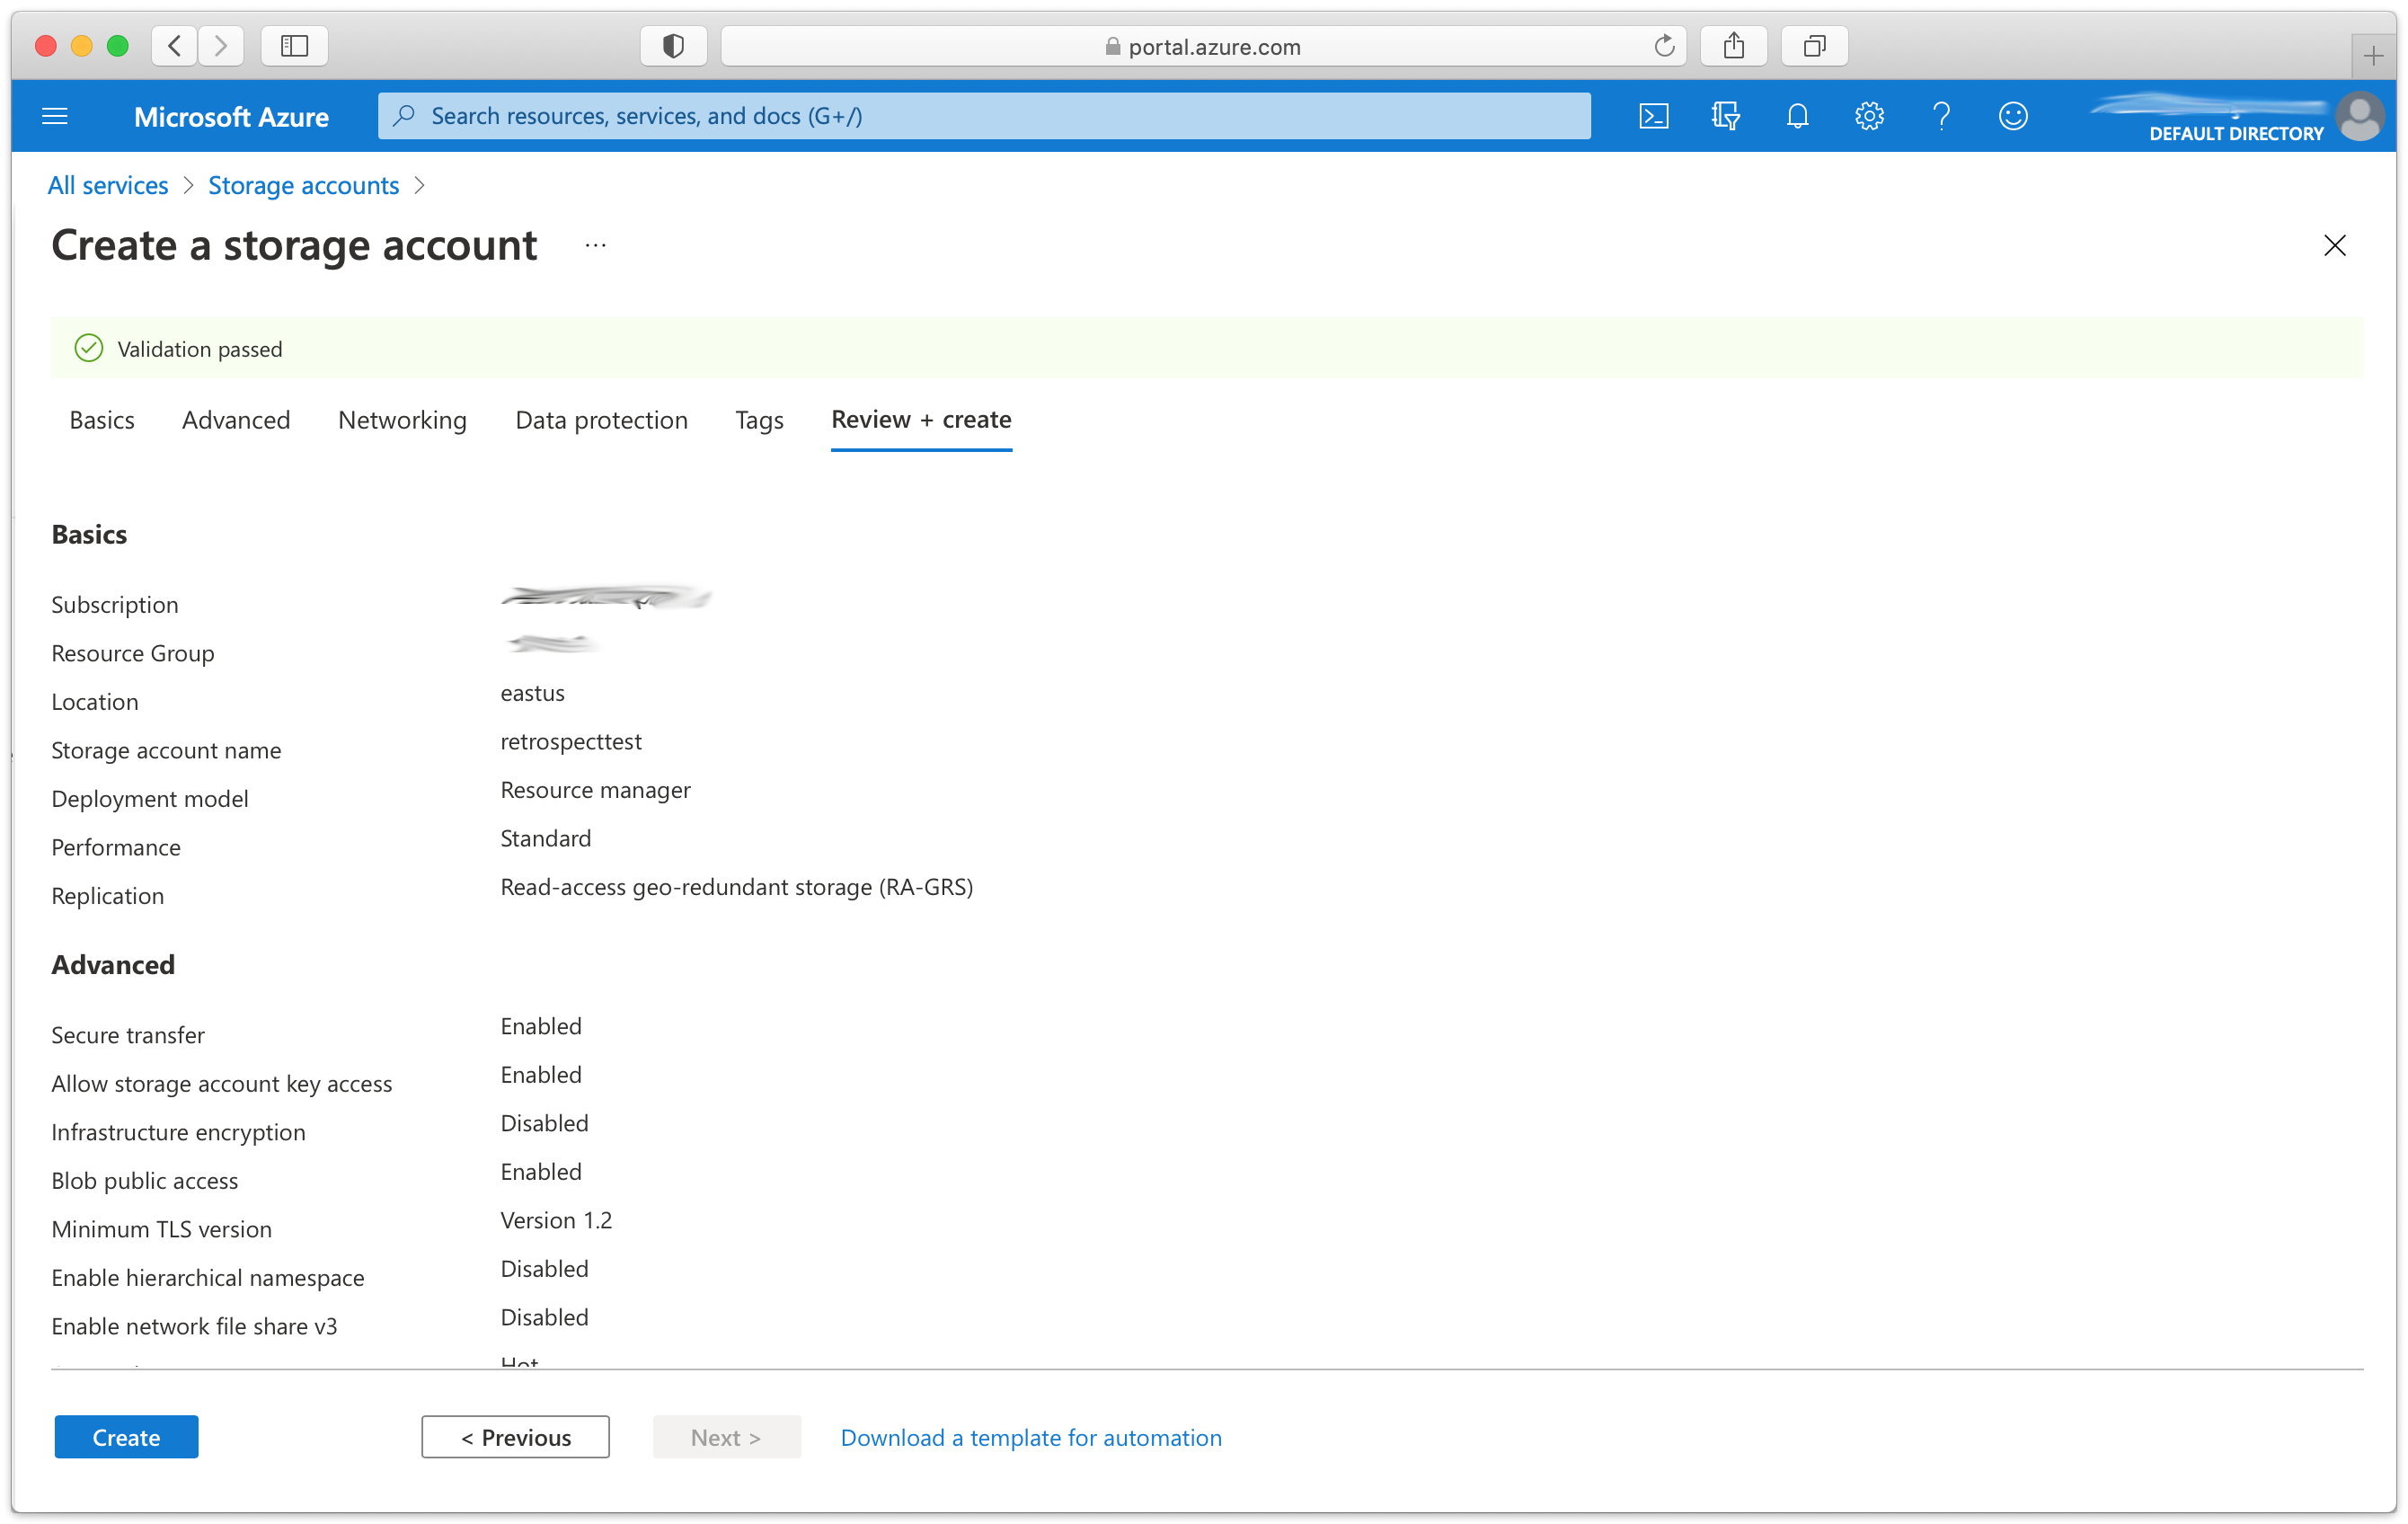
Create a storage account.
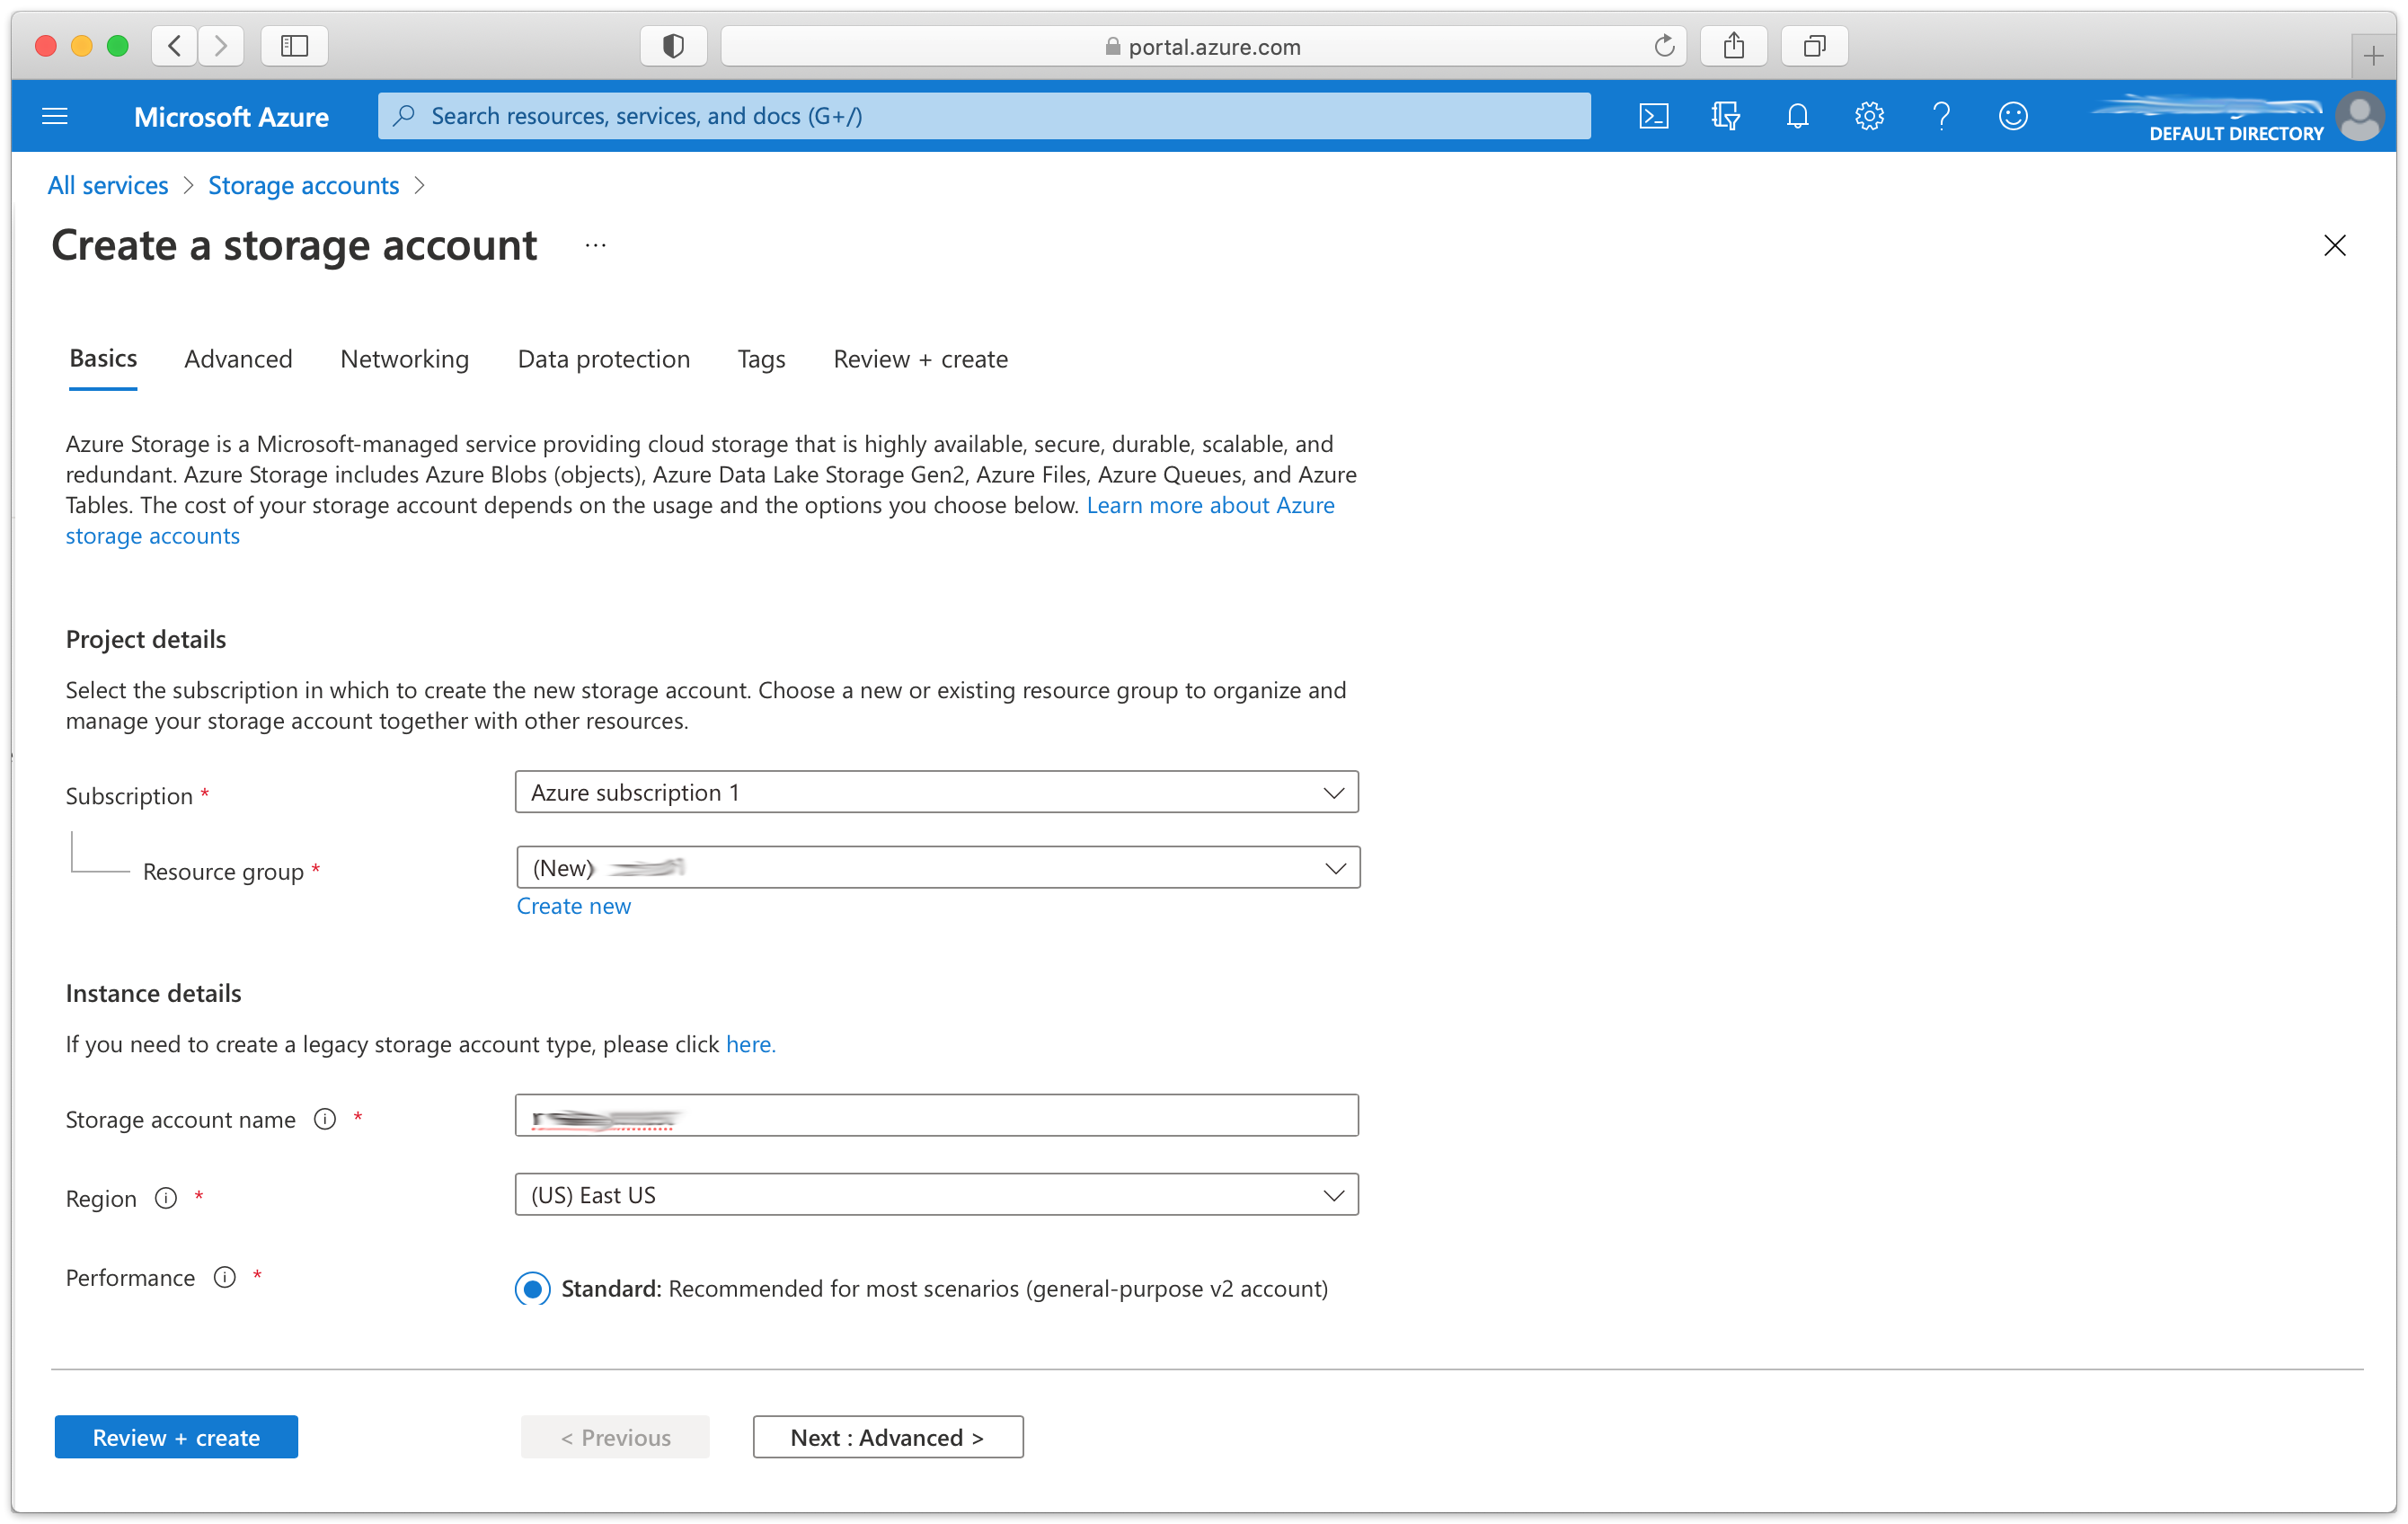
Configure your storage account and click "Create".
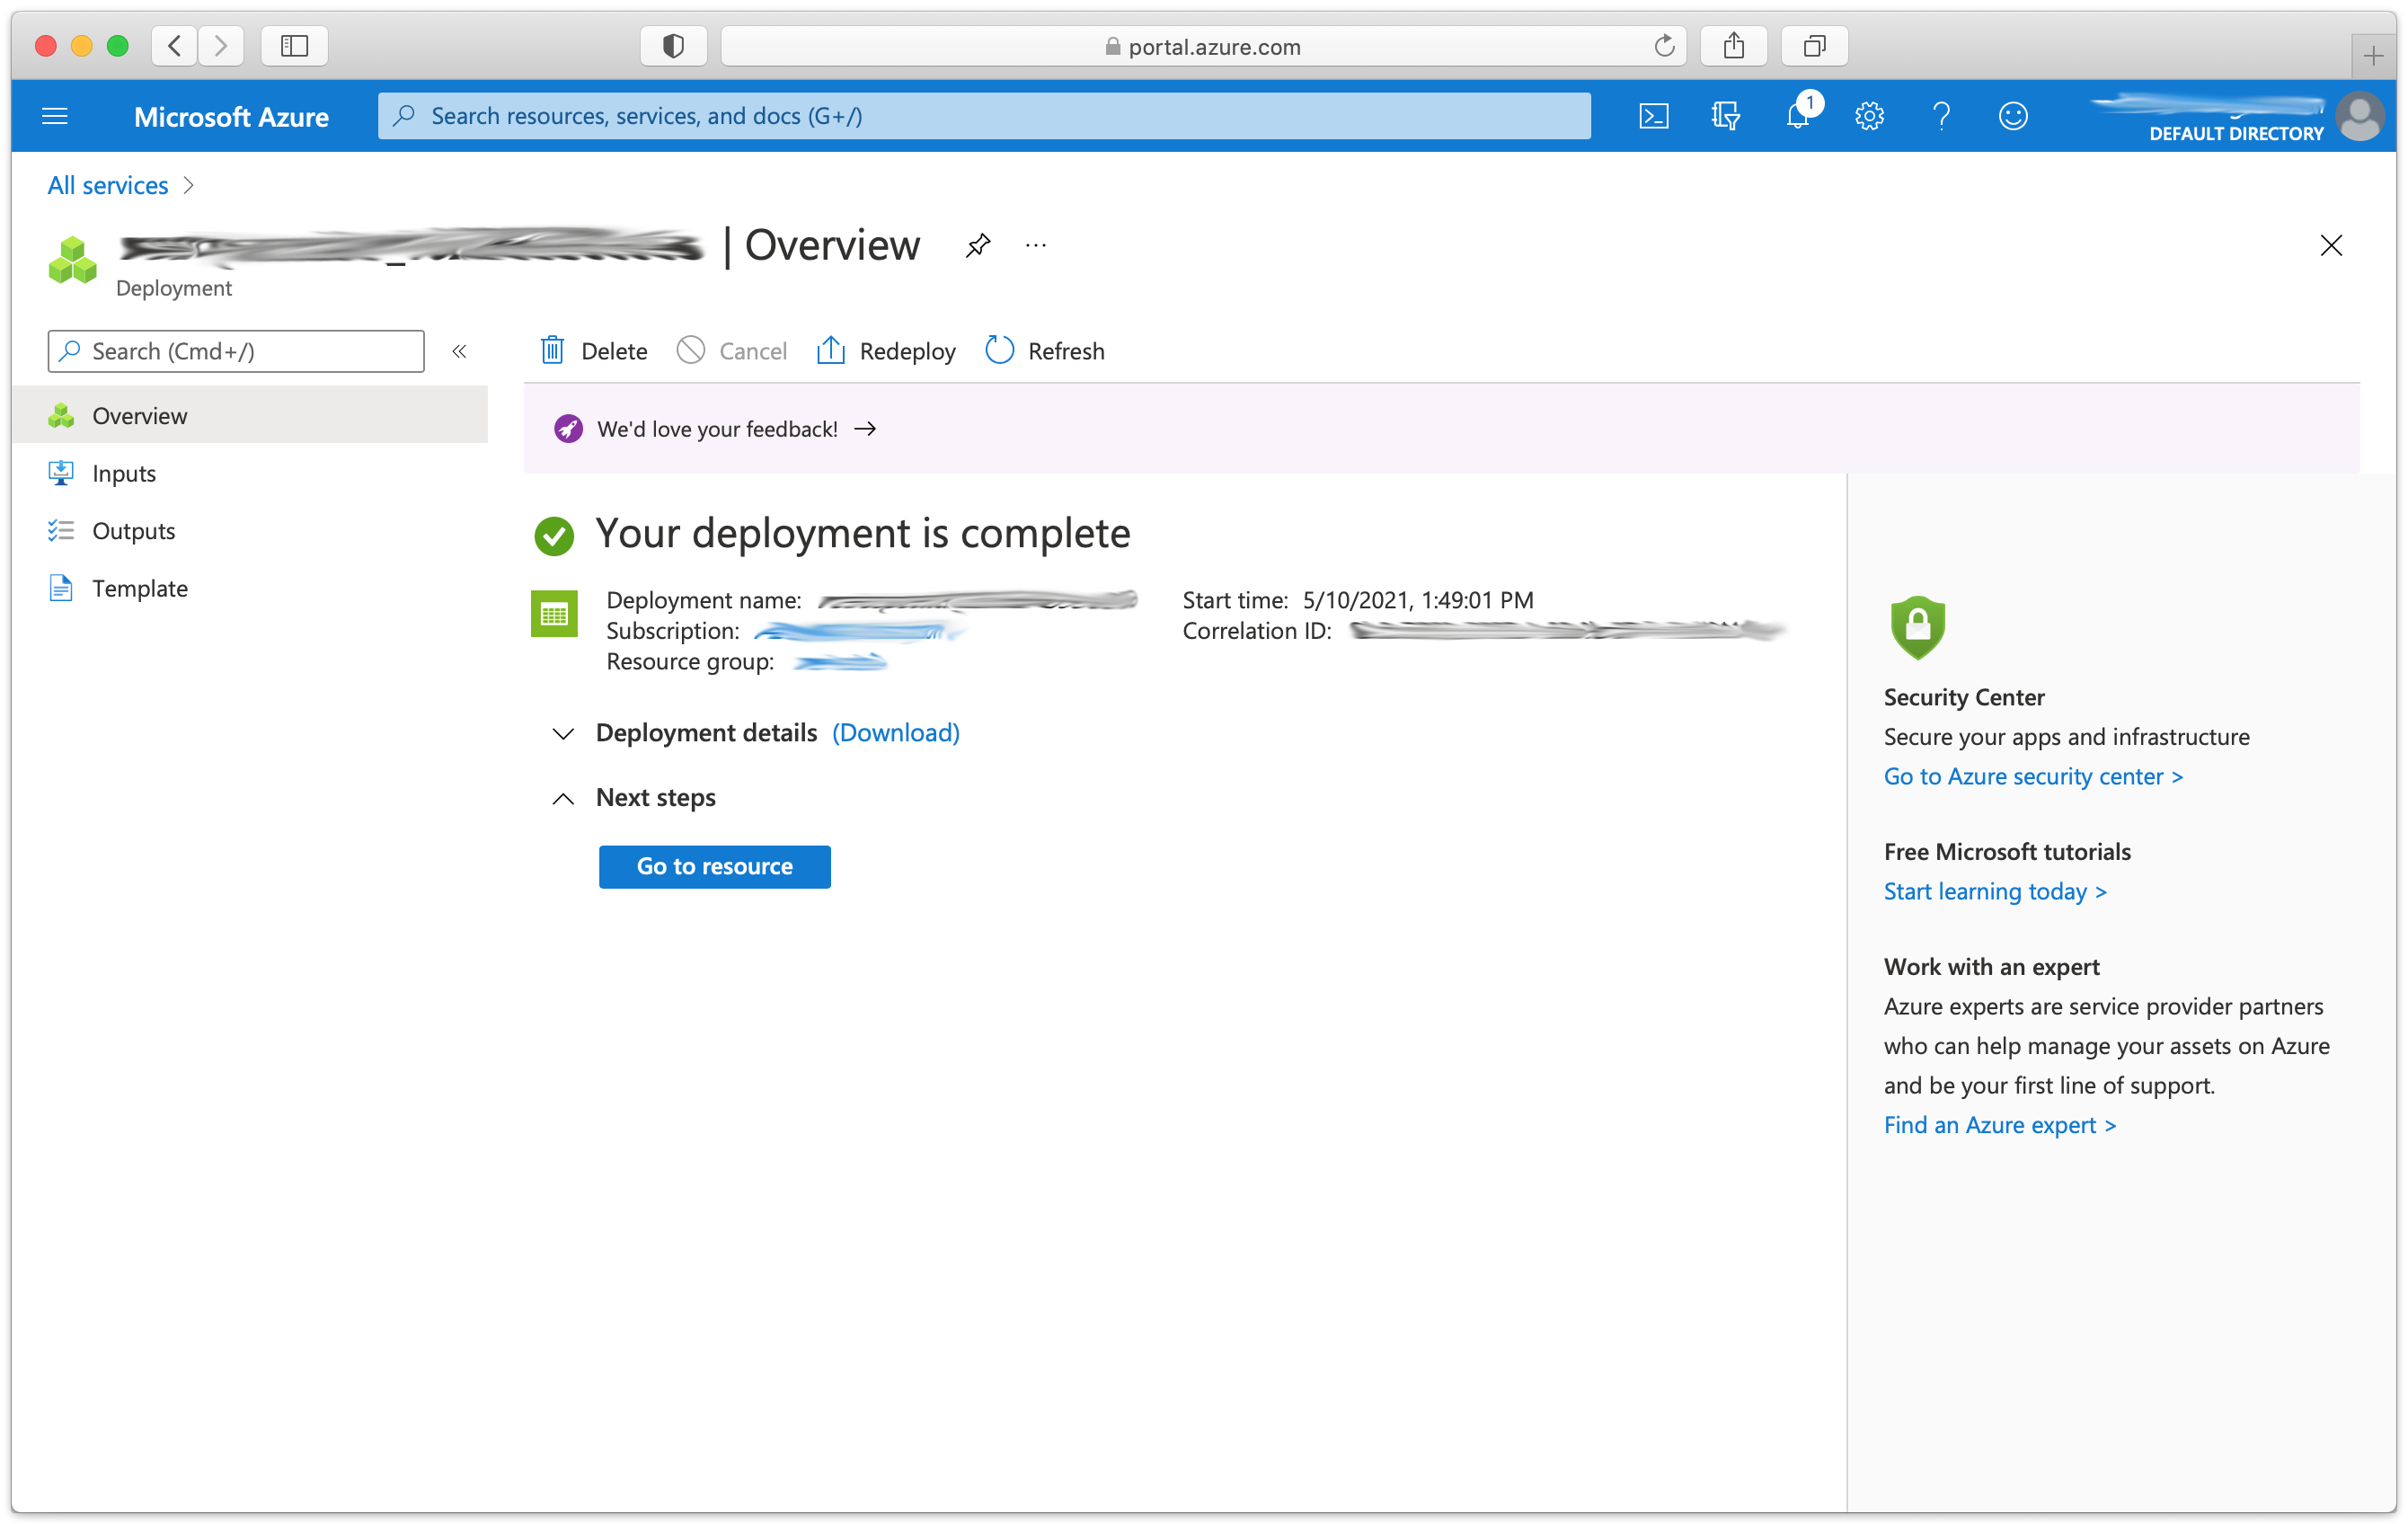
Click "Go to resource" to vist your new storage account.
Storage Setup Guide
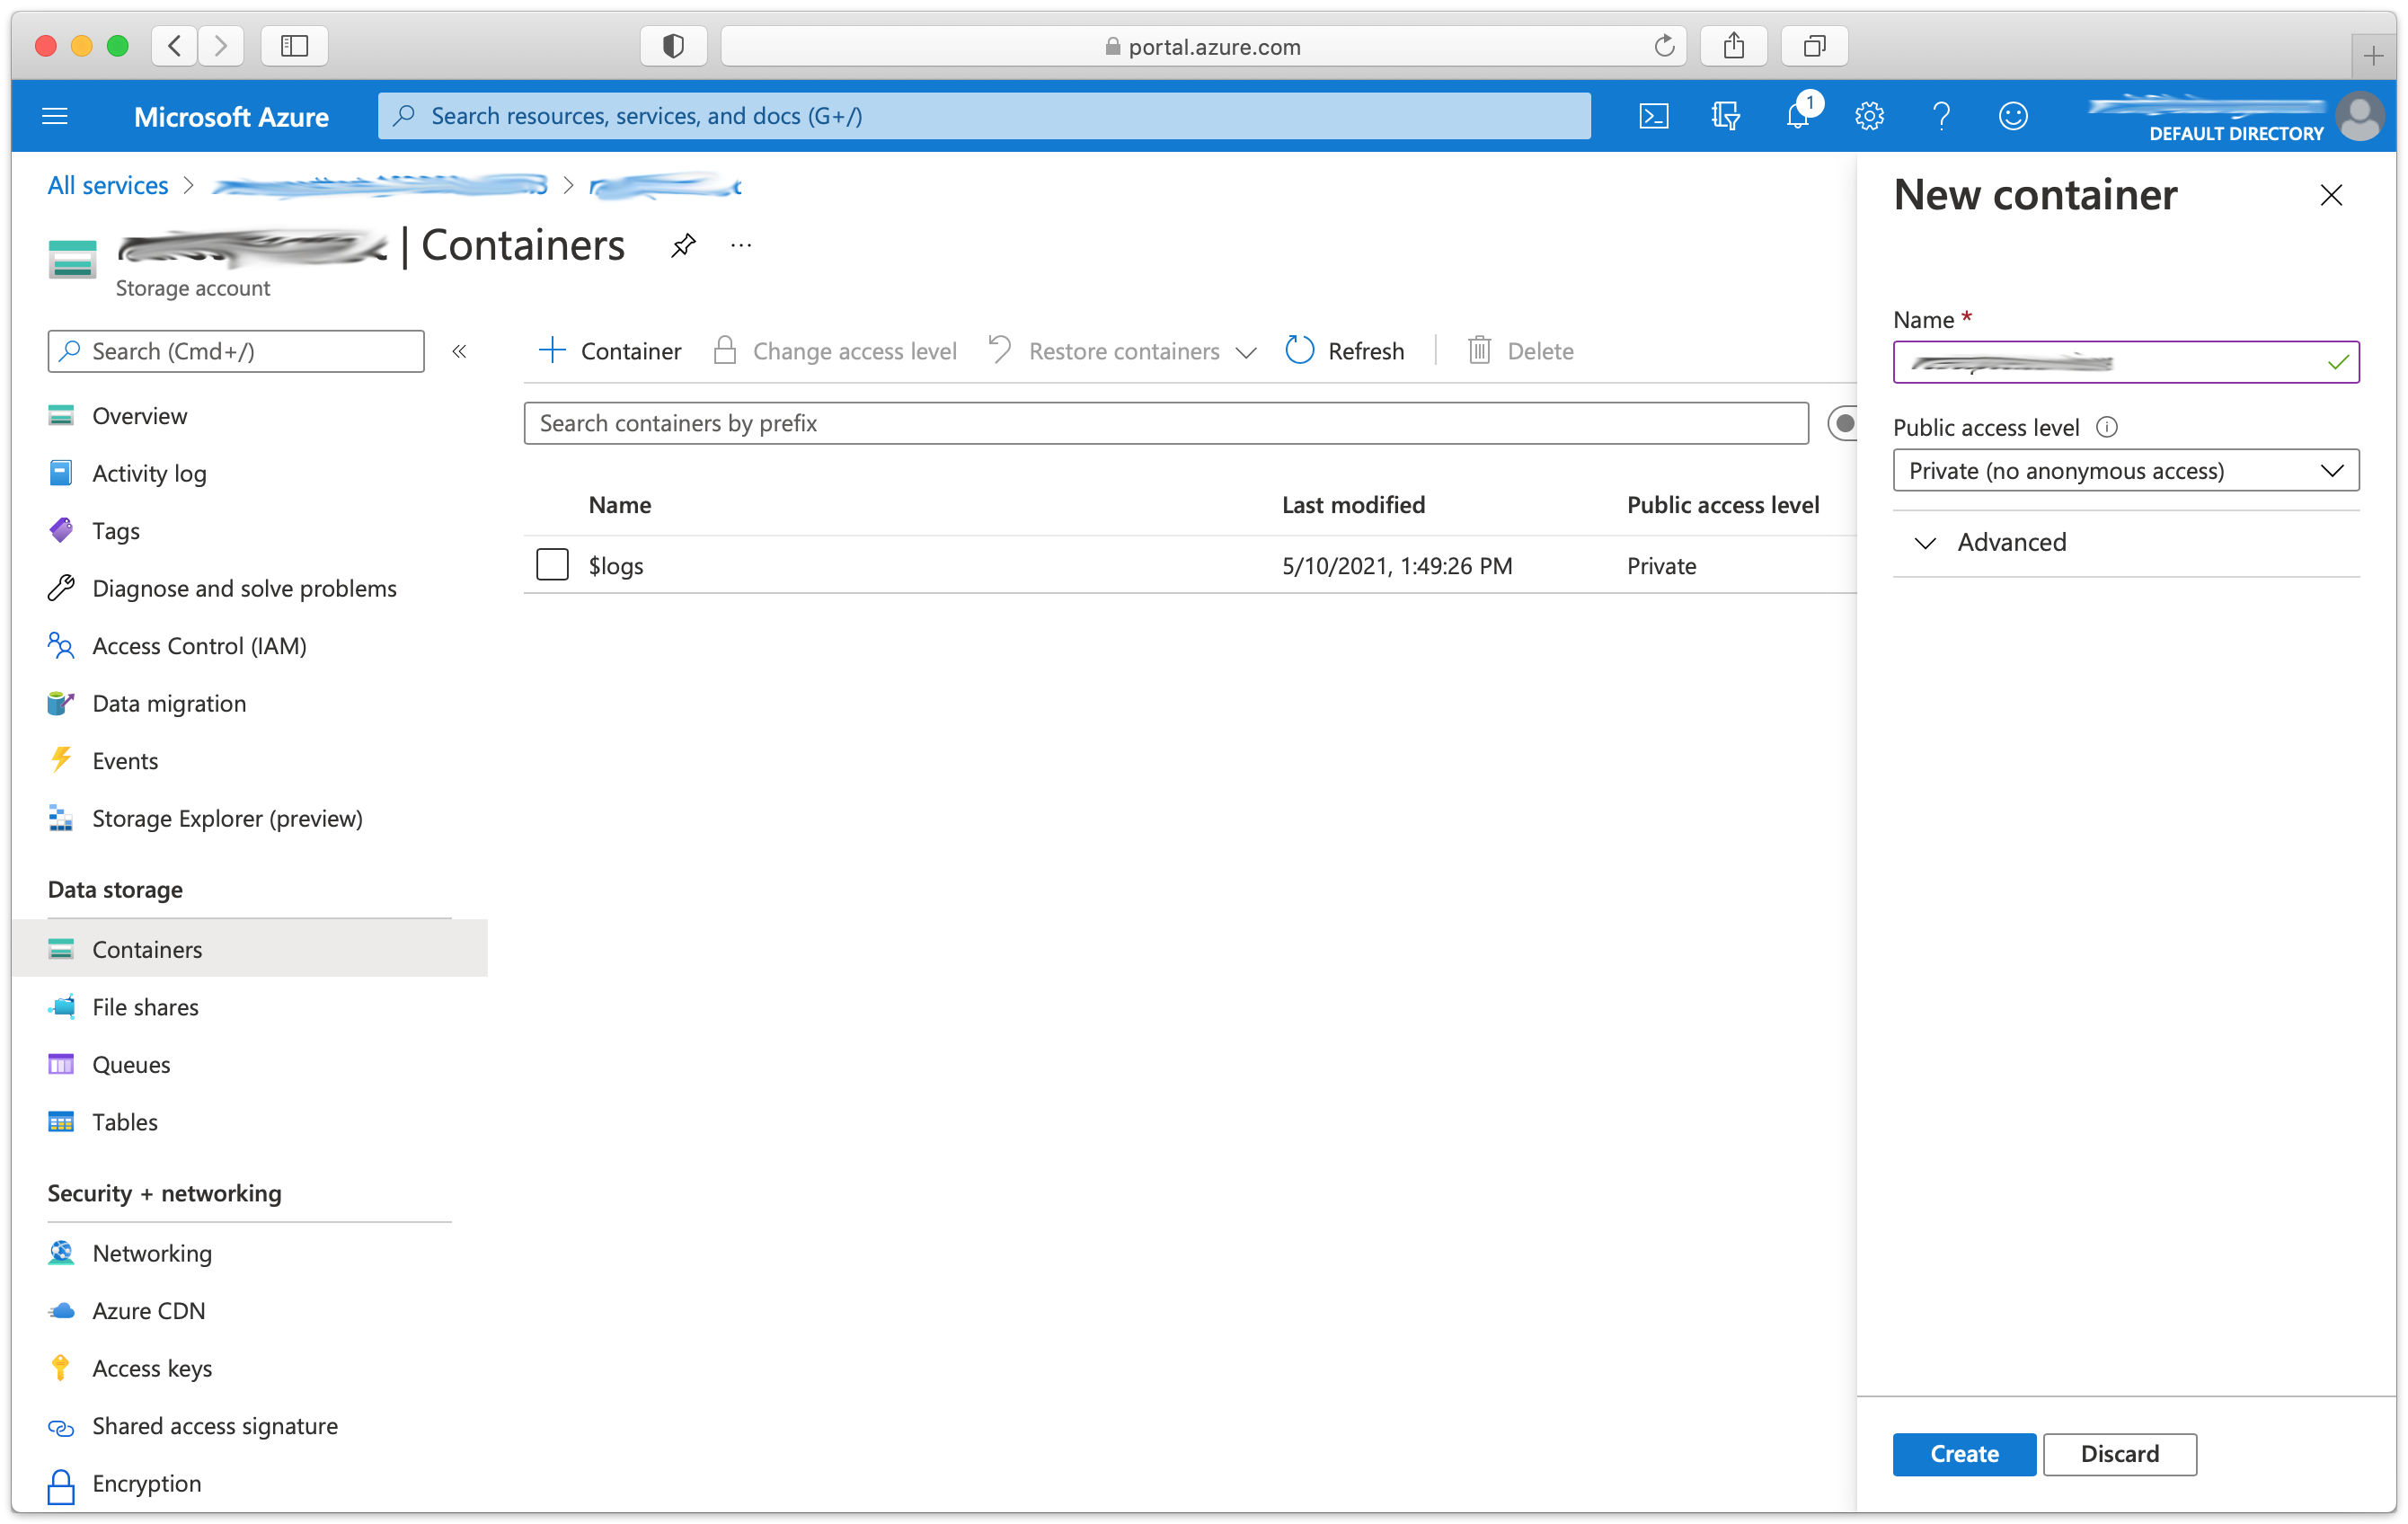
Now we will create a container that Retrospect can use to store backups.
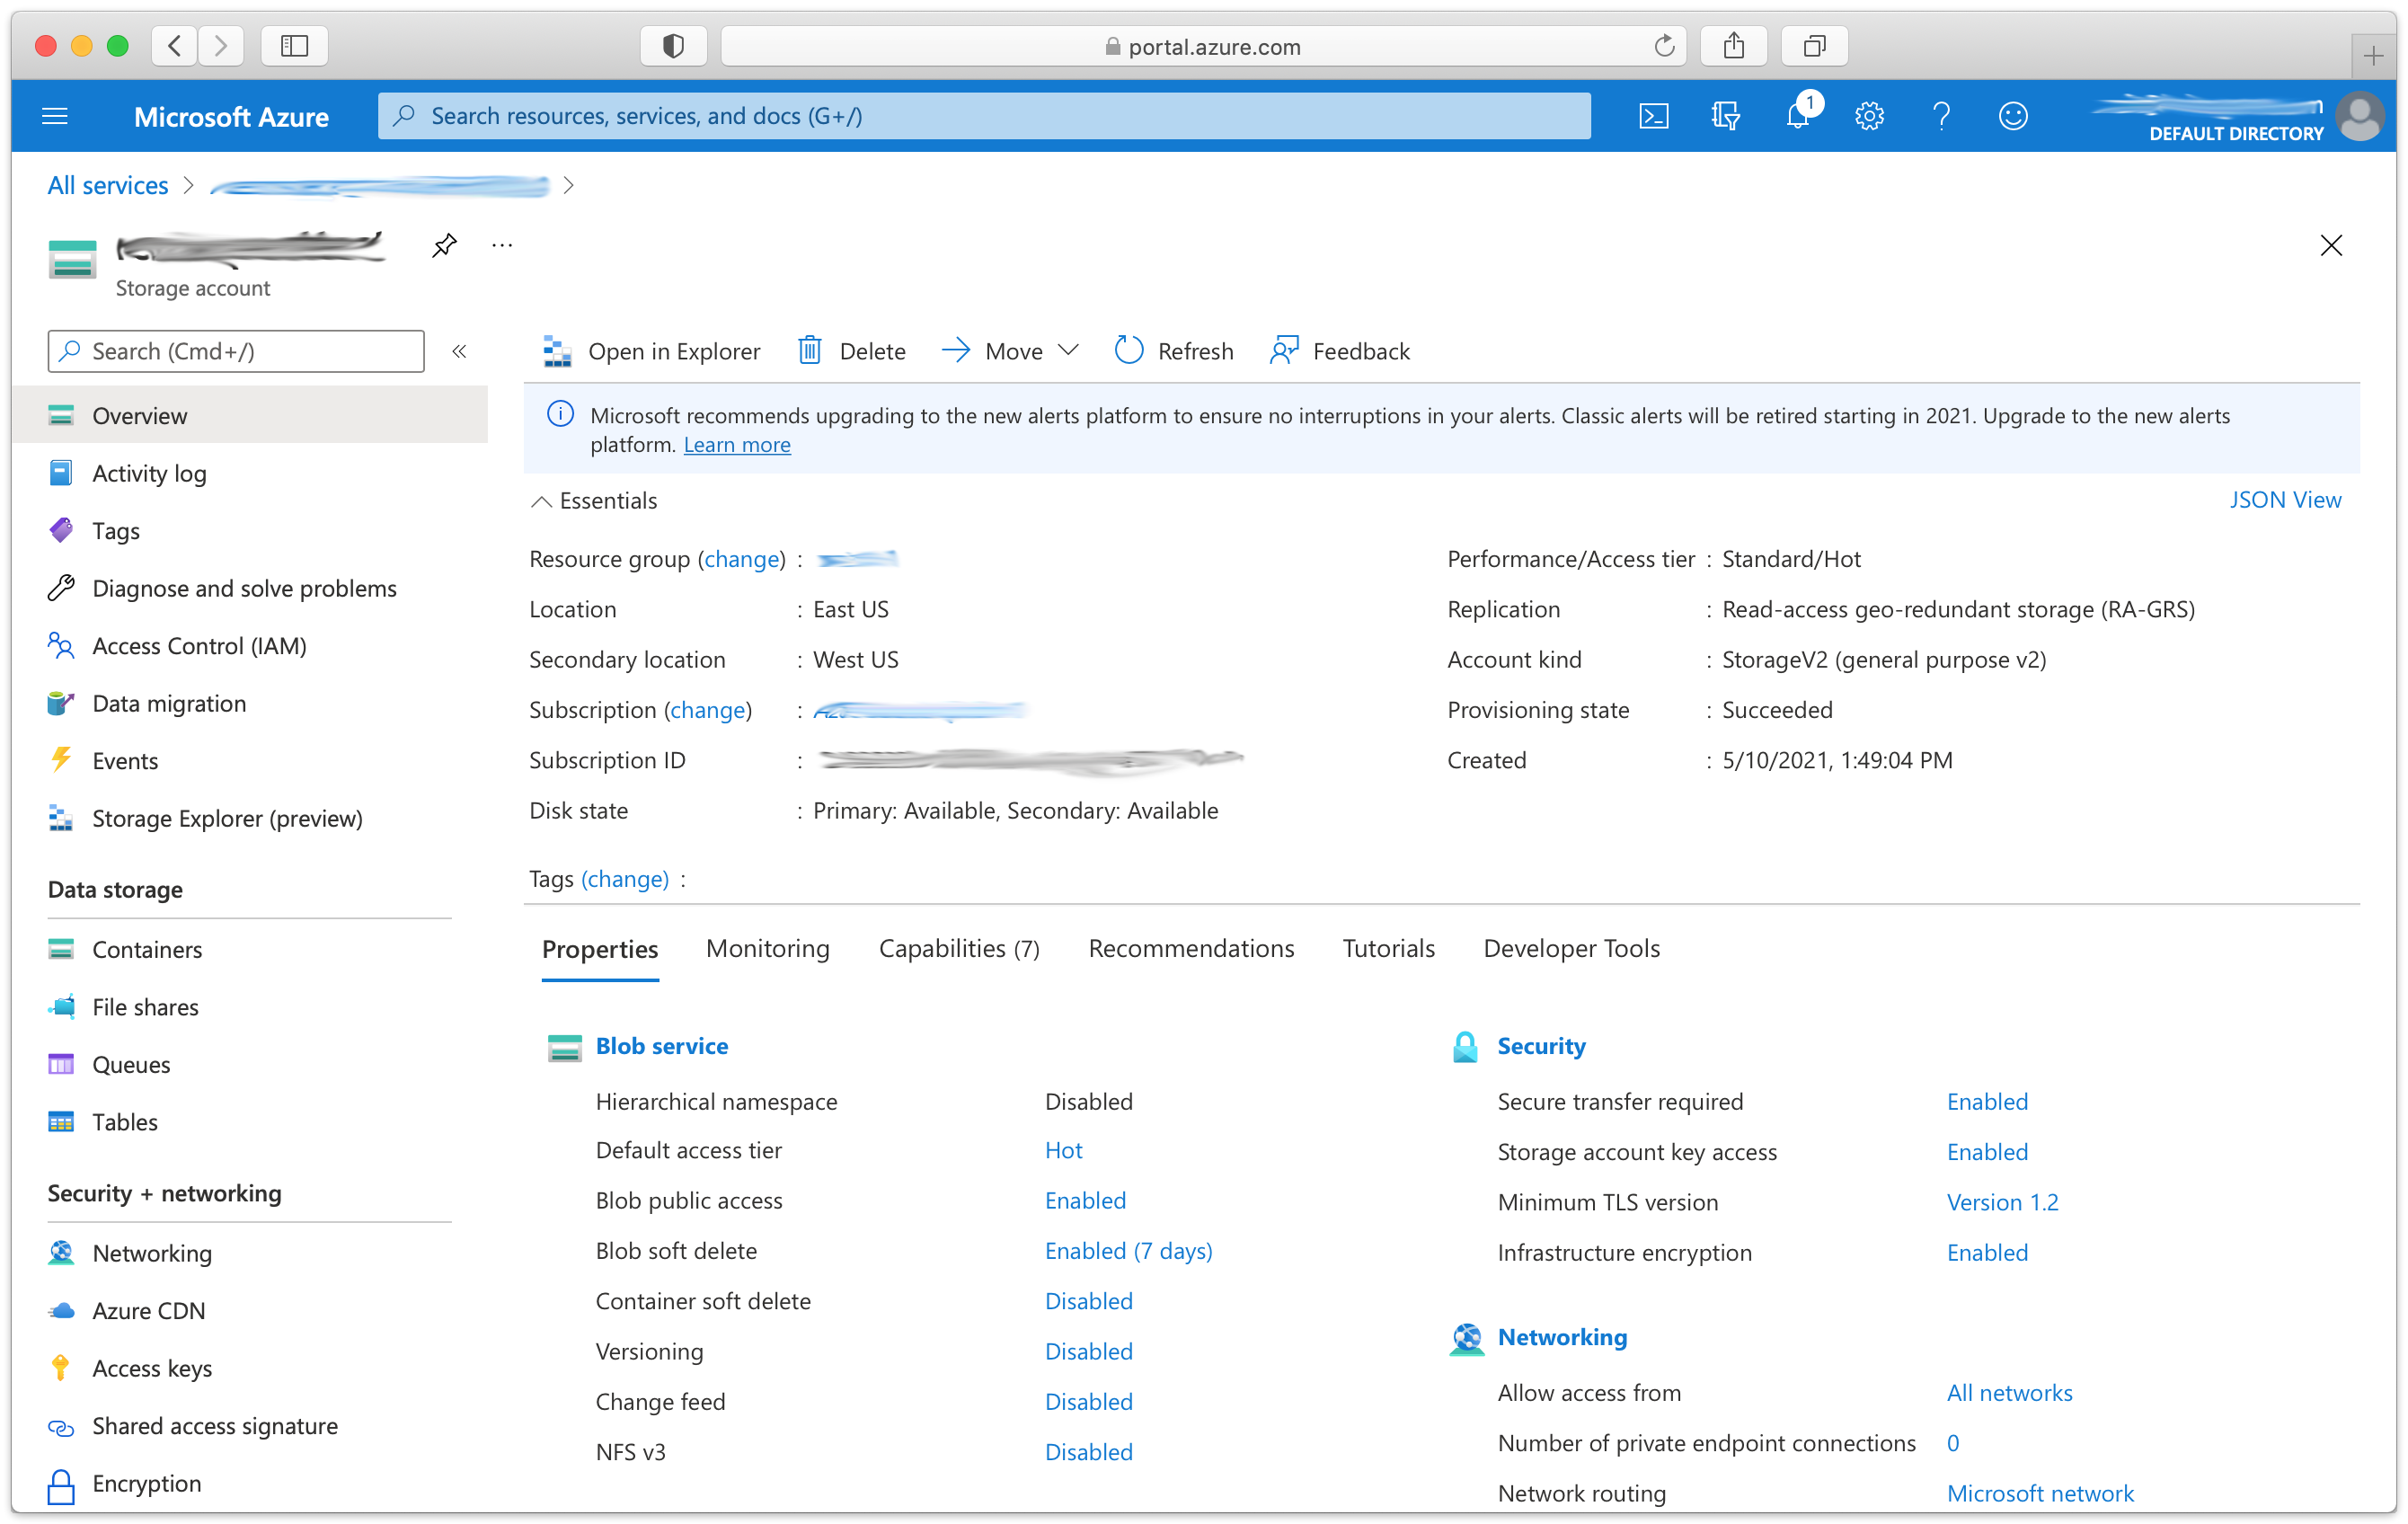
In your storage account, click on "Containers".
Click "+ Container".
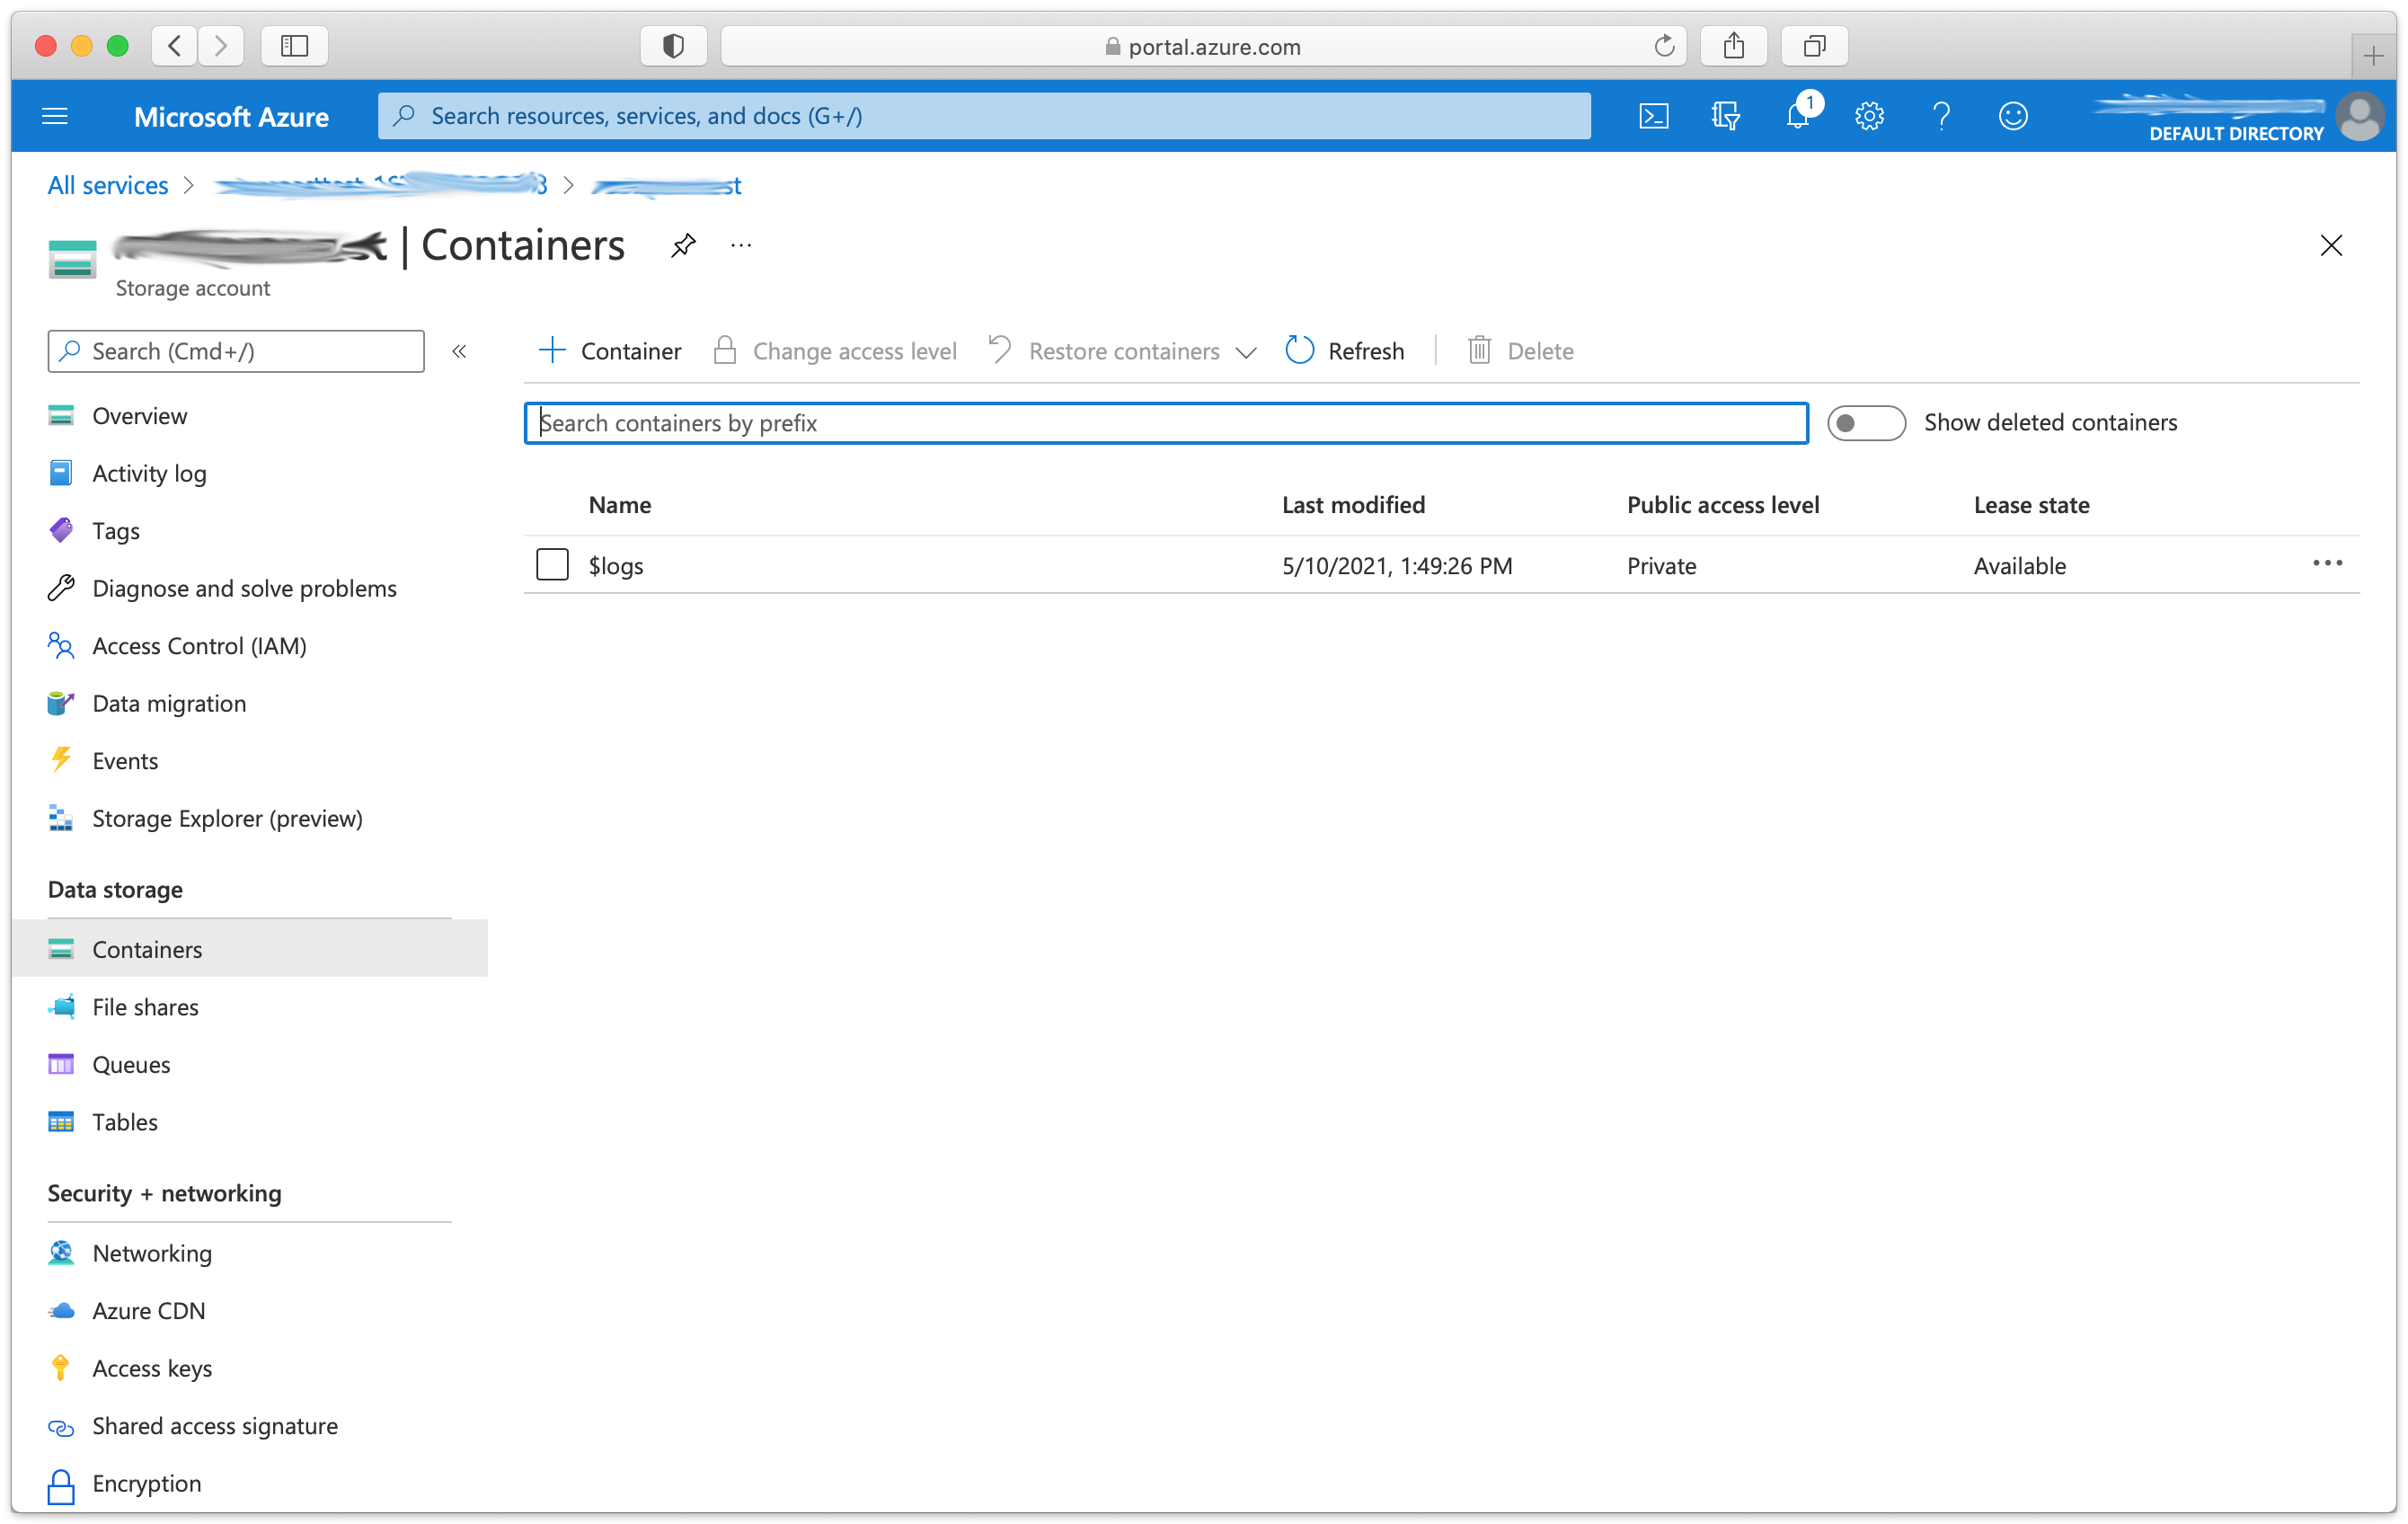
Fill in your container name and click "Create".
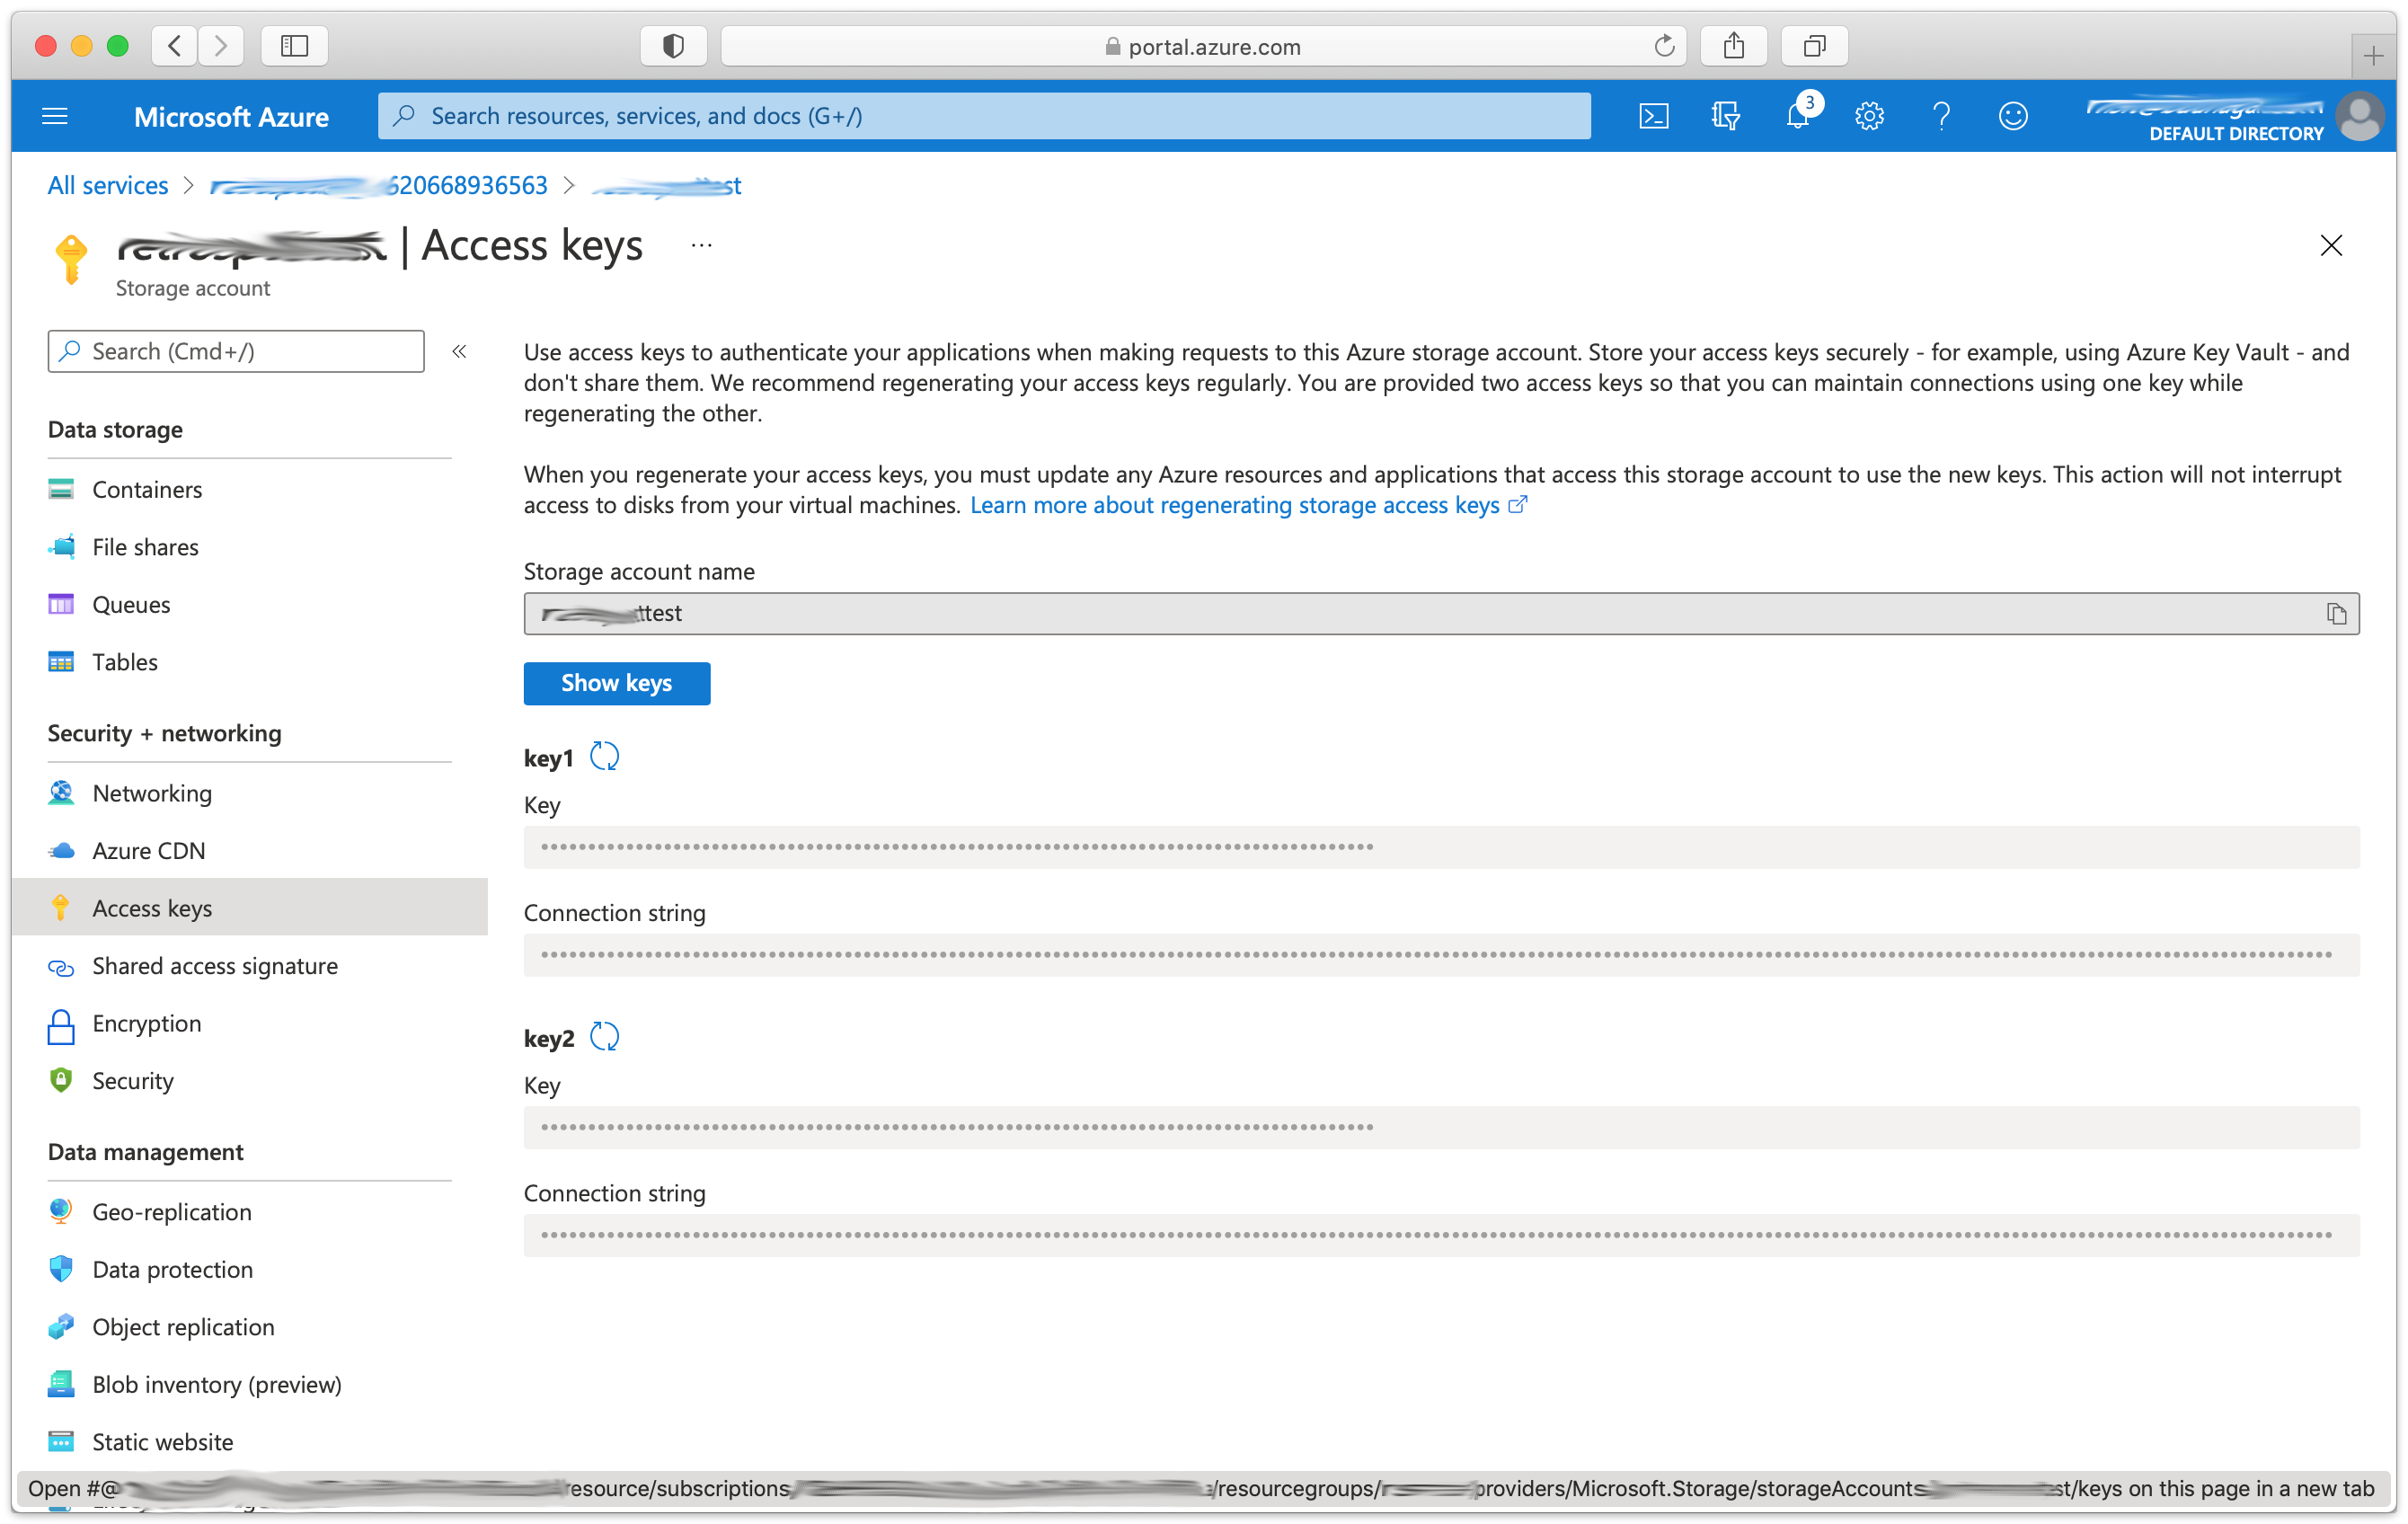
Click on "Access keys" and click "Show keys" to get your secret key from under key1 > Key.
Information for Retrospect
Retrospect needs three pieces of information to access Microsoft Azure Blog Storage:
- Account – Use the account name from above.
- Container Path – container_name/path
- Access Key – Use the access key from Storage Account > Access Keys > Secret.
Note that on Mac, "Account" and "Container Path" are combined into "Path", separated with a forward slash.
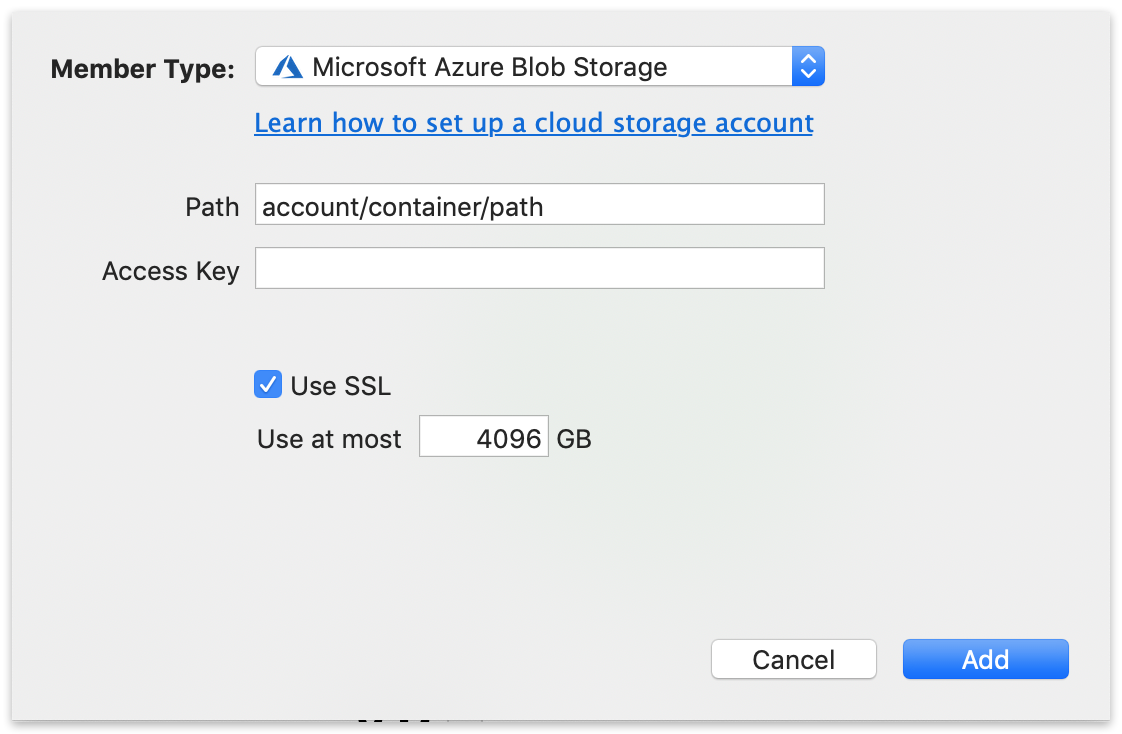
Adding Cloud Storage in Retrospect
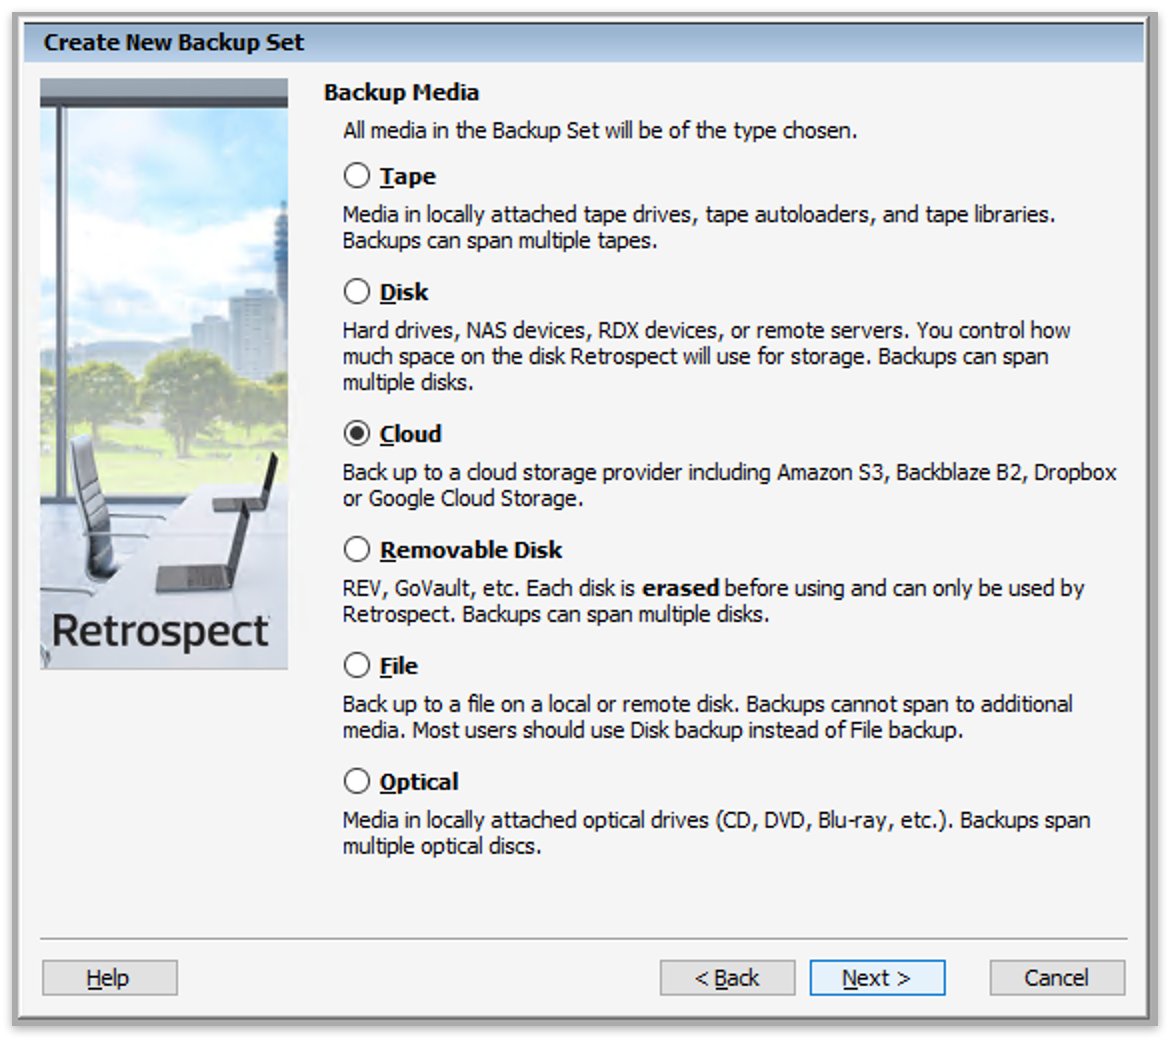
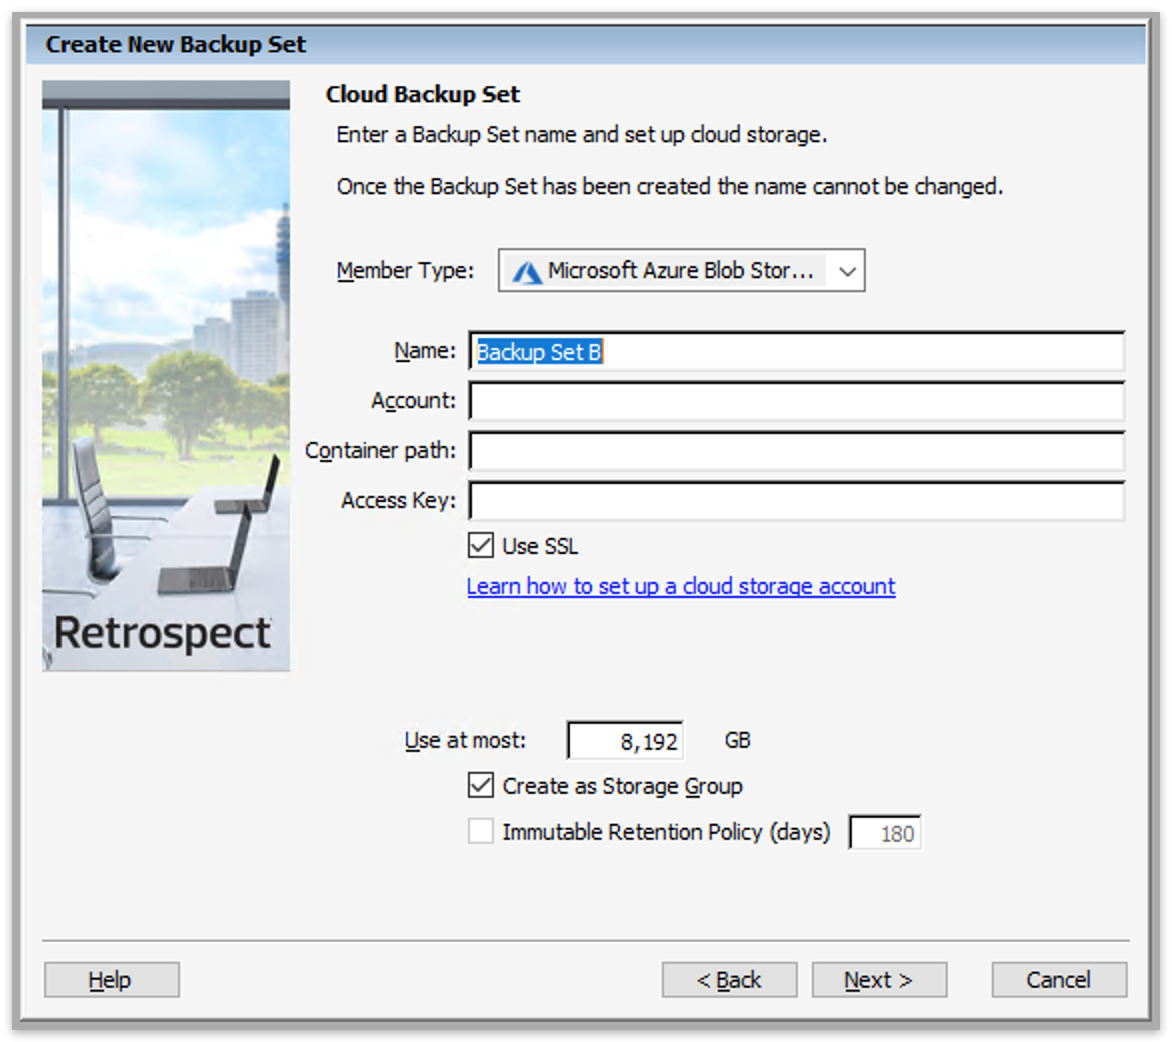
Adding cloud storage as a destination is simple. Retrospect has a new set type called "Cloud". Create a new backup set/media set and select "Cloud" as the type.

Next you’ll need to enter your cloud storage credentials. Retrospect allows customers to enable or disable SSL encryption (HTTP or HTTPS) and to set the maximum storage usage, up to 8TB per cloud member.
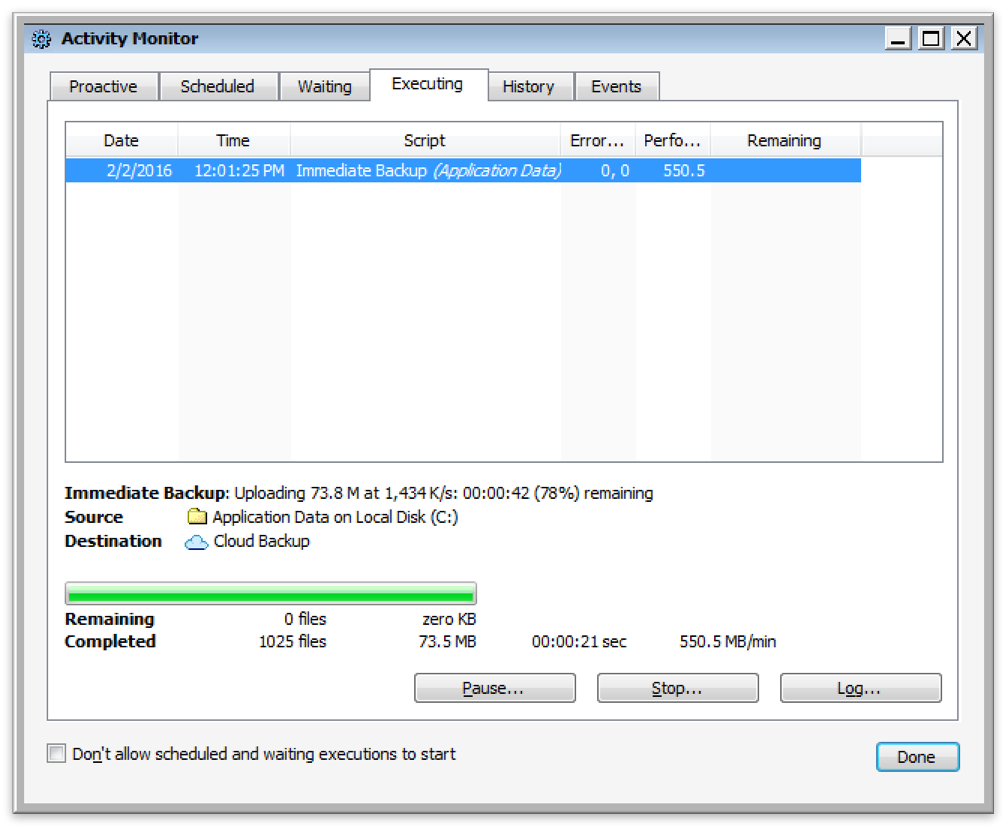
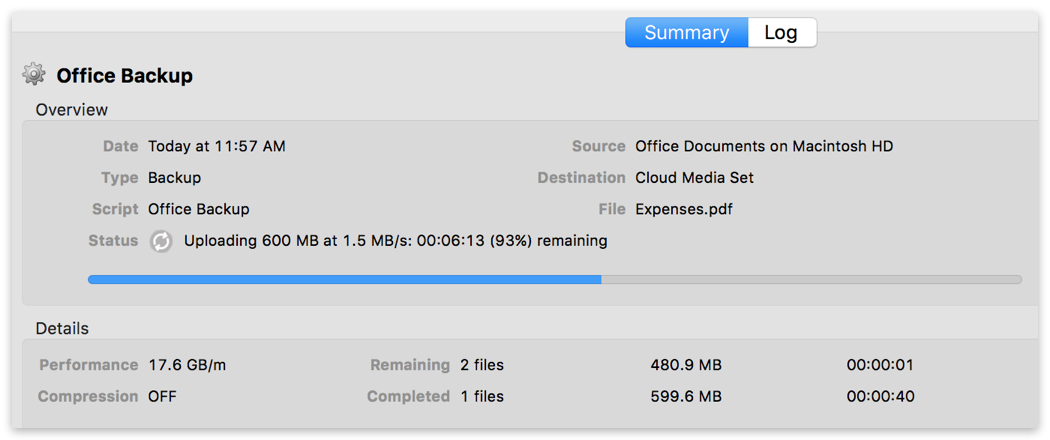
Using Cloud Storage in Retrospect
Using cloud storage is simple. After you have created a cloud set, create a new script or add it to an existing one, and click "Run". The backup will begin with the contents of the set being uploaded to your cloud storage location. You can track the progress in the execution/activity.
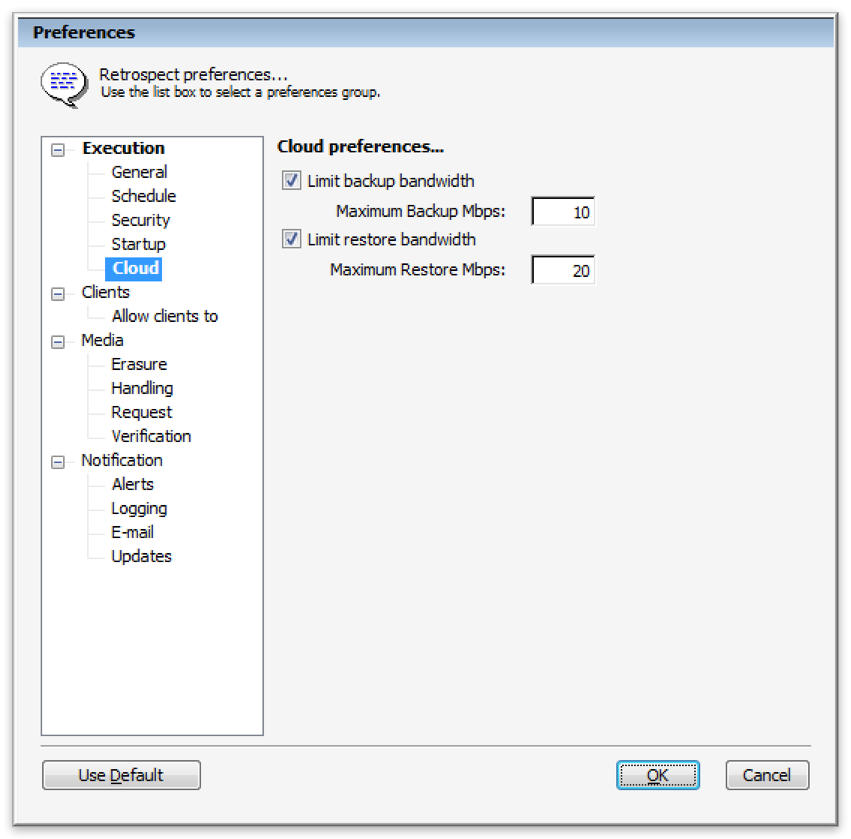
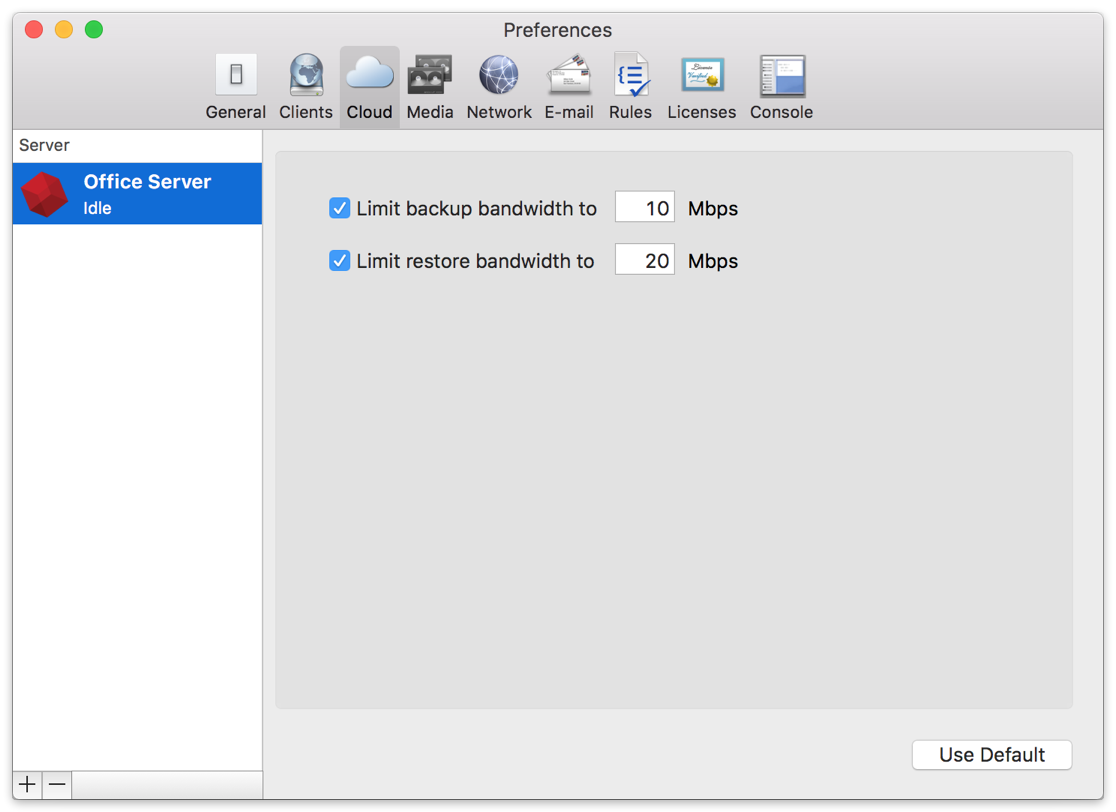
Throttling Cloud Backups in Retrospect
Throttling for cloud backup and cloud restore is available in Preferences.
General Tips
Below are a number of tips for using cloud storage in Retrospect:
- Bandwidth Measurement Tool – Measure your upload and download bandwidth with this free tool: Speedtest.net.
- Disable Backup Verification – Verification will download all of the data that you upload. See more details about why you should disable it for cloud backups in Cloud Backup - Best Practices for Data Protection with Cloud Storage.
Last Update: June 21, 2021
Was this article helpful?