How to Set Up Drobo for Retrospect Backup
- 14 Dec 2023
- 1 Minute to read
- Print
- DarkLight
- PDF
How to Set Up Drobo for Retrospect Backup
- Updated on 14 Dec 2023
- 1 Minute to read
- Print
- DarkLight
- PDF
Article Summary
Share feedback
Thanks for sharing your feedback!
Set up a Drobo 5C, 5D3, 8D, or B810i
Drobos that directly connect to your computer—DAS and iSCSI SAN devices like the 5C, 5D3, 8D, and B810i—do not need additional setup. You can immediately select them as a volume for your backup destination. For NAS Drobos like the 5N2 and B810n, see our instructions below.
Set up a Drobo 5N2 or B810n
Drobos support expandable storage. You can add new drives or upsize drives (replacing smaller ones with larger ones) on the fly, and the Drobo automatically supports the larger capacity. Drobos do this using a technology called thin provisioning. When you mount a Drobo share, the OS sees the maximum amount of storage that the Drobo is capable of, rather than the amount that is available.
Retrospect allows you to easily configure the amount of storage you use on the backup destination, and you can change it at any time. Use the following steps to limit the backup storage that Retrospect uses on your Drobo.
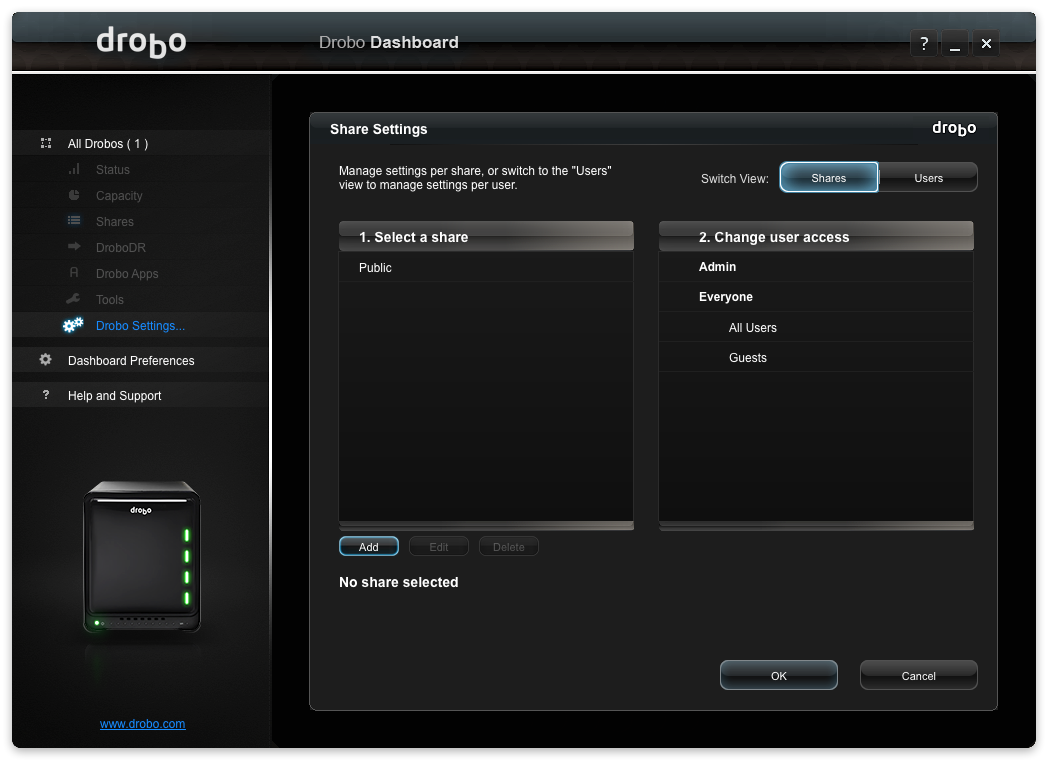
In the Drobo Dashboard, select your Drobo and then "Shares".

Under "Share Settings", select "Add".
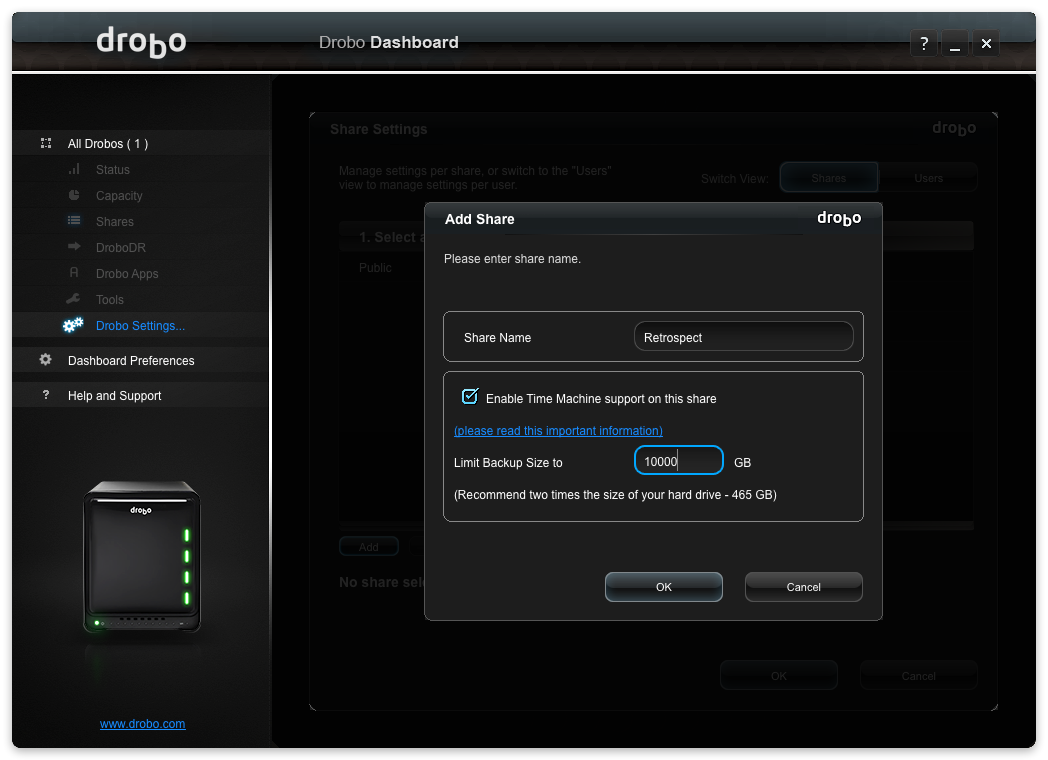
In "Add Share", type in a share name, like "Retrospect", then select "Enable Time Machine support on this share". Specify a maximum storage size for your backups.
In "Share Settings", select writeable for everyone or a different set of credentials and permissions. Then click "OK".
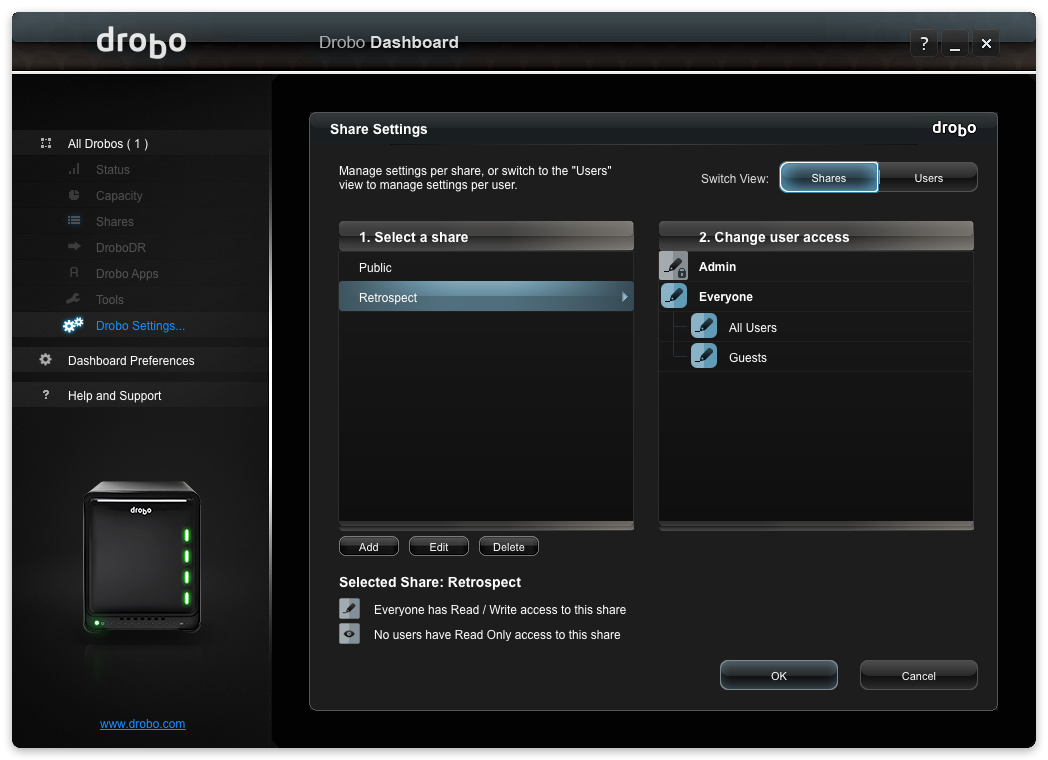
You will see your new "Retrospect" share appear in your list of shares.
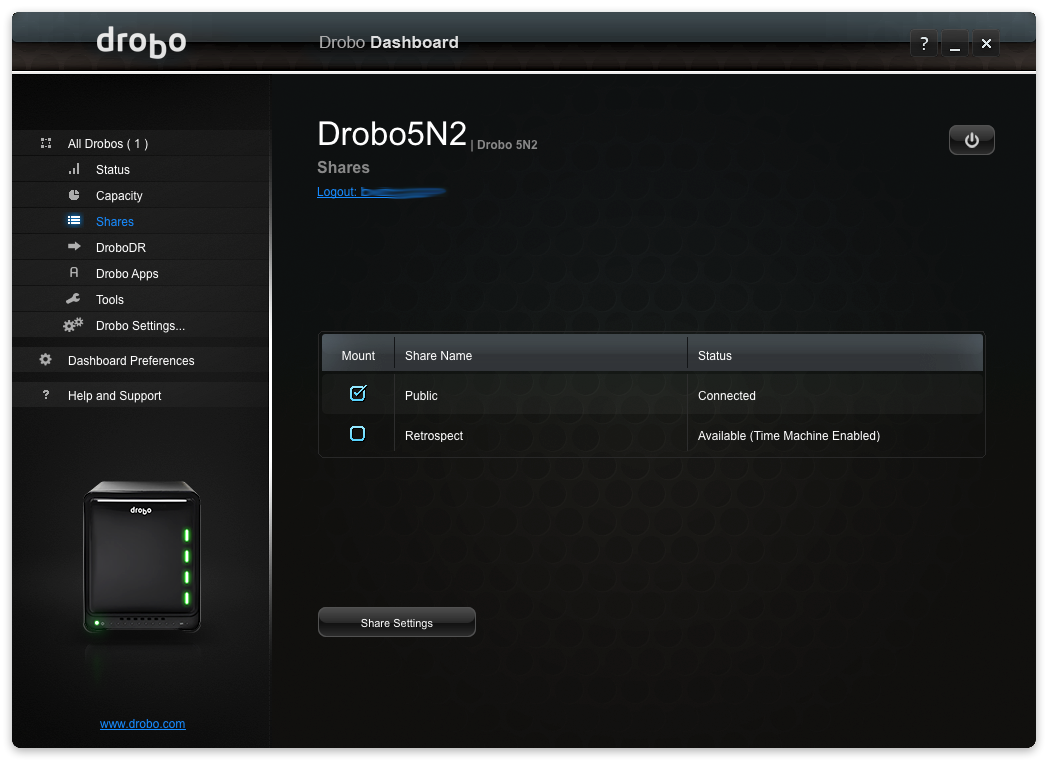
The final step is mounting the share by clicking the "Mount" checkbox.
Full Disk Access on macOS Mojave and Catalina
If you are running macOS Mojave or macOS Catalina, you will need to enable "Full Disk Access" for Retrospect to be allowed to access your Drobo. Please follow our step-by-step guide.
Retrospect Setup: Add Drobo as a Destination
Adding Drobo to Retrospect as a destination is easy. Follow our quick video tutorials for step-by-step guidance:
Note that you can add Drobos by name (the one that appears in the Drobo Dashboard) or by IP address:
smb://Drobo5N2/Public
smb://192.168.0.5/Public
Retrospect Setup: Add Drobo as a Source
Adding Drobo to Retrospect as a source is easy. Follow our quick video tutorials for step-by-step guidance:
Note that you can add Drobos by name (the one that appears in the Drobo Dashboard) or by IP address:
smb://Drobo5N2/Public
smb://192.168.0.5/Public
Last Update: January 10, 2023
Was this article helpful?