macOS Monterey – Application Data Privacy – Full Disk Access
- 17 Nov 2023
- 1 Minute to read
- Print
- DarkLight
- PDF
macOS Monterey – Application Data Privacy – Full Disk Access
- Updated on 17 Nov 2023
- 1 Minute to read
- Print
- DarkLight
- PDF
Article Summary
Share feedback
Thanks for sharing your feedback!
Overview
Retrospect Backup 18.2 supports Apple macOS Monterey (12).
macOS Catalina (10.15) extends the Full Disk Access security feature from macOS Mojave to help users manage their data privacy. This additional protection ensures you know exactly which applications have access to your data by requiring explicit consent for file-level access to certain application data folders, like Mail, Messages, and Safari, so Retrospect Backup engine and client will not be able to access the entire system without explicit user action. Follow our step-by-step guide to allow Retrospect Backup to continue protecting your Mac environment.
Upgrading
With Retrospect Backup 16.5 and higher, there are no additional steps for upgrading. Please follow the steps below after the upgrade is complete.
Steps
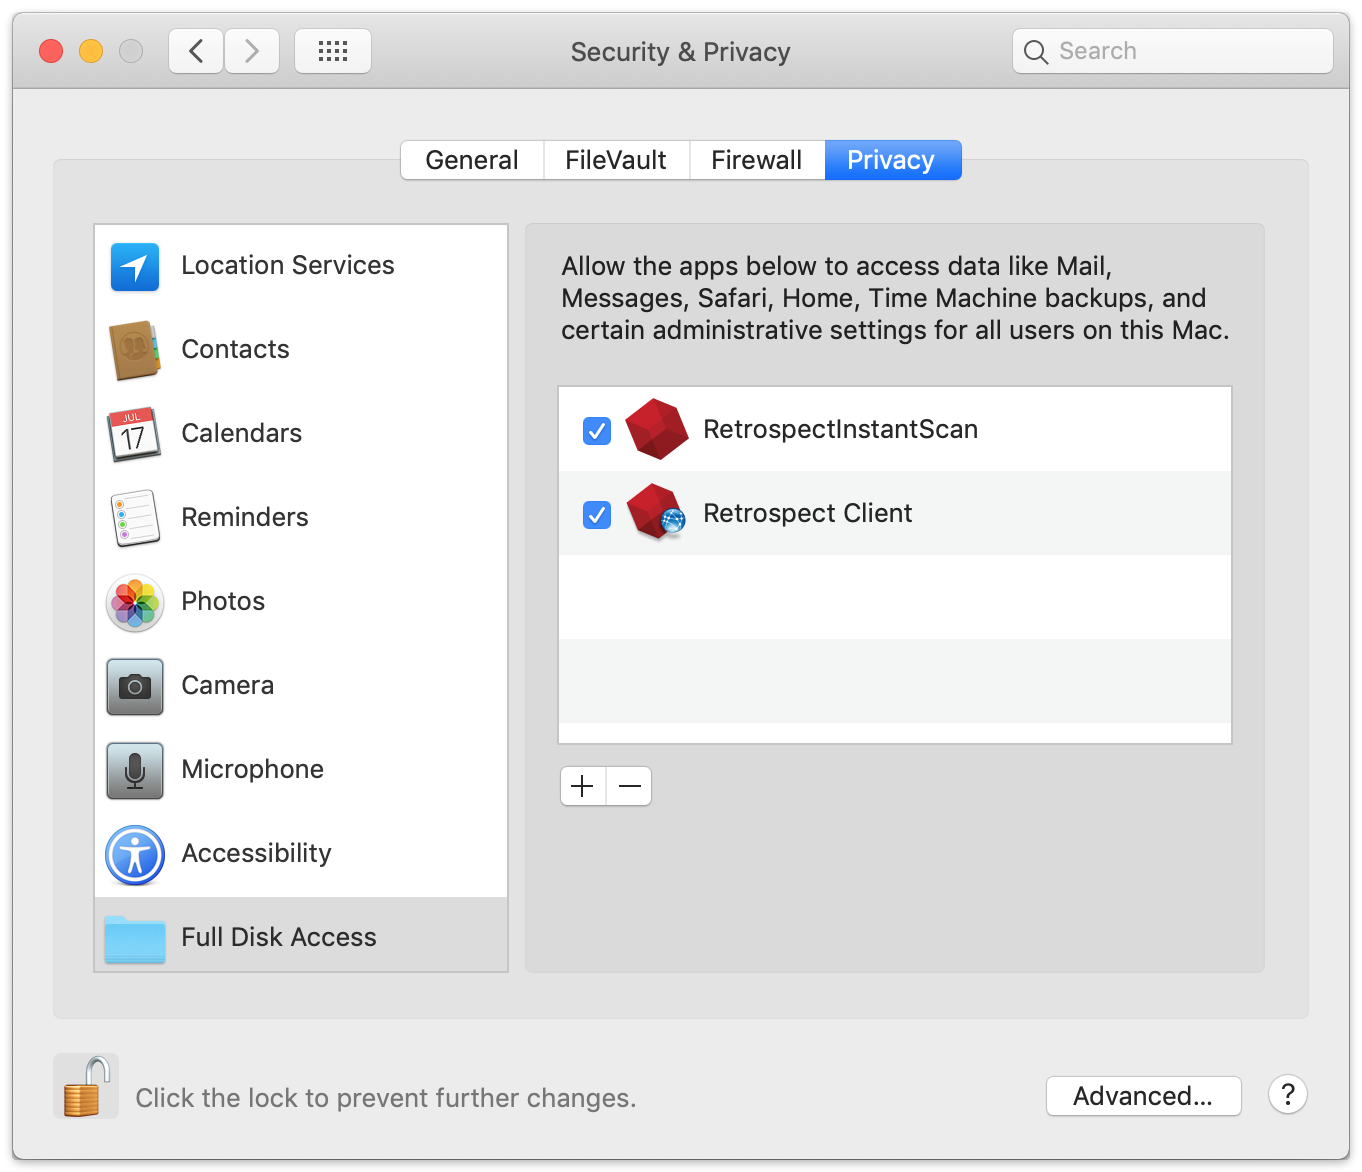
Retrospect needs to be listed under System Preferences > Security & Privacy > Privacy > Full Disk Access. This applies to both a local Retrospect engine and a remote Retrospect Client application. Note that if you have already followed these steps under macOS Mojave, no further action is required.
Engine
- Open "System Preferences" under the Apple at the top left of your screen.
- Click on "Security & Privacy" then "Privacy". You should see "Full Disk Access".
- Click on the lock to authenticate and allow changes.
- Now you need to find the Retrospect applications to drag into this list. Go to "Finder". Select "Go" from the menu bar and then "Go to Folder...". Enter:
/Library/Application Support/Retrospect - Scroll down "RetrospectEngine" and "RetrospectInstantScan" and drag them into the "Full Disk Access" list. Close "System Preferences".

Client
- Open "System Preferences" under the Apple at the top left of your screen.
- Click on "Security & Privacy" then "Privacy". You should see "Full Disk Access".
- Click on the lock to authenticate and allow changes.
- Now you need to find the Retrospect applications to drag into this list. Go to "Finder". Select "Go" from the menu bar and then "Go to Folder...". Enter:
/Library/PreferencePanes (Retrospect Client)
/Library/Application Support/Retrospect (RetrospectInstantScan) - Scroll down "Retrospect Client" (from the first folder) and "RetrospectInstantScan" (from the second folder) and drag them into the "Full Disk Access" list. Close "System Preferences".
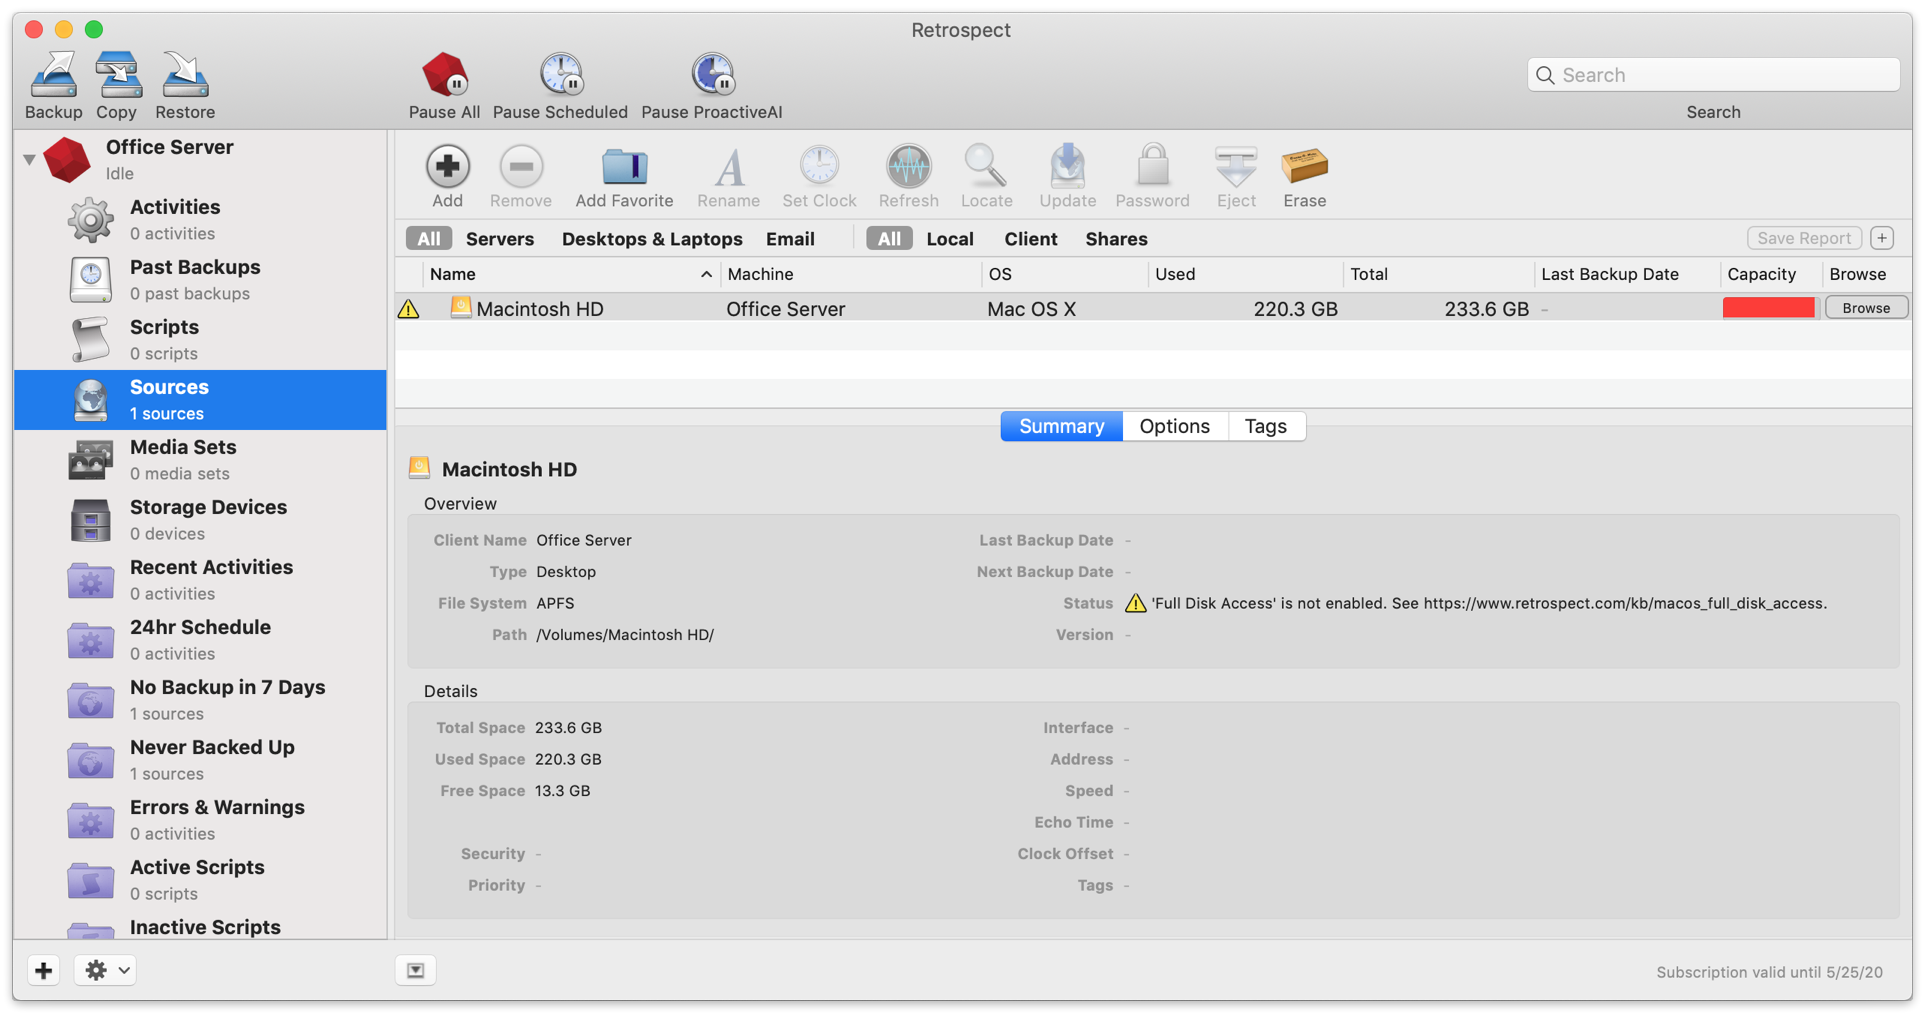
If you do not add these, you will see the following error message during backup:
"Retrospect has detected it is not listed under "Full Disk Access" on the backup source system and cannot access all user data to create a complete backup."
Last Update: November 2023
Was this article helpful?