Cloud Backup
title: Cloud Backup - How to Set Up Synology for Cloud Backup created_at: 2018.05.17 updated_at: 2018.05.17 category: Cloud Backup --- :toc: macro :toc-title:

Synology provides affordable, scalable network attached storage (NAS) devices for consumers, small businesses, and enterprises. Using open source software like Minio or Zenko, you can leverage your own NAS for cloud storage. Retrospect 15.1 for Windows and Mac are certified for Synology. Follow these step-by-step instructions for configuring Retrospect to integrate with Synology.

Visit Synology’s website to choose the right NAS for your business needs. Ensure that it supports hosting Docker instances. Retrospect is currently certified to integrate with Minio and Zenko Cloud Server Docker instances. See below for setup instructions.
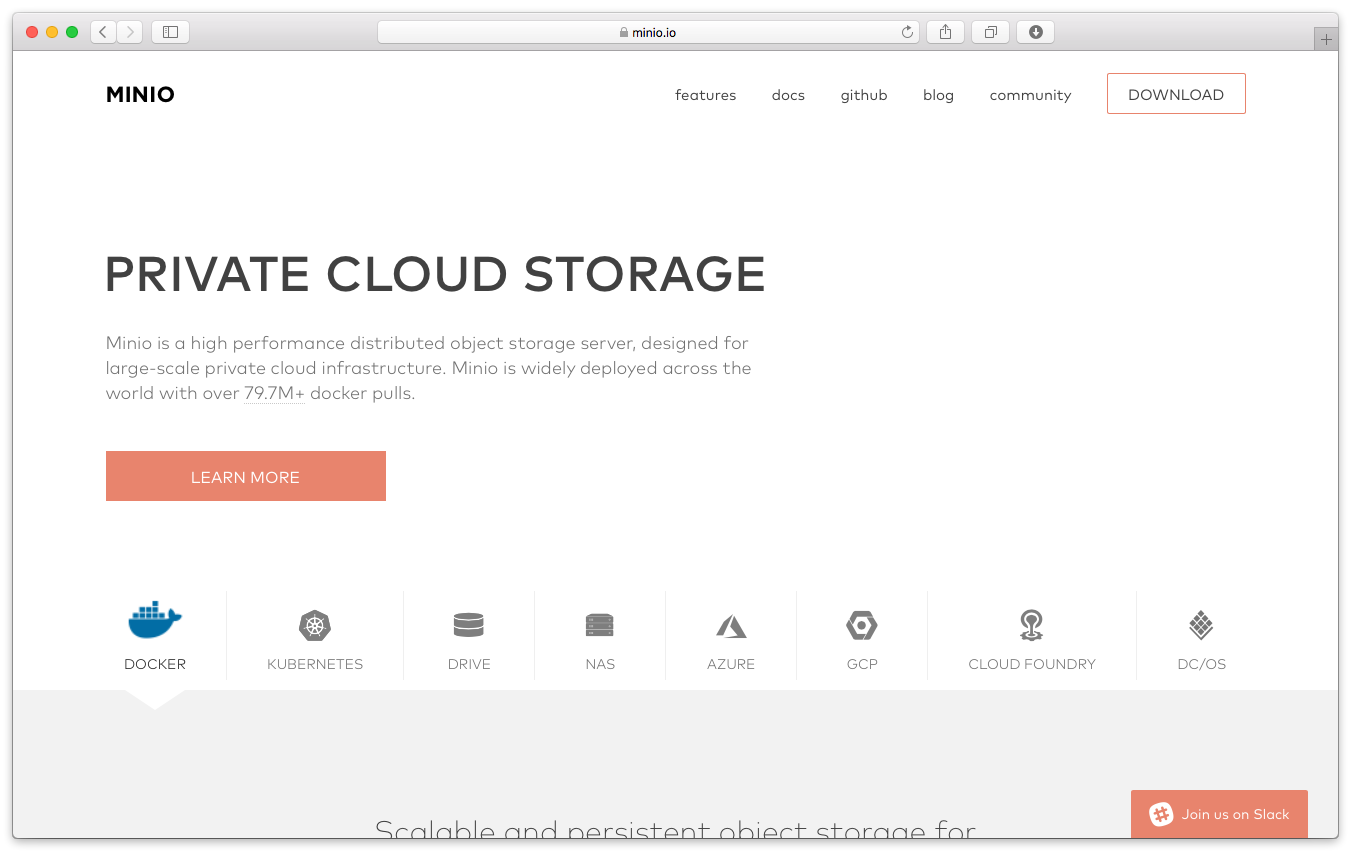
Minio is a high performance distributed object storage server, designed for large-scale private cloud infrastructure. Minio is widely deployed across the world with over 79.7M+ docker pulls. You can deploy it on any hardware you prefer. At the end of the setup, you will receive a path, an access key, and a secret key.
Install Docker.
Download minio/minio.
Connect via SSH.
Run: sudo docker run -p 9000:9000 --name minio -d minio/minio server /export
Run: sudo docker logs minio
Launch a web browser and visit the instance to create a bucket.

Zenko provides a single unifying interface using the Amazon S3 API, supporting multi-cloud backend data storage both on-premises and in the Amazon S3 public cloud as well as other services, including: Available now for Amazon S3, Scality RING and Docker. You can deploy it on any hardware you prefer. At the end of the setup, you will receive a path, an access key, and a secret key.
Install Docker.
Download scality/s3server.
Launch scality/s3server via Image in Docker.
In Docker > Container, highlight scality/s3server1 click on "Details". Local port is what is needed to connect.
Create a bucket (folder) using Cyberduck instructions.
Copy down the default access key and secret key.
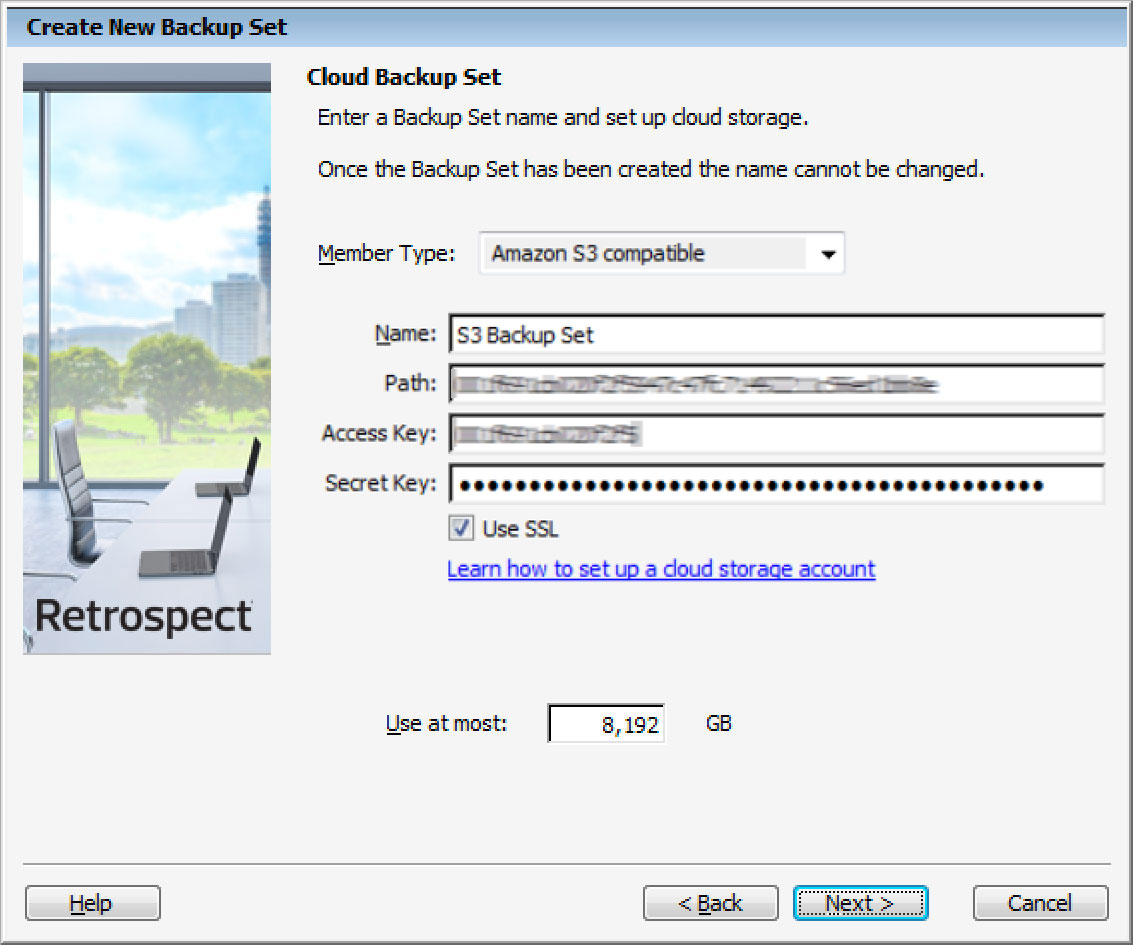
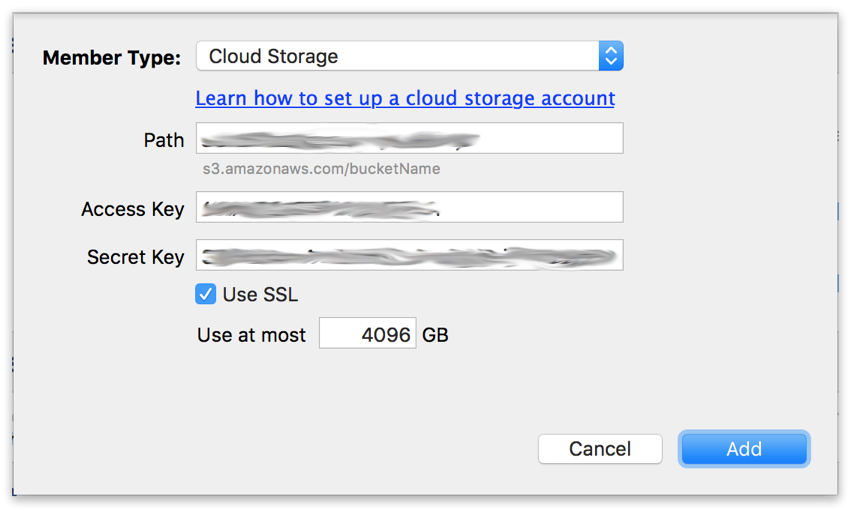
Retrospect needs three pieces of information to access Synology:
Path – url_to_instance:port_number/your_bucket_name
Access Key – Use the Access Key provided by your cloud storage instance.
Secret Key – Use the Secret Key provided by your cloud storage instance.
Añadir el almacenamiento en la nube como destino es simple. Retrospect tiene un nuevo tipo de conjunto llamado "nube". Cree un nuevo conjunto de copia de seguridad/conjunto de medios y seleccione "nube" como tipo.
Interfaz de Windows

Interfaz de Mac

Next you’ll need to enter your cloud storage credentials.
Interfaz de Windows
Interfaz de Mac
Usar el almacenamiento en la nube es simple. Después de haber creado un conjunto en la nube, cree una nueva secuencia de comandos o añádala a una ya existente y haga clic en "Ejecutar". La copia de seguridad se iniciará, siendo subido el contenido del conjunto a su lugar de almacenamiento en la nube. Puede hacer un seguimiento del progreso en la ejecución/actividad.
Interfaz de Windows

Interfaz de Mac

La limitación para la copia de seguridad en la nube y la restauración de la nube está disponible en Preferencias.
Interfaz de Windows

Interfaz de Mac

Below are a number of tips for using cloud storage in Retrospect:
Herramienta de medición de ancho de banda – Mida su ancho de banda de subida y bajada con esta herramienta gratuita: <a target="_blank" href="http://speedtest.net">Speedtest.net</a>.
Desactivar la verificación de copia de seguridad – La verificación descargará todos los datos que suba. Vea más detalles acerca de por qué debe desactivarla para las copias de seguridad en la nube en <a href="/es/support/kb/best_practices_for_cloud_storage#notes">Copia de seguridad en la nube: las mejores prácticas para la protección de datos con almacenamiento en la nube</a>.
Last Update: 17 de mayo de 2018

