Cloud Backup
title: Cloud Backup - How to Set Up DreamHost for Cloud Backup created_at: 2016.03.12 updated_at: 2016.07.04 category: Cloud Backup --- :toc: macro :toc-title:

DreamHost DreamObjects is a cost-effective US-based cloud storage service for secure off-site data protection. Retrospect 11 for Windows and Retrospect 13 for Mac are certified for DreamHost DreamObjects. Follow these step-by-step instructions for setting up a DreamHost account, configuring a storage location (called a "bucket"), and creating a set of security credentials (an Access Key and a Secret Key, similar to a username and password).
Special Deal – 20% off on storage up to 2TB. See DreamHost DreamObjects for Retrospect.
Visit DreamHost to start the account creation process and click "Try if Free for 30 Days".

Fill in an email address and a password.
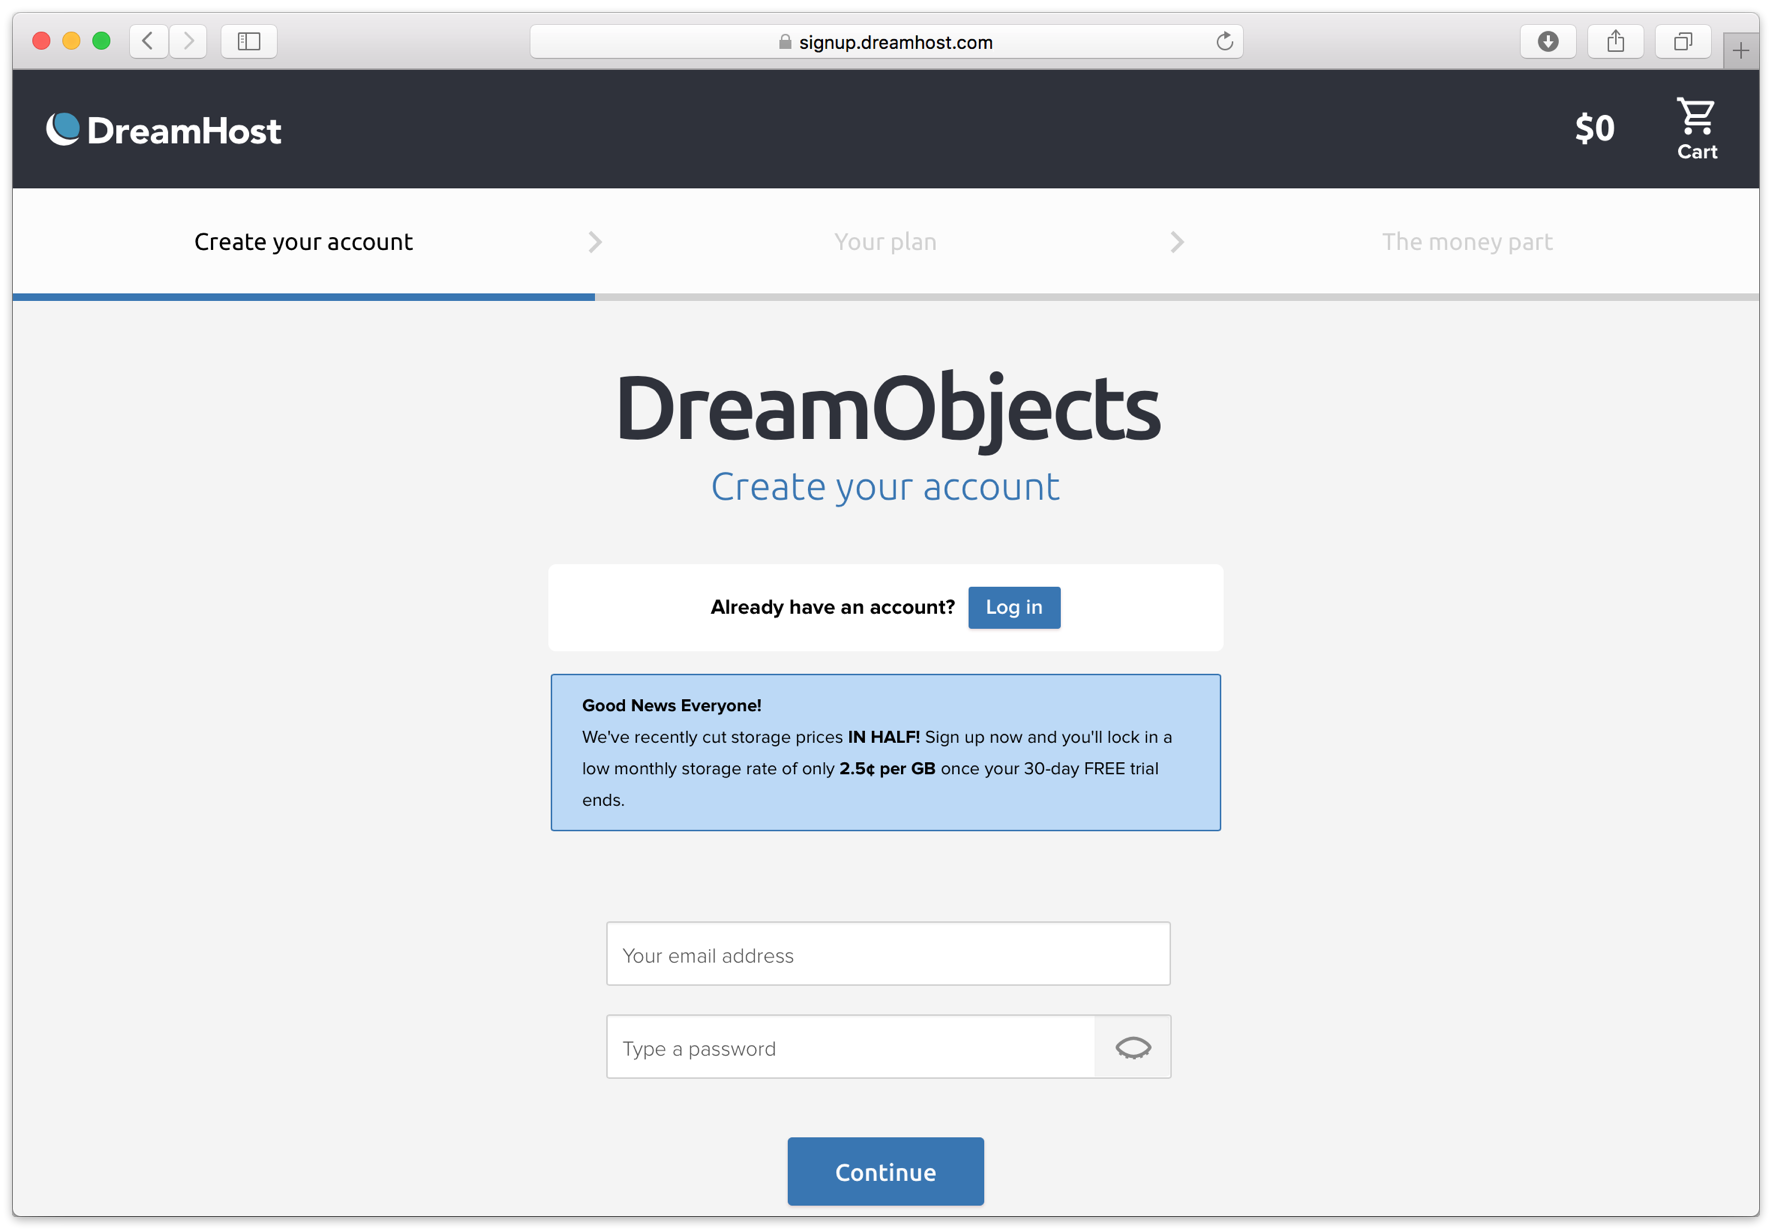
Confirm the free trial plan.

Complete the contact details and billing details.

The new account is created. You’re ready to set up the storage location.

Now we will create a bucket that Retrospect can use to store backups.
Navigate to the DreamObjects section.
 2 . Click "Create New User". Type in a username, and click "Add User"

DreamHost will begin creating your new user. When it’s done, you’ll see it along with your new Access Key.

Click "Add Bucket". Type in a bucket name. Note that these are globally-unique names. Click "Add Bucket".

Your new bucket is now created and ready to use. In Retrospect, the "Path" is objects-us-west-1.dream.io/your_bucket_name.

You’re ready to use Retrospect. You now have a bucket location, an Access Key, and a Secret Key (shown when you click "Show Secret Key").

Retrospect needs three pieces of information to access DreamHost:
Path – objects-us-west-1.dream.io/your_bucket_name
Access Key – Use the Access Key from above.
Secret Key – Use the Secret Key from above.
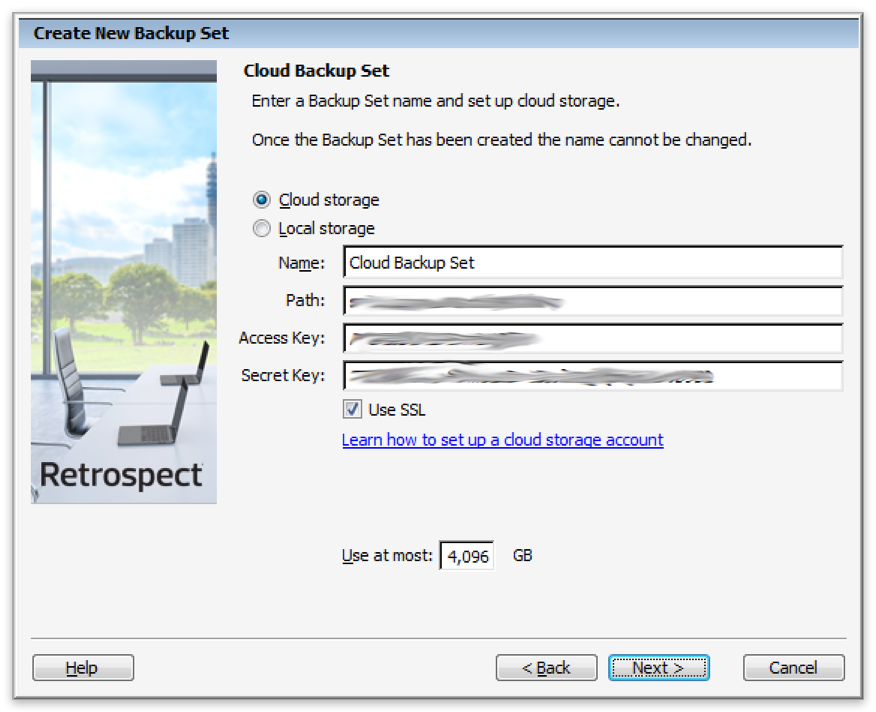
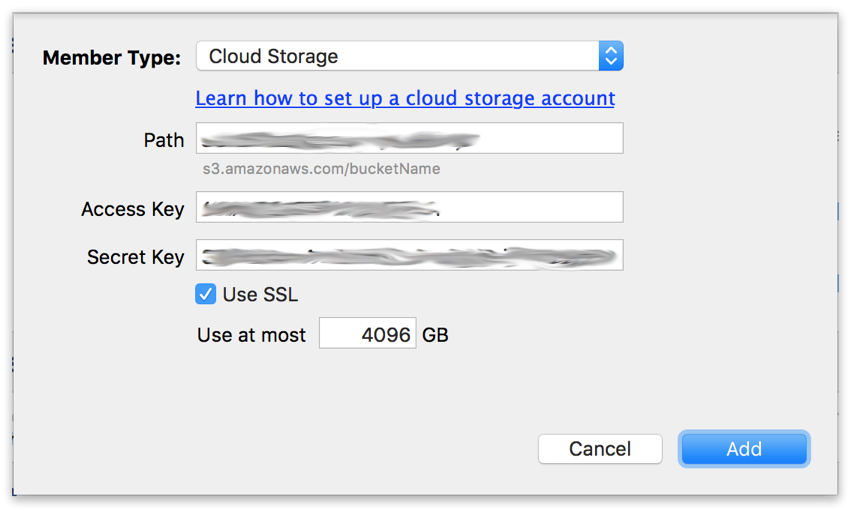
Añadir el almacenamiento en la nube como destino es simple. Retrospect tiene un nuevo tipo de conjunto llamado "nube". Cree un nuevo conjunto de copia de seguridad/conjunto de medios y seleccione "nube" como tipo.
Interfaz de Windows

Interfaz de Mac

Next you’ll need to enter your cloud storage credentials. Retrospect allows customers to enable or disable SSL encryption (HTTP or HTTPS) and to set the maximum storage usage, up to 8TB per cloud member.
Interfaz de Windows
Interfaz de Mac
Usar el almacenamiento en la nube es simple. Después de haber creado un conjunto en la nube, cree una nueva secuencia de comandos o añádala a una ya existente y haga clic en "Ejecutar". La copia de seguridad se iniciará, siendo subido el contenido del conjunto a su lugar de almacenamiento en la nube. Puede hacer un seguimiento del progreso en la ejecución/actividad.
Interfaz de Windows

Interfaz de Mac

La limitación para la copia de seguridad en la nube y la restauración de la nube está disponible en Preferencias.
Interfaz de Windows

Interfaz de Mac

Below are a number of tips for using cloud storage in Retrospect:
Herramienta de medición de ancho de banda – Mida su ancho de banda de subida y bajada con esta herramienta gratuita: <a target="_blank" href="http://speedtest.net">Speedtest.net</a>.
Desactivar la verificación de copia de seguridad – La verificación descargará todos los datos que suba. Vea más detalles acerca de por qué debe desactivarla para las copias de seguridad en la nube en <a href="/es/support/kb/best_practices_for_cloud_storage#notes">Copia de seguridad en la nube: las mejores prácticas para la protección de datos con almacenamiento en la nube</a>.
As a reference, we have confirmed the following bandwidth for DreamHost DreamObjects:
Verified Upload Bandwidth – 20 Mbps
Verified Download Bandwidth – 90 Mbps
DNS Name: DreamHost updated its DNS name from objects.dreamhost.comobjects-us-west-1.dream.io
Last Update: 04 de julio de 2016

