Cloud Backup
title: kb.dunkel.title created_at: 2016.04.05 updated_at: 2016.04.16 category: Cloud Backup --- :toc: macro :toc-title:

<a href="https://www.dunkel.de/s3/">Dunkel Cloud Storage</a> is a cost-effective Germany-based cloud storage service for secure off-site data protection. Retrospect 11 for Windows and Retrospect 13 for Mac are certified for Dunkel Cloud Storage. Follow these step-by-step instructions for setting up a Dunkel Cloud Storage account, configuring a storage location (called a "bucket"), and creating a set of security credentials (an Access Key and a Secret Key, similar to a username and password).
Oferta especial – 40% de descuento por 12 meses de prepago 1TB y 5TB más €80 para la preparación. Consulte <a target="_blank" href="https://www.dunkel.de/retrospect">Dunkel Cloud Storage for Retrospect</a>.
Visit <a href="https://www.dunkel.de/retrospect">Dunkel Cloud Storage for Retrospect</a> to contact Dunkel.

Dunkel will reach out to you shortly to set up an account.
Now we will create a bucket that Retrospect can use to store backups. This can be done with any compatible software. This tutorial uses <a href="https://cyberduck.io">Cyberduck</a>, an excellent and free cloud storage browser, available for Windows and Mac.
Download, install, and launch Cyberduck.

Click 'Open Connection' and select 'S3 (Amazon Simple Storage Service)'. Enter in 'dcs.dunkel.de' as the server, your supplied Access Key as the username, and your supplied Secret Key as the password.

Click 'Action' and select 'New Folder'. Type in a name for it. This will be the name of your bucket for Retrospect to use.

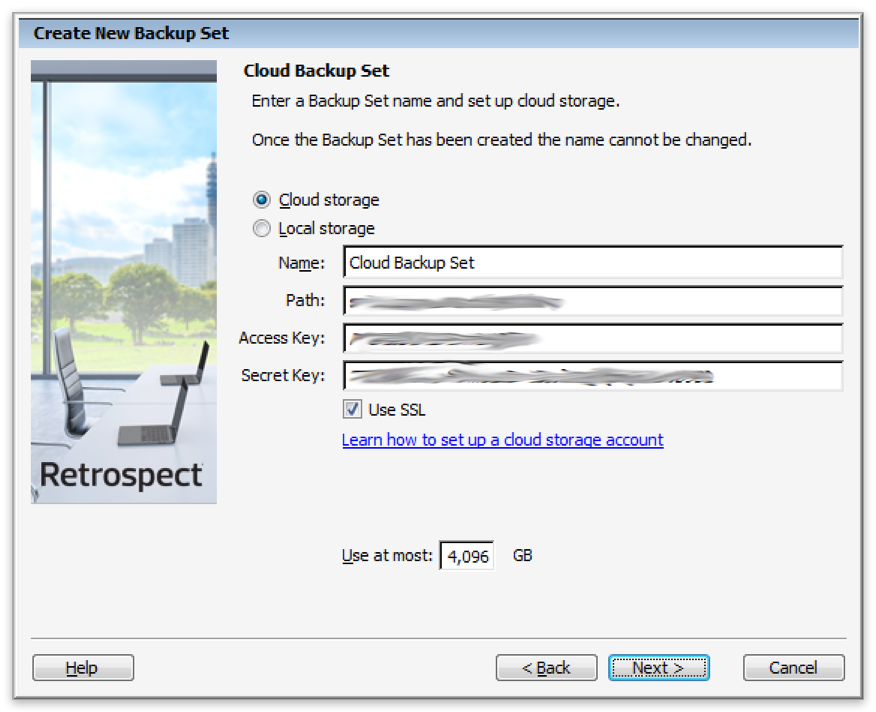
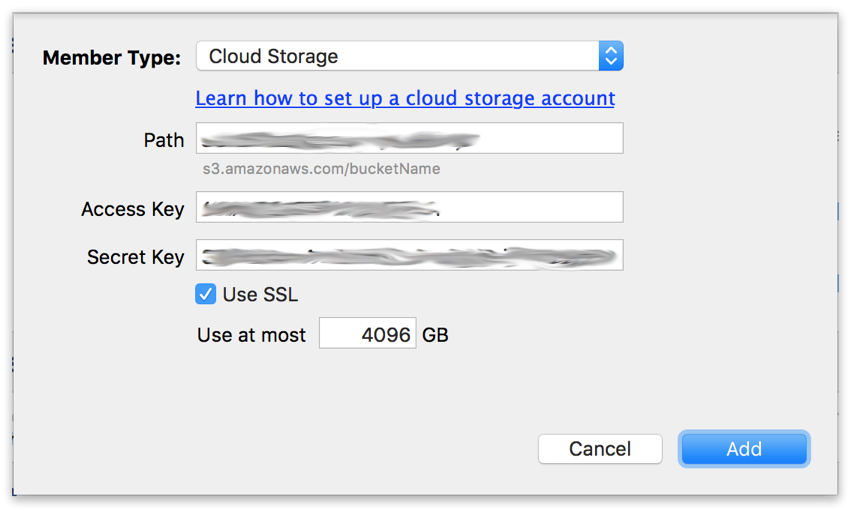
Retrospect needs three pieces of information to access Dunkel Cloud Storage:
Path – dcs.dunkel.de/bucket
Access Key – Use the Access Key from above.
Secret Key – Use the Secret Key from above.
Añadir el almacenamiento en la nube como destino es simple. Retrospect tiene un nuevo tipo de conjunto llamado "nube". Cree un nuevo conjunto de copia de seguridad/conjunto de medios y seleccione "nube" como tipo.
Interfaz de Windows
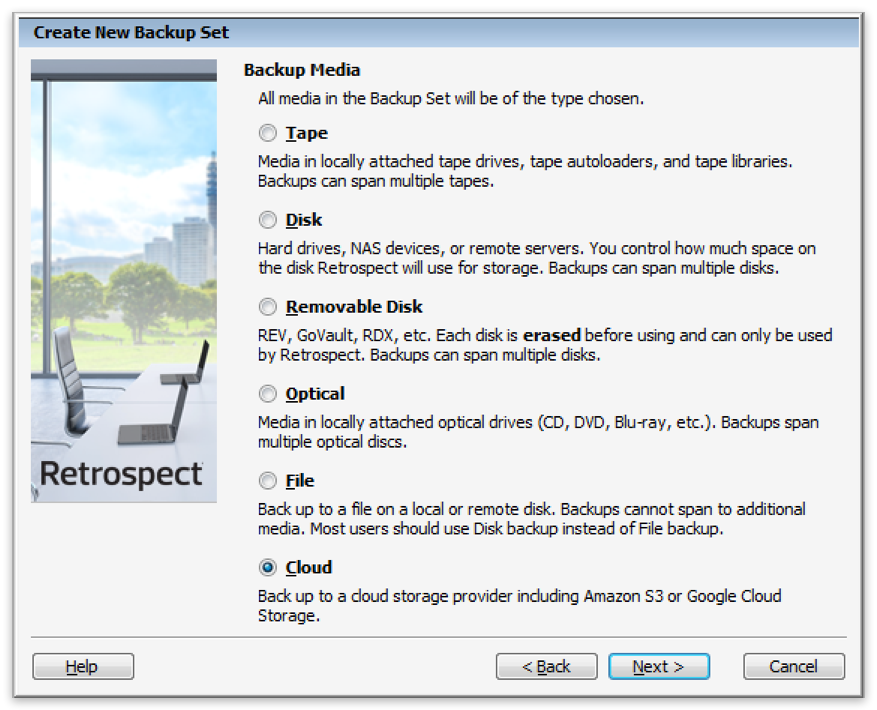
Interfaz de Mac
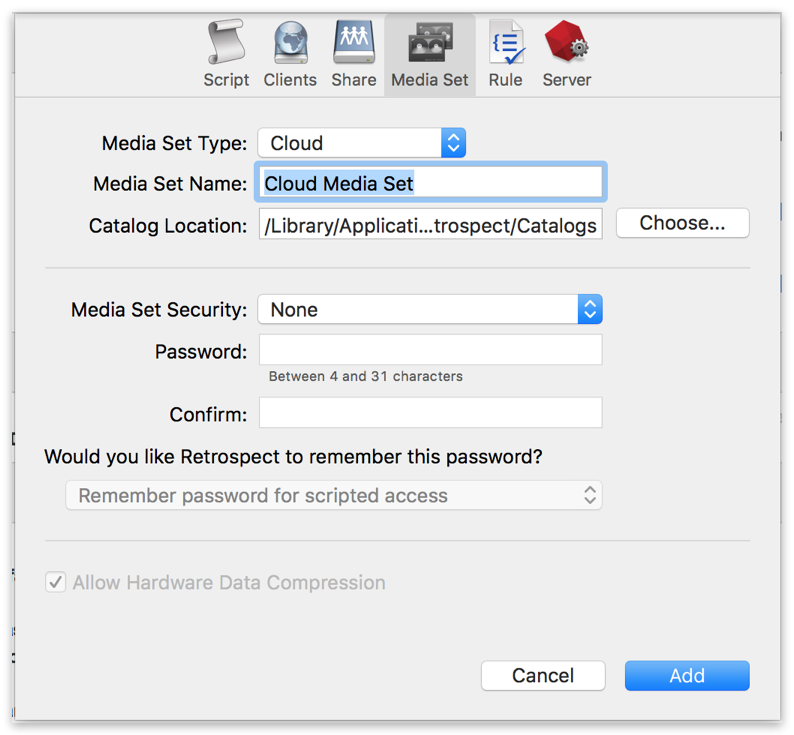
Next you'll need to enter your cloud storage credentials.
Los diferentes proveedores de almacenamiento en la nube ofrecen diferentes opciones. Retrospect permite a los clientes activar o desactivar el cifrado SSL (HTTP o HTTPS) y establecer el uso máximo de almacenamiento, hasta 8TB por miembro en la nube. Cuando la copia de seguridad en la nube use esto, solicitará permiso para crear un nuevo miembro de 8TB, hasta 100TB por conjunto de copia de seguridad en la nube.
Interfaz de Windows
Interfaz de Mac
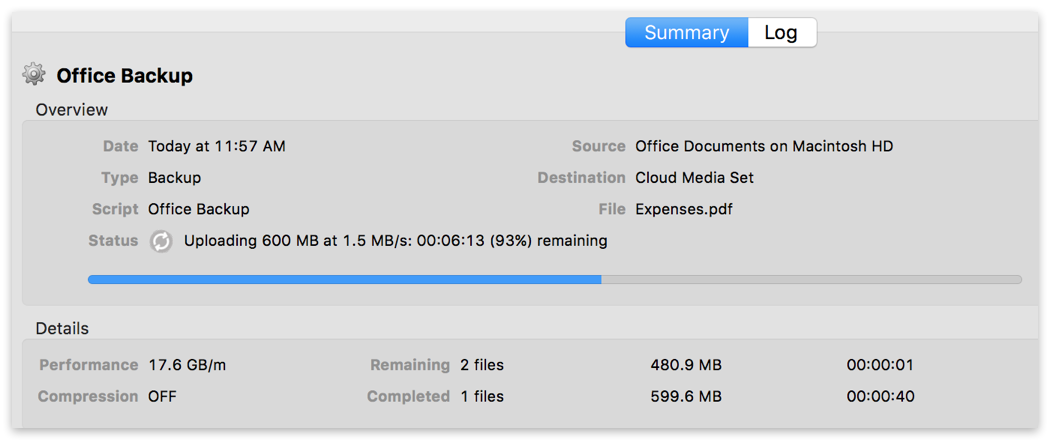
Usar el almacenamiento en la nube es simple. Después de haber creado un conjunto en la nube, cree una nueva secuencia de comandos o añádala a una ya existente y haga clic en "Ejecutar". La copia de seguridad se iniciará, siendo subido el contenido del conjunto a su lugar de almacenamiento en la nube. Puede hacer un seguimiento del progreso en la ejecución/actividad.
Interfaz de Windows
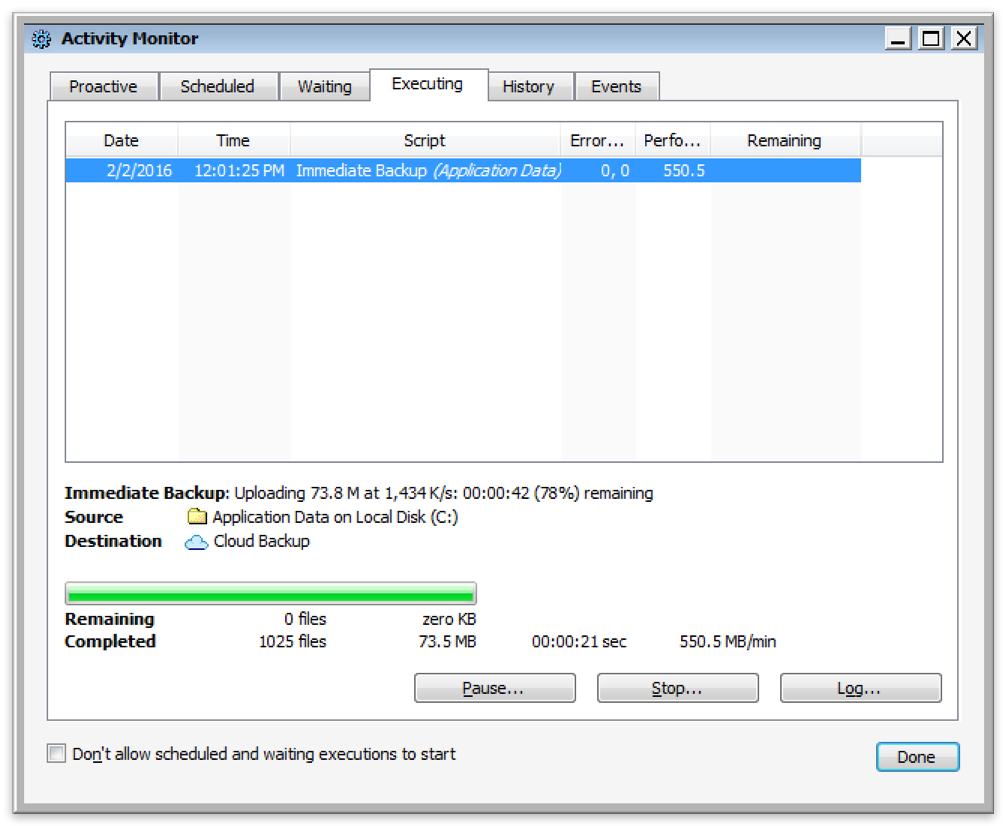
Interfaz de Mac
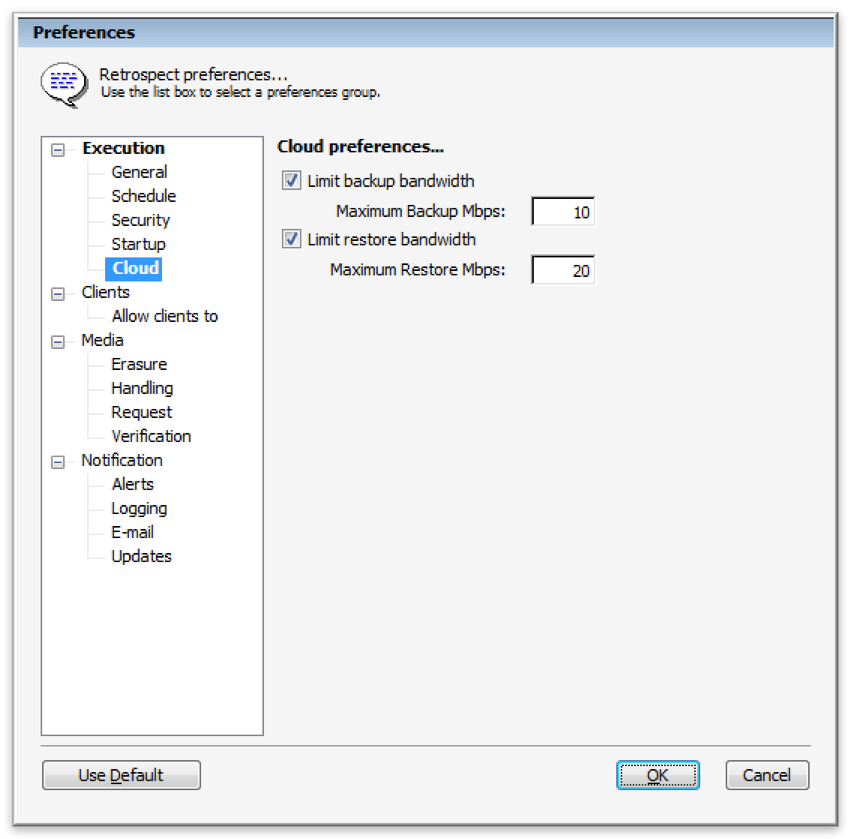
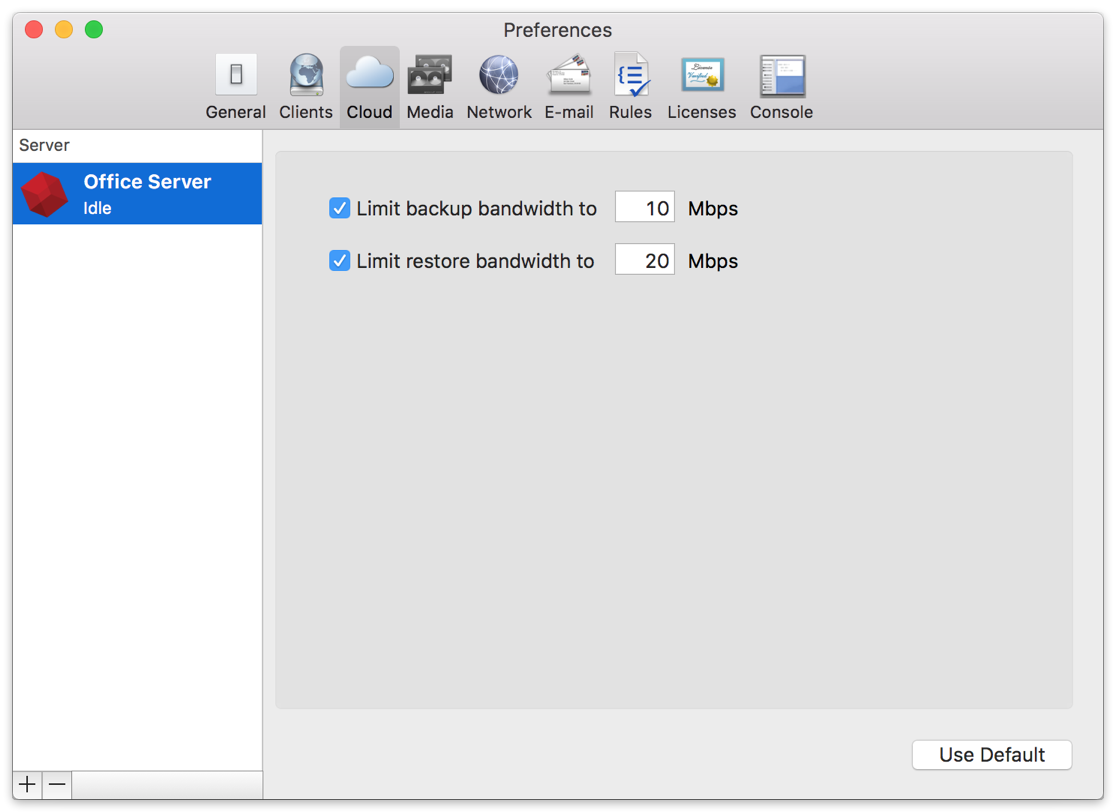
La limitación para la copia de seguridad en la nube y la restauración de la nube está disponible en Preferencias.
Interfaz de Windows
Interfaz de Mac
Herramienta de medición de ancho de banda – Mida su ancho de banda de subida y bajada con esta herramienta gratuita: <a target="_blank" href="http://speedtest.net">Speedtest.net</a>.
Desactivar la verificación de copia de seguridad – La verificación descargará todos los datos que suba. Vea más detalles acerca de por qué debe desactivarla para las copias de seguridad en la nube en <a href="/es/support/kb/best_practices_for_cloud_storage#notes">Copia de seguridad en la nube: las mejores prácticas para la protección de datos con almacenamiento en la nube</a>.
Dunkel Cloud Storage - Ancho de banda de subida verificado – 20 Mbps
Dunkel Cloud Storage - Ancho de banda de descarga verificado – 110 Mbps
Last Update: 16 de abril de 2016