Cloud Backup
title: Cloud Backup - How to Set Up Backblaze B2 (S3 API) for Cloud Backup created_at: 2017.02.02 updated_at: 2023.01.09 category: Cloud Backup --- :toc: macro :toc-title:

Backblaze B2 is a business-class cloud storage provider with extremely low costs, at $0.005/GB a month or $5/TB a month. Retrospect 17.5 for Windows and Mac are certified for Backblaze B2 (S3 API). Follow these step-by-step instructions for setting up a Backblaze B2 (S3 API) account and adding it to Retrospect.
Please note that buckets created before May 4, 2020 cannot be used with Backblaze S3 Compatible APIs.
NOTE: Please note that the Native API is the Legacy API for Backblaze and you should use the S3 API if possible. For the Native API - Legacy instructions, see How to Set Up Backblaze B2 (Native API - Legacy) for Cloud Backup.
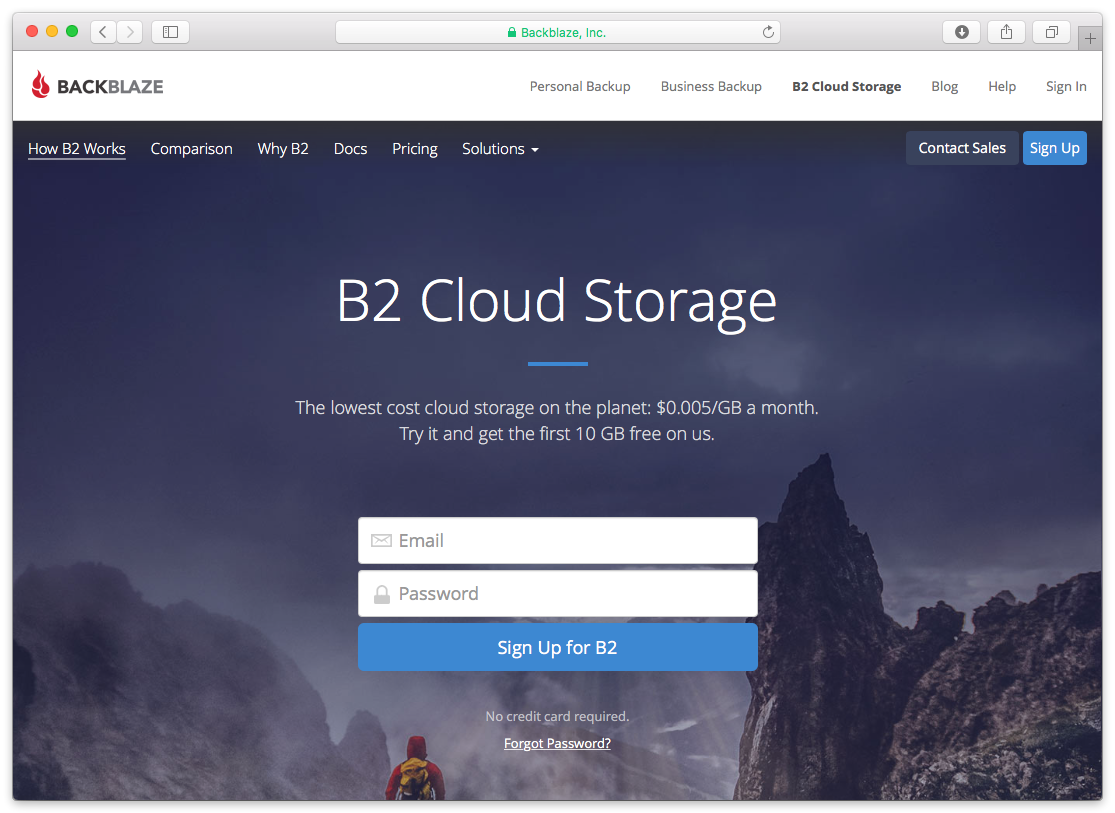
Setting up a Backblaze B2 account is quick and easy.
Visit Backblaze B2. Type in your email address and password and click "Sign up for B2".
Backblaze B2 requires a valid phone number, so you’ll need to verify yours with a text message. This also allows you to set up two-factor authentication for added security.
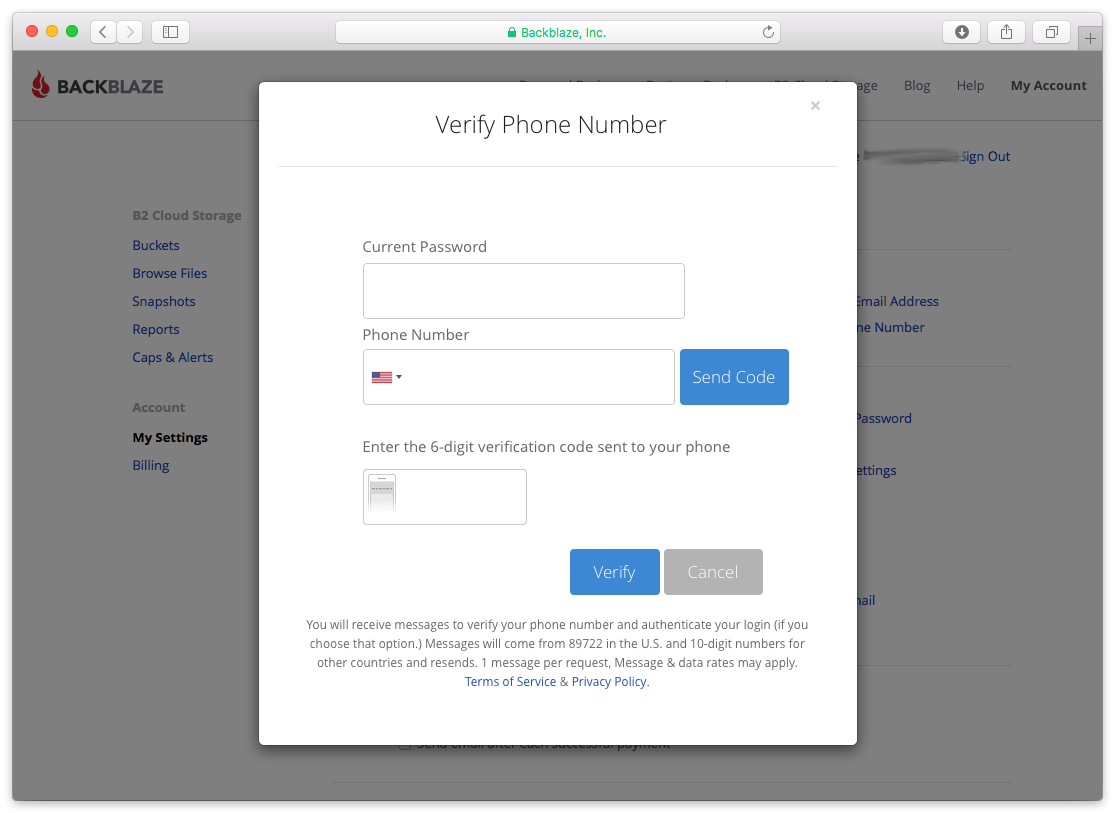
After verifying your phone number, you’ll see your new Backblaze B2 account page.

Retrospect needs these pieces of information to access Backblaze B2.
Path – s3.us-west-001.backblazeb2.com/your_bucket_name (using the endpoint URL listed in Backblaze "Buckets" page)
Access Key: Use the Application Key ID (keyID).
Secret Key: Use the Application Key (applicationKey).
The S3 Compatible API does not support the master key but does support application-specific keys. You’ll need to click "Add a New Application Key" under "App Keys" to get the "Application Key ID" (KeyID) and the "Application Key" (applicationKey).


The path is listed as "Endpoint" under the bucket description on your Backblaze "Buckets" page.
Adicionar armazenamento em nuvem como um destino é simples. O Retrospect tem um novo tipo de conjunto chamado "Cloud". Crie um novo conjunto de backup / conjunto de mídias e selecione "Cloud" como o tipo.
Interface do Windows

Interface Mac

Next you’ll need to enter your cloud storage credentials. Retrospect allows customers to set the maximum storage usage, up to 100TB. If you have an existing bucket, type it into "Bucket". Otherwise, leave that field blank, and Retrospect will walk through creating a new one.
Interface do Windows

Interface Mac

Usar o armazenamento em nuvem é simples. Depois de criar um conjunto de nuvens, crie um novo script ou adicione-o a um existente e clique em "Executar". O backup começará com o conteúdo do conjunto sendo carregado para o local de armazenamento na nuvem. Você pode acompanhar o progresso na execução / atividade.
Interface do Windows

Interface Mac

A otimização para backup na nuvem e restauração na nuvem está disponível em Preferências.
Interface do Windows

Interface Mac

Retrospect Backup supports integration with B2 Fireball. However, when doing this backup, it will be important that you create a Cloud Backup Set and not a Disk Backup set for the Fireball device.
Below are a number of tips for using cloud storage in Retrospect:
Ferramenta de Medição de Largura de Banda – Meça o seu upload e download de banda com esta ferramenta gratuita: <a target="_blank" href="http://speedtest.net">Speedtest.net</a>.
Desativar a verificação de backup – A verificação fará o download de todos os dados que você enviar. Veja mais detalhes sobre por que você deve desativá-lo para backups na nuvem em <a href="/br/support/kb/best_practices_for_cloud_storage#notes">Backup na nuvem - Práticas recomendadas para proteção de dados com armazenamento em nuvem</a>.
Disabling Multiple Versions in Lifecycle
In some cases, Retrospect Backup will receive an error during upload and need to retry. You need to set your bucket’s lifecycle to "Keep only the last version". Otherwise, B2 might store retain the prior incomplete copies of your RDB file, and B2 will charge you for this space.
See this example of B2 storing multiple verisons:

You can find a bucket’s lifecycle settings here:

Última atualização: 09 de janeiro de 2023

