Cloud Backup
title: Cloud Backup - How to Set Up DreamHost for Cloud Backup created_at: 2016.03.12 updated_at: 2016.07.04 category: Cloud Backup --- :toc: macro :toc-title:

DreamHost DreamObjects is a cost-effective US-based cloud storage service for secure off-site data protection. Retrospect 11 for Windows and Retrospect 13 for Mac are certified for DreamHost DreamObjects. Follow these step-by-step instructions for setting up a DreamHost account, configuring a storage location (called a "bucket"), and creating a set of security credentials (an Access Key and a Secret Key, similar to a username and password).
Special Deal – 20% off on storage up to 2TB. See DreamHost DreamObjects for Retrospect.
Visit DreamHost to start the account creation process and click "Try if Free for 30 Days".

Fill in an email address and a password.
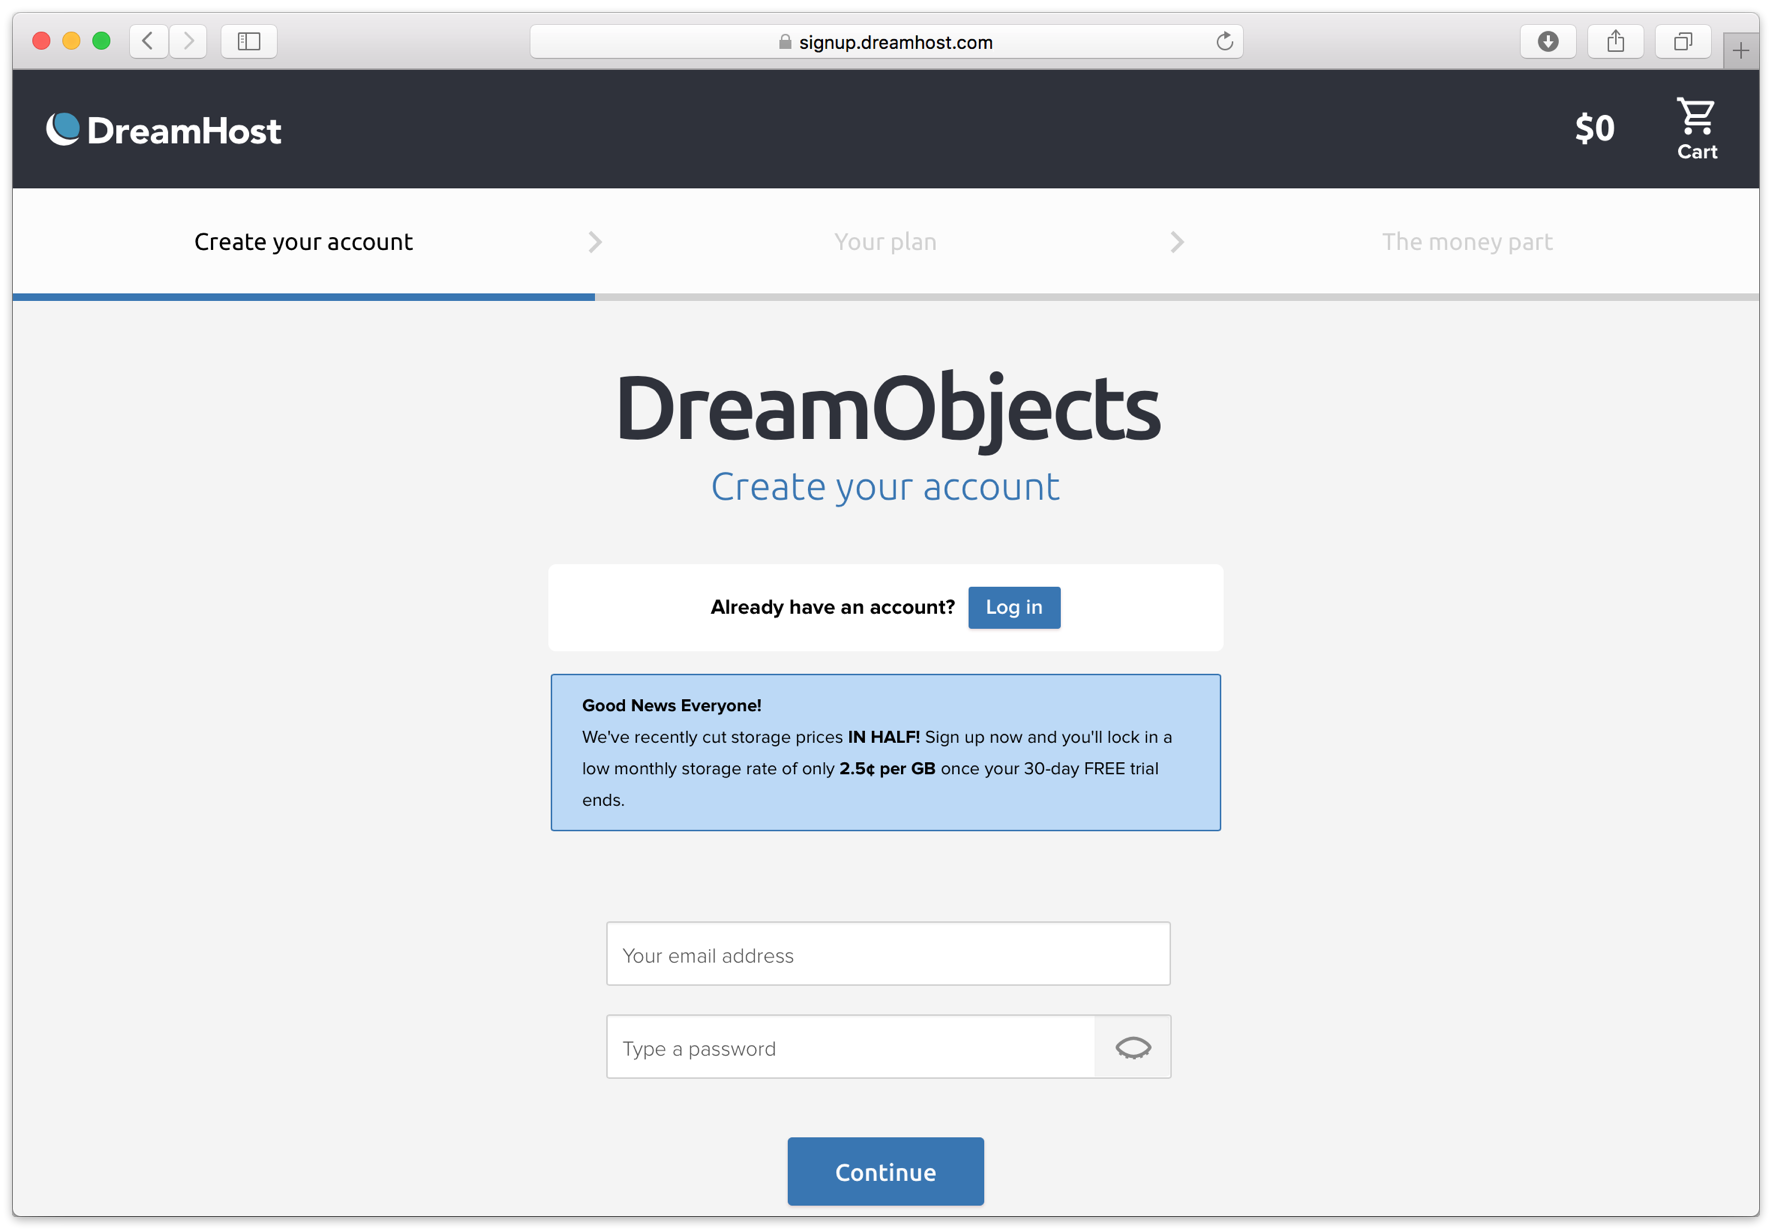
Confirm the free trial plan.

Complete the contact details and billing details.

The new account is created. You’re ready to set up the storage location.

Now we will create a bucket that Retrospect can use to store backups.
Navigate to the DreamObjects section.
 2 . Click "Create New User". Type in a username, and click "Add User"

DreamHost will begin creating your new user. When it’s done, you’ll see it along with your new Access Key.

Click "Add Bucket". Type in a bucket name. Note that these are globally-unique names. Click "Add Bucket".

Your new bucket is now created and ready to use. In Retrospect, the "Path" is objects-us-west-1.dream.io/your_bucket_name.

You’re ready to use Retrospect. You now have a bucket location, an Access Key, and a Secret Key (shown when you click "Show Secret Key").

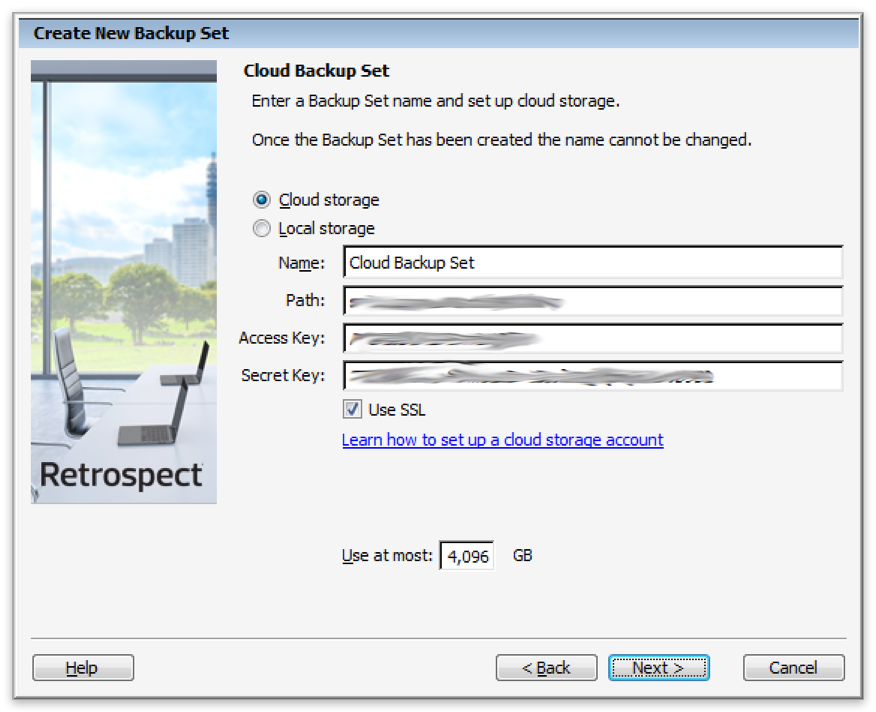
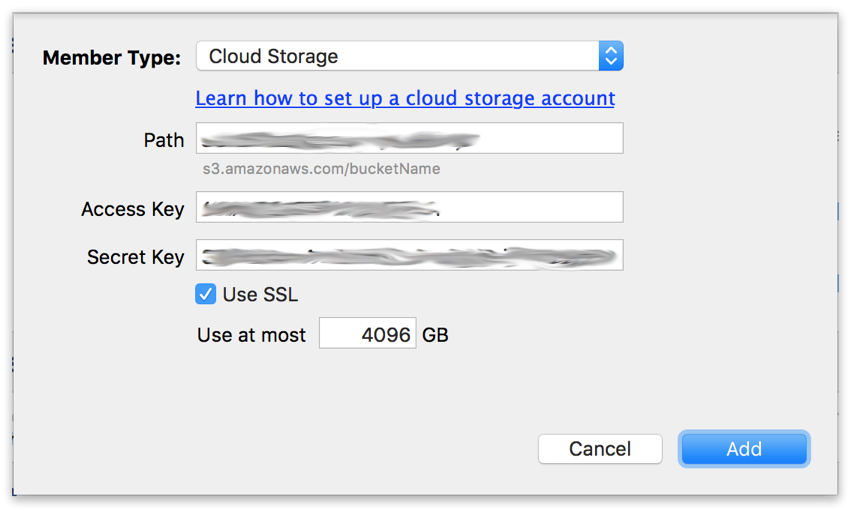
Retrospect needs three pieces of information to access DreamHost:
Path – objects-us-west-1.dream.io/your_bucket_name
Access Key – Use the Access Key from above.
Secret Key – Use the Secret Key from above.
Ajouter le stockage cloud comme destination est simple. Retrospect a un nouveau type de jeu appelé « Nuage/Cloud ». Créez un nouveau jeu de sauvegarde/jeu de media et sélectionnez « Nuage/Cloud » comme type.
Interface Windows

Interface Mac

Next you’ll need to enter your cloud storage credentials. Retrospect allows customers to enable or disable SSL encryption (HTTP or HTTPS) and to set the maximum storage usage, up to 8TB per cloud member.
Interface Windows
Interface Mac
Utiliser le stockage cloud est simple. Après avoir créé un jeu sur le cloud, créez un nouveau script ou ajoutez-le à un script déjà existant, puis cliquez sur « Exécuter ». La sauvegarde commencera avec le téléchargement du contenu du jeu sur l'emplacement de votre stockage sur le cloud. Vous pourrez suivre l’avancée de cette tâche dans l’onglet Exécution (version Windows) ou sous « Activités » (version Mac).
Interface Windows

Interface Mac

La limitation de bande passante pour la sauvegarde sur le cloud et la restauration sur le cloud est disponible dans Préférences.
Interface Windows

Interface Mac

Below are a number of tips for using cloud storage in Retrospect:
Outil de mesure de la bande passante – Mesurez votre bande passante de téléversement et de téléchargement avec cet outil gratuit : <a target="_blank" href="http://speedtest.net">Speedtest.net</a>.
Désactiver la vérification de la sauvegarde – La vérification reviendrait à télécharger en local toutes les données sauvegardées sur le cloud. Retrouvez plus d'information sur l'importance de la désactivation de la vérification pour les sauvegardes dans le cloud sur <a href="/fr/support/kb/best_practices_for_cloud_storage#notes">Sauvegarde sur le cloud - meilleures pratiques pour la protection des données avec le stockage sur le cloud</a>.
As a reference, we have confirmed the following bandwidth for DreamHost DreamObjects:
Verified Upload Bandwidth – 20 Mbps
Verified Download Bandwidth – 90 Mbps
DNS Name: DreamHost updated its DNS name from objects.dreamhost.comobjects-us-west-1.dream.io
Last Update: 04 juillet 2016

