Cloud Backup
title: Cloud Backup - How to Set Up Zenko CloudServer for Cloud Backup created_at: 2018.05.17 updated_at: 2018.05.17 category: Cloud Backup --- :toc: macro :toc-title:

Zenko CloudServer (formerly S3 Server) provides a free, open source, scalable cloud storage location for secure on-site data protection. Retrospect 15.1 for Windows and Mac are certified for Zenko CloudServer. Follow these step-by-step instructions for configuring Retrospect to integrate with Zenko CloudServer.

Zenko provides a single unifying interface using the Amazon S3 API, supporting multi-cloud backend data storage both on-premises and in the Amazon S3 public cloud as well as other services, including: Available now for Amazon S3, Scality RING and Docker. You can deploy it on any hardware you prefer. At the end of the setup, you will receive a path, an access key, and a secret key.
You will need a Synology or QNAP NAS that can host Docker instances.
Install Docker.
Download scality/s3server.
Launch scality/s3server via Image in Docker.
In Docker > Container, highlight scality/s3server1 click on "Details". Local port is what is needed to connect.
Create a bucket (folder) using Cyberduck instructions.
Copy down the default access key and secret key.
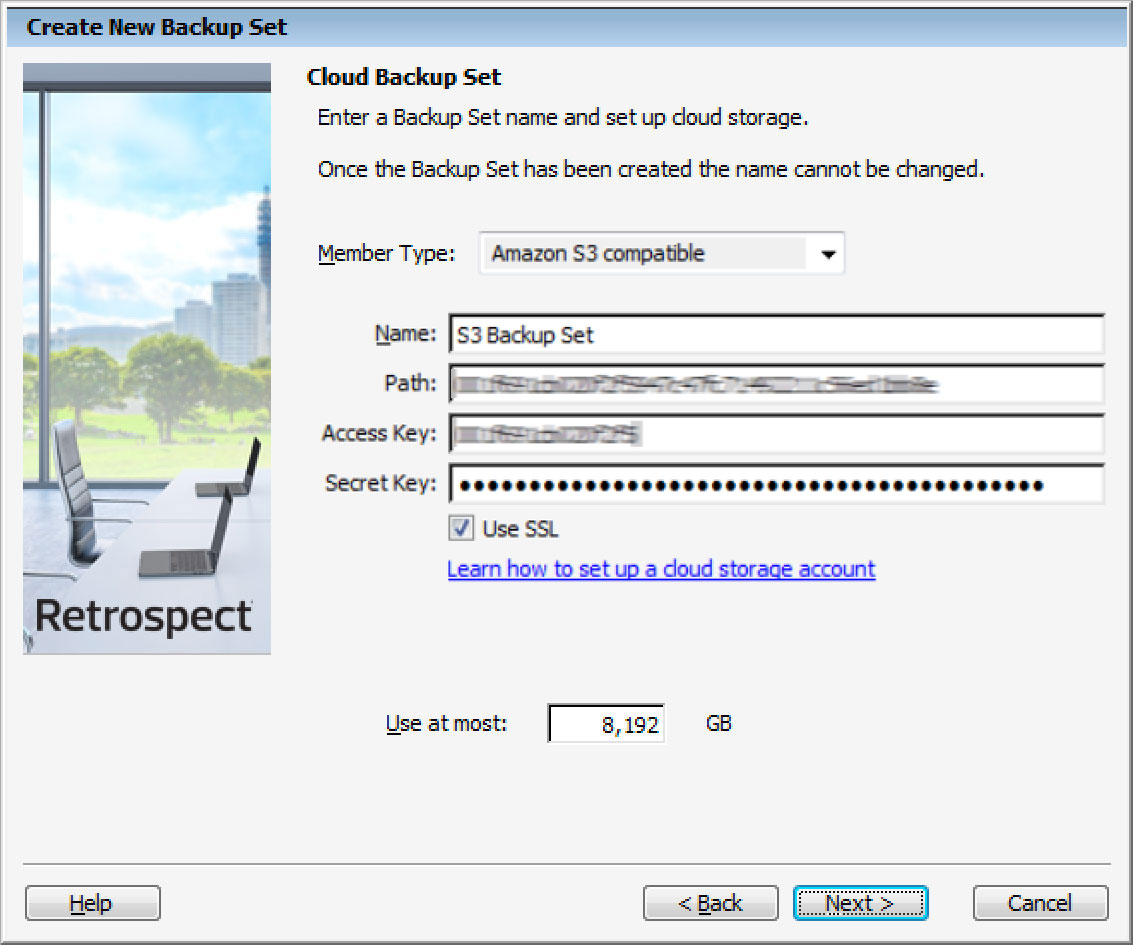
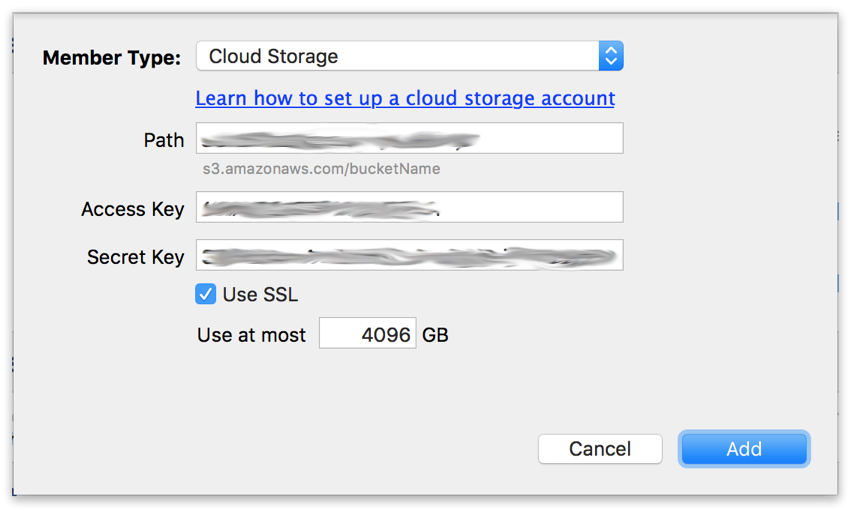
Retrospect needs three pieces of information to access Zenko CloudServer:
Path – url_to_instance:port_number/your_bucket_name
Access Key – Use the Access Key provided by your Zenko CloudServer instance.
Secret Key – Use the Secret Key provided by your Zenko CloudServer instance.
クラウドストレージを宛先として追加する方法はシンプルです。Retrospect には「クラウド」と呼ばれる新しいセットタイプがあります。新規のバックアップセット/メディアセットを作成して、タイプに「クラウド」を選択してください。
Windows インターフェイス

Mac インターフェイス

Next you’ll need to enter your cloud storage credentials.
Windows インターフェイス
Mac インターフェイス
クラウドストレージの使用方法はシンプルです。クラウドセットを作成した後、新規スクリプトを作成するかそのクラウドセットを既存のスクリプトに追加して、「実行」をクリックしてください。バックアップが開始し、そのセットの内容が自分のクラウドストレージの場所にアップロードされます。実行/アクティビティの進行状況を追跡することができます。
Windows インターフェイス

Mac インターフェイス

環境設定で、クラウドバックアップおよびクラウド復元のための帯域幅調整が可能です。
Windows インターフェイス

Mac インターフェイス

Below are a number of tips for using cloud storage in Retrospect:
帯域幅計測ツール – この無料ツールでアップロードとダウンロードの帯域を計測しましょう: <a target="_blank" href="http://speedtest.net">Speedtest.net</a>。
バックアップの検証を無効化する – 検証を行うと、アップロードした全てのデータをもう一度ダウンロードします。クラウドバックアップではなぜこの機能を無効化した方が良いのか、詳細は<a href="/ja/support/kb/best_practices_for_cloud_storage#notes">クラウドバックアップ - クラウドストレージによるデータ保護のベストプラクティス</a>でご確認ください。
Last Update: 2018年05月17日

