Cloud Backup
title: Cloud Backup - How to Set Up Retrospect Cloud Storage for Cloud Backup created_at: 2023.01.10 updated_at: 2023.10.13 category: Cloud Backup --- :toc: macro :toc-title:
Retrospect provides a low-cost, scalable cloud storage location for secure off-site data protection. With its Object Lock capabilities, Retrospect Cloud Storage enables customers to lock specific files for a retention period, such that no one, not even the root user on the account, can delete the files until the time has passed.
Retrospect Cloud Storage is available as a subscription license, compatible with both perpetual and subscription licenses. It’s available as tiers of 500GB, 1TB, 5TB, and 10TB. Purchase through Retrospect.com for a free 30-day trial.
Customers can purchase as much storage space as they need, and it will be associated with their account. They can use that cloud storage space anywhere across their infrastructure.
Setting up a Retrospect Cloud Storage account is quick and easy.
Visit Retrospect.com and select "Cloud".
Purchase a Retrospect Cloud Storage license through Retrospect.com or through a Retrospect partner.
After you receive your license, go to Retrospect Management Console.
Go to "Settings" and find your current Retrospect Backup instance. If you don’t have one, click "Add Server" under "Organizations" and type in a name.

On the server page, click "Add License" and add the Retrospect Cloud Storage license.

Retrospect Management Console will provision an account for you and display it below.
Retrospect Backup is fully integrated with Retrospect Cloud Storage through Retrospect Management Console. Retrospect Backup uses three pieces of information to access your storage:
Path – s3.us-west-1.retrospectcloud.com/your_bucket_name (or applicable region)
Access Key – Use the Access Key from above.
Secret Key – Use the Secret Key from above.
This information is managed in Retrospect Management Console and accessible under Settings > Machines.
To integrate multiple Retrospect Backup or Retrospect Virtual instances with Retrospect Cloud Storage, you can type the above information into the Backup Set wizard to set up a new cloud backup set.
If you receive the error "These credentials are not valid", your URL might not be correct. Please verify that it includes the region.
L'aggiunta del cloud storage come destinazione è semplice. Retrospect ha un nuovo tipo di set chiamato "Cloud". Crea un nuovo set di backup/supporti e seleziona "Cloud" come tipo.
Interfaccia Windows

Interfaccia Mac

Next you’ll need to enter your cloud storage credentials. Retrospect allows customers to set the maximum storage usage, up to 100TB. If you have an existing bucket, type it into "Bucket". Otherwise, leave that field blank, and Retrospect will walk through creating a new one.
Interfaccia Windows

Interfaccia Mac

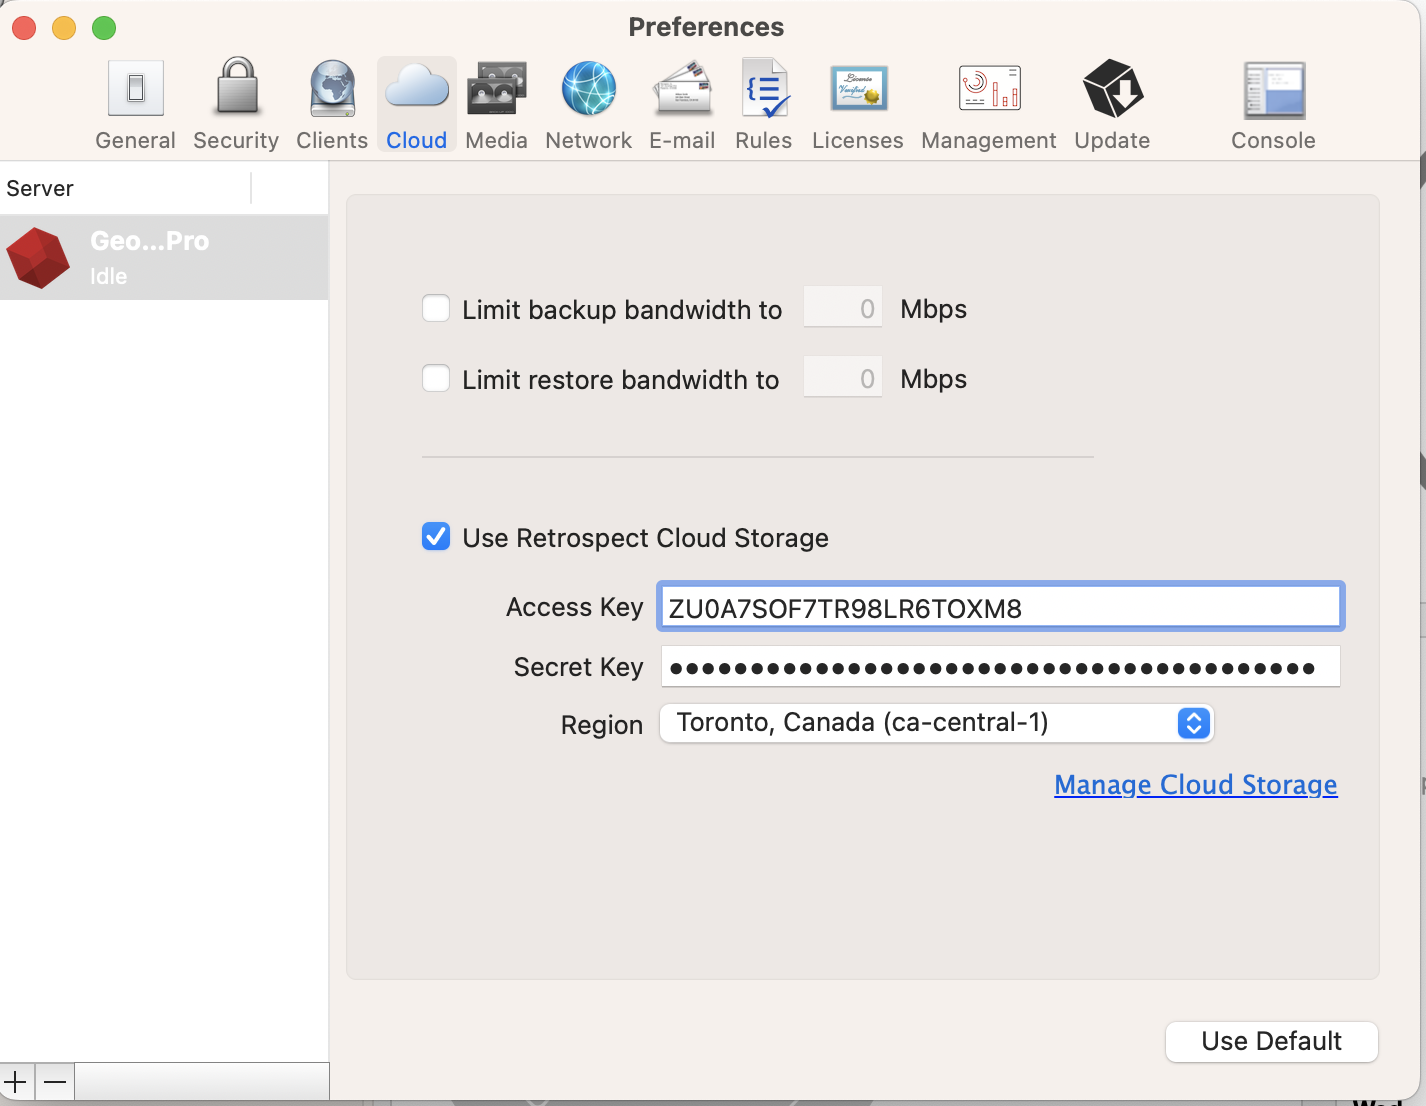
You can also visit Preferences to see your Retrospect Cloud Storage settings.
Interfaccia Windows

Interfaccia Mac
L'utilizzo del cloud storage è semplice. Dopo aver creato un set di cloud, crea un nuovo script o aggiungilo a uno già esistente e fai clic su "Esegui". Il backup inizierà con i contenuti del set che devono essere caricati nella posizione di archiviazione su cloud. Puoi seguire lo stato di avanzamento dell'esecuzione/attività.
Interfaccia Windows

Interfaccia Mac

La limitazione per il backup e il ripristino su cloud è disponibile nelle Preferenze.
Interfaccia Windows

Interfaccia Mac

Below are a number of tips for using cloud storage in Retrospect:
Strumento di misurazione della larghezza di banda – Misura la larghezza di banda in upload e download con questo strumento gratuito: <a target="_blank" href="http://speedtest.net">Speedtest.net</a>.
Disattivare la verifica di backup – La verifica scaricherà tutti i dati che carichi. Ulteriori informazioni sul perché è consigliabile disattivarla per i backup cloud sono consultabili su <a href="/it/support/kb/best_practices_for_cloud_storage#notes">Backup su Cloud - Best practice per la protezione dei dati con il Cloud Storage</a>.
Direct Access: To access your Retrospect Cloud Storage account directly, you can use a tool like Cyberduck with the path and credential information from Retrospect Management Console’s Settings page.
Last Update: 13 Ott 2023

