Cloud Backup
title: Cloud Backup - How to Set Up DreamHost for Cloud Backup created_at: 2016.03.12 updated_at: 2016.07.04 category: Cloud Backup --- :toc: macro :toc-title:

DreamHost DreamObjects is a cost-effective US-based cloud storage service for secure off-site data protection. Retrospect 11 for Windows and Retrospect 13 for Mac are certified for DreamHost DreamObjects. Follow these step-by-step instructions for setting up a DreamHost account, configuring a storage location (called a "bucket"), and creating a set of security credentials (an Access Key and a Secret Key, similar to a username and password).
Special Deal – 20% off on storage up to 2TB. See DreamHost DreamObjects for Retrospect.
Visit DreamHost to start the account creation process and click "Try if Free for 30 Days".

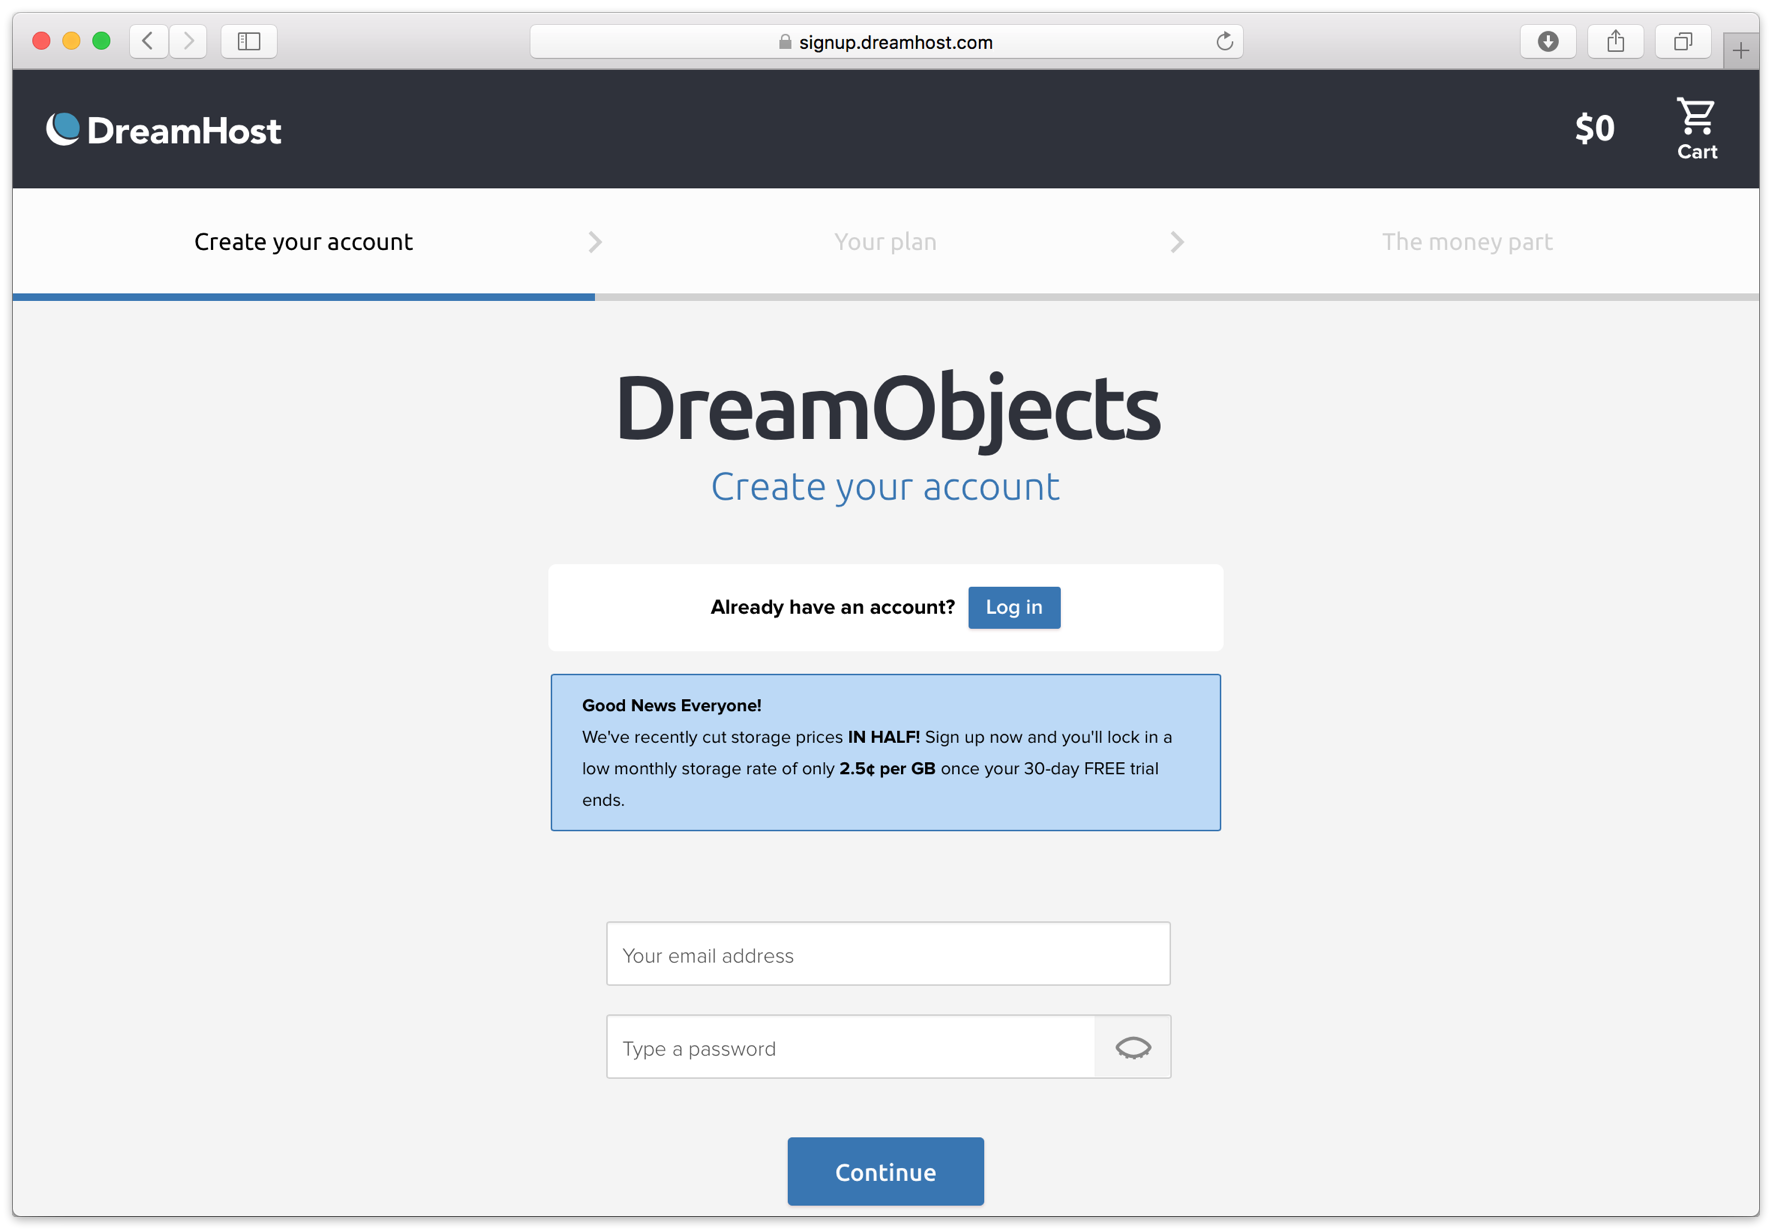
Fill in an email address and a password.
Confirm the free trial plan.

Complete the contact details and billing details.

The new account is created. You’re ready to set up the storage location.

Now we will create a bucket that Retrospect can use to store backups.
Navigate to the DreamObjects section.
 2 . Click "Create New User". Type in a username, and click "Add User"

DreamHost will begin creating your new user. When it’s done, you’ll see it along with your new Access Key.

Click "Add Bucket". Type in a bucket name. Note that these are globally-unique names. Click "Add Bucket".

Your new bucket is now created and ready to use. In Retrospect, the "Path" is objects-us-west-1.dream.io/your_bucket_name.

You’re ready to use Retrospect. You now have a bucket location, an Access Key, and a Secret Key (shown when you click "Show Secret Key").

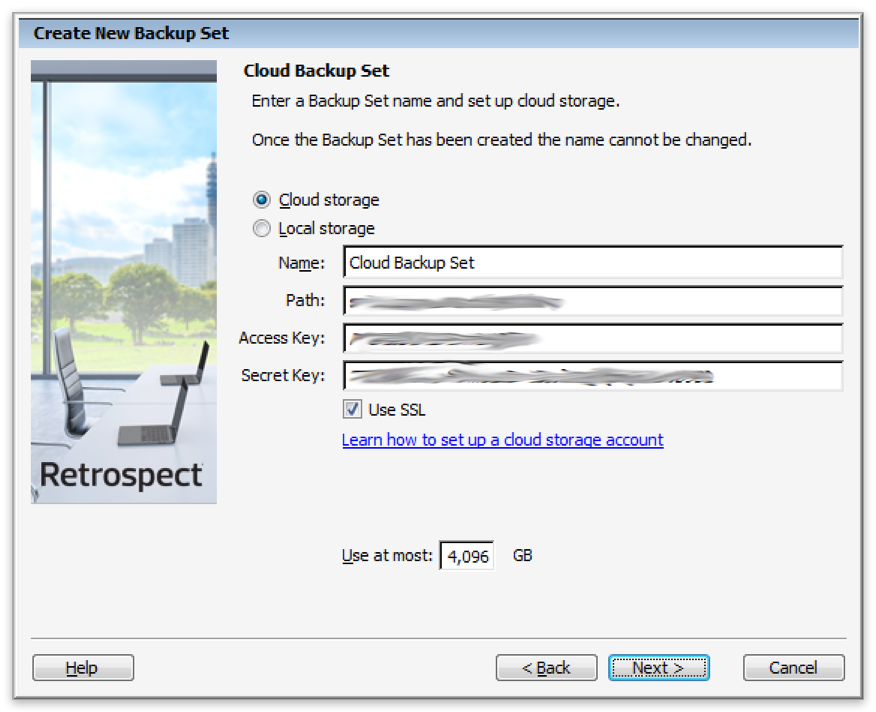
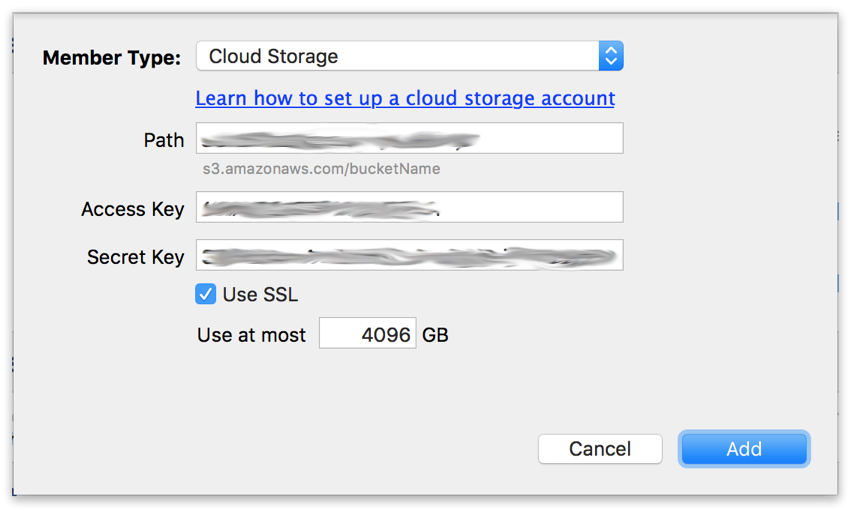
Retrospect needs three pieces of information to access DreamHost:
Path – objects-us-west-1.dream.io/your_bucket_name
Access Key – Use the Access Key from above.
Secret Key – Use the Secret Key from above.
L'aggiunta del cloud storage come destinazione è semplice. Retrospect ha un nuovo tipo di set chiamato "Cloud". Crea un nuovo set di backup/supporti e seleziona "Cloud" come tipo.
Interfaccia Windows

Interfaccia Mac

Next you’ll need to enter your cloud storage credentials. Retrospect allows customers to enable or disable SSL encryption (HTTP or HTTPS) and to set the maximum storage usage, up to 8TB per cloud member.
Interfaccia Windows
Interfaccia Mac
L'utilizzo del cloud storage è semplice. Dopo aver creato un set di cloud, crea un nuovo script o aggiungilo a uno già esistente e fai clic su "Esegui". Il backup inizierà con i contenuti del set che devono essere caricati nella posizione di archiviazione su cloud. Puoi seguire lo stato di avanzamento dell'esecuzione/attività.
Interfaccia Windows

Interfaccia Mac

La limitazione per il backup e il ripristino su cloud è disponibile nelle Preferenze.
Interfaccia Windows

Interfaccia Mac

Below are a number of tips for using cloud storage in Retrospect:
Strumento di misurazione della larghezza di banda – Misura la larghezza di banda in upload e download con questo strumento gratuito: <a target="_blank" href="http://speedtest.net">Speedtest.net</a>.
Disattivare la verifica di backup – La verifica scaricherà tutti i dati che carichi. Ulteriori informazioni sul perché è consigliabile disattivarla per i backup cloud sono consultabili su <a href="/it/support/kb/best_practices_for_cloud_storage#notes">Backup su Cloud - Best practice per la protezione dei dati con il Cloud Storage</a>.
As a reference, we have confirmed the following bandwidth for DreamHost DreamObjects:
Verified Upload Bandwidth – 20 Mbps
Verified Download Bandwidth – 90 Mbps
DNS Name: DreamHost updated its DNS name from objects.dreamhost.comobjects-us-west-1.dream.io
Last Update: 04 Lug 2016

