Cloud Backup
title: Cloud Backup - How to Set Up DreamHost for Cloud Backup created_at: 2016.03.12 updated_at: 2016.07.04 category: Cloud Backup --- :toc: macro :toc-title:

DreamHost DreamObjects is a cost-effective US-based cloud storage service for secure off-site data protection. Retrospect 11 for Windows and Retrospect 13 for Mac are certified for DreamHost DreamObjects. Follow these step-by-step instructions for setting up a DreamHost account, configuring a storage location (called a "bucket"), and creating a set of security credentials (an Access Key and a Secret Key, similar to a username and password).
Special Deal – 20% off on storage up to 2TB. See DreamHost DreamObjects for Retrospect.
Visit DreamHost to start the account creation process and click "Try if Free for 30 Days".

Fill in an email address and a password.
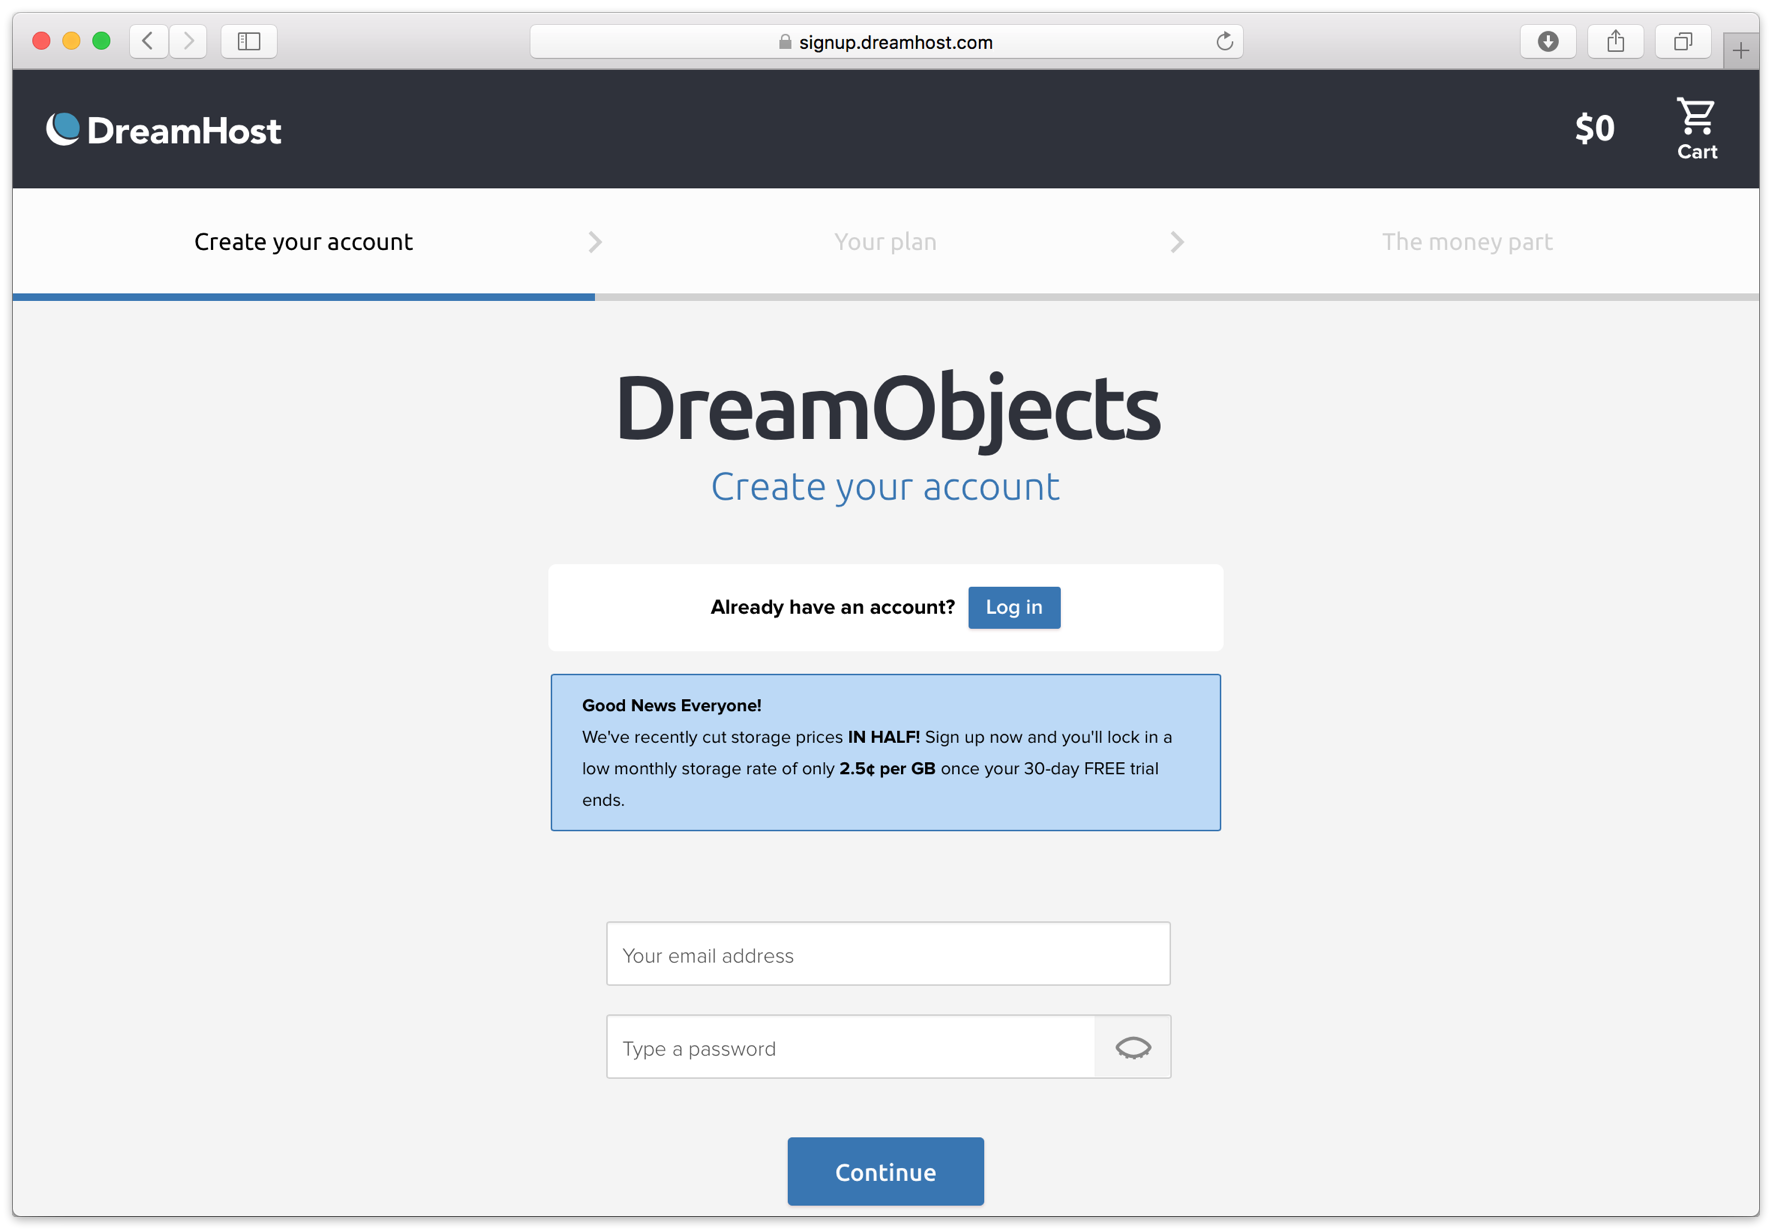
Confirm the free trial plan.

Complete the contact details and billing details.

The new account is created. You’re ready to set up the storage location.

Now we will create a bucket that Retrospect can use to store backups.
Navigate to the DreamObjects section.
 2 . Click "Create New User". Type in a username, and click "Add User"

DreamHost will begin creating your new user. When it’s done, you’ll see it along with your new Access Key.

Click "Add Bucket". Type in a bucket name. Note that these are globally-unique names. Click "Add Bucket".

Your new bucket is now created and ready to use. In Retrospect, the "Path" is objects-us-west-1.dream.io/your_bucket_name.

You’re ready to use Retrospect. You now have a bucket location, an Access Key, and a Secret Key (shown when you click "Show Secret Key").

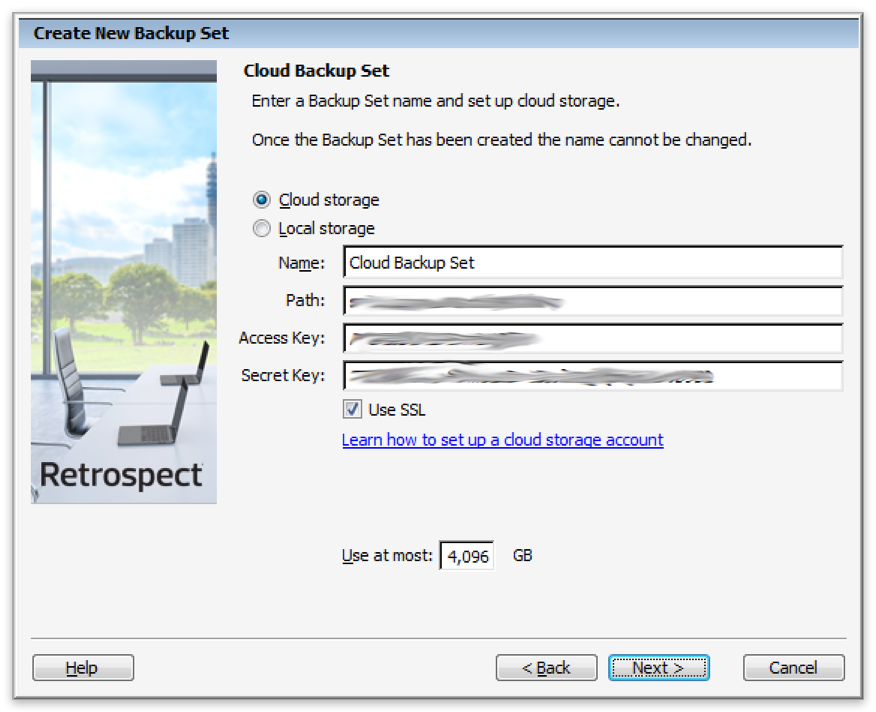
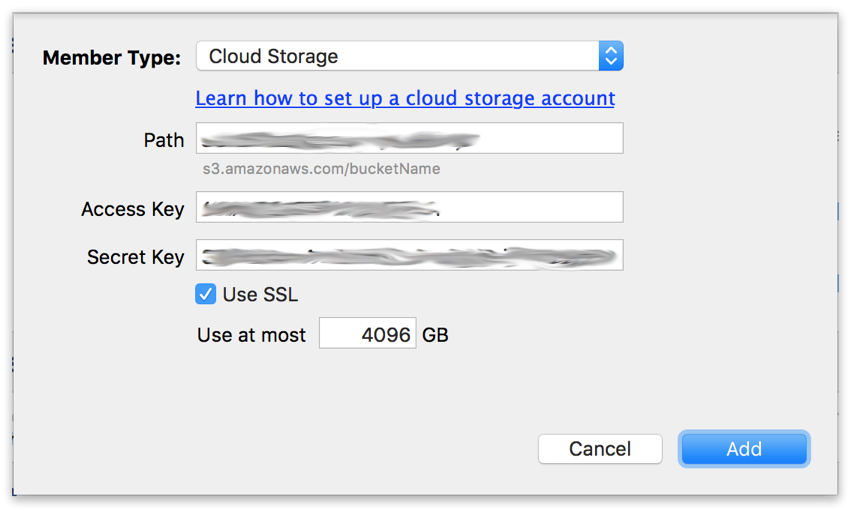
Retrospect needs three pieces of information to access DreamHost:
Path – objects-us-west-1.dream.io/your_bucket_name
Access Key – Use the Access Key from above.
Secret Key – Use the Secret Key from above.
クラウドストレージを宛先として追加する方法はシンプルです。Retrospect には「クラウド」と呼ばれる新しいセットタイプがあります。新規のバックアップセット/メディアセットを作成して、タイプに「クラウド」を選択してください。
Windows インターフェイス

Mac インターフェイス

Next you’ll need to enter your cloud storage credentials. Retrospect allows customers to enable or disable SSL encryption (HTTP or HTTPS) and to set the maximum storage usage, up to 8TB per cloud member.
Windows インターフェイス
Mac インターフェイス
クラウドストレージの使用方法はシンプルです。クラウドセットを作成した後、新規スクリプトを作成するかそのクラウドセットを既存のスクリプトに追加して、「実行」をクリックしてください。バックアップが開始し、そのセットの内容が自分のクラウドストレージの場所にアップロードされます。実行/アクティビティの進行状況を追跡することができます。
Windows インターフェイス

Mac インターフェイス

環境設定で、クラウドバックアップおよびクラウド復元のための帯域幅調整が可能です。
Windows インターフェイス

Mac インターフェイス

Below are a number of tips for using cloud storage in Retrospect:
帯域幅計測ツール – この無料ツールでアップロードとダウンロードの帯域を計測しましょう: Speedtest.net。
バックアップの検証を無効化する – 検証を行うと、アップロードした全てのデータをもう一度ダウンロードします。クラウドバックアップではなぜこの機能を無効化した方が良いのか、詳細はクラウドバックアップ - クラウドストレージによるデータ保護のベストプラクティスでご確認ください。
As a reference, we have confirmed the following bandwidth for DreamHost DreamObjects:
Verified Upload Bandwidth – 20 Mbps
Verified Download Bandwidth – 90 Mbps
DNS Name: DreamHost updated its DNS name from objects.dreamhost.comobjects-us-west-1.dream.io
Last Update: 2016年07月04日

