Retrospect Management Console enables you to monitor and manage multiple instances of Retrospect from a single interface. You’ll be able to see which sources are protected and which needs your attention, from your desktop browser or mobile device. Retrospect Backup 16 for Windows or Mac is required.
Retrospect Management Console enables complete monitoring and management available from anywhere for every Retrospect Backup engine. It is a hosted service with in-transit and at-rest encryption, enabling businesses and partners to securely monitor and manage their backup environment. See details.
We will walk through integrating Retrospect Backup with Retrospect Management Console.
Go to https://console.retrospect.com. Select on "Sign Up".

Type in your email and password and click "Sign Up"

When you sign up, we generate a verification email to ensure you are the owner of that email address. Select on the link in the email to verify it.

Type in your name and organization.

Your organization is now created.

Install Retrospect 16.
Ensure that the application has a license.
Navigate to the Preferences. On Windows, it’s available on the left navigation. On Mac, it’s available in the toolbar menu.


Select "Management".
Check "Enable Management Console" and fill in the "Organization UUID" from your Retrospect Management Console settings and the server name if not already filled in.
Close Preferences. The engine data will show up in your Retrospect Management Console account, and you’ll see the "Last Updated" status show the last time the data was sent. There is also a status message to help troubleshooting.
If you receive the error "The management console requires an organization UUID and so the option was turned off." on Windows, please check that you added both the Organization UUID and the backup server name.
Firewall Configuration
Retrospect Backup communicates with the Management Console using HTTPS, so the port is 443. As it’s the same as HTTPS web traffic (like Gmail and Amazon), it’s not generally blocked. If the firewall white-lists domains, "console.retrospect.com" will need to be added.
Technical Details
The Retrospect Management Console uses the organization UUID to link a Retrospect Backup instance to the correct organization. Within the organization, the Retrospect Backup application license is used to uniquely identify the data for that instance. If the application license is used by more than one instance (for example, re-using a trial license), then the data from the most recent communication from one of those instances will appear.
When configured, Retrospect Backup communicates with the Retrospect Management Console every minute.
To disable it, repeat the above steps and uncheck "Enable Management Console".
Select "Settings" in the top right.
Select "Users".

Select "New User".
Type in the name, email, and password. Select "Create".

Your user is now created.

Retrospect Management Console allows you to managed multiple managed organizations within your organization. This might be in the form of different geographic sites where you have a number of Retrospect Backup engines, or it might be a partner managing different customer accounts. There is no limitation on the number of organizations that you can manage or the managed organization can manage.
Select "Settings" in the top right.
Select "Organizations" on the left.
Select "New Managed Organization" at the bottom.

Type in the new managed organization’s name and select "Save".

Your new managed organization is created. You will see their new UUID.

Select "Organizations" to see a list of your managed organizations.

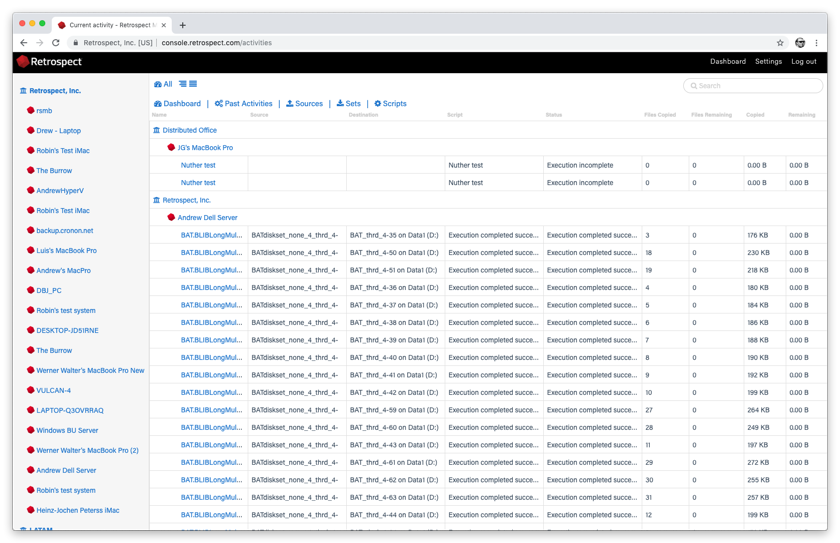
Retrospect Management Console displays activities, sources, and backup sets for customers to drill down on.
Dashboard

Activities
Sources

Backup Sets

Scripts
Retrospect Management Console also displays scripts (only available with Retrospect Backup 16.5+ engines).

Retrospect Management Console lets customers create and edit scripts for individual engines, and those changes are sent to each engine every minute. This includes the creation of destinations as well, including local disk sets, NAS disk sets, and cloud sets.
Select "Scripts" at the top.
Select "New Script" on the right.

Type in a script name.
Select the sources to back up.
Select the destination to use. You can choose from existing "Backup Sets", existing destinations under "Available Drives" to createa a new backup set on, and new destinations under "Other destinations" for a choice of new cloud storage or new NAS storage.
To set up a new NAS destination, select "Other network storage". You will see a popup where you can enter the name, path, user, and password for that NAS. Select "Save".

To set up a new cloud destination, select "Other cloud storage". You will see a popup where you can enter name, cloud (S3-compatible or Backblaze B2), path, access key, and secret key. Select "Save".

Select the appropriate schedule for the script.
Select "Save" to create the script. It will be synced to the engine in a couple minutes.
Log into your Retrospect Management Console account and click on "Settings" to access your account at the top right of the screen.
Click on "Scripts". You will see a list of Shared Scripts with a summary of each, including deployments.

Click on "New Shared Script". You will be able to select which source containers you want to include, which cloud destination, and the schedule.

For the "Destination", you can select between Amazon S3 compatible providers and B2. For a B2 cloud destination, enter the bucket name. For an Amazon S3 compatible provider, use the entire URL with bucket name.

After you save the script, select that script’s deployment options. Select the engines that you would like to deploy this Shared Script to and click "Save". The script will then be deployed to those engines.

All Shared Scripts are use AES-256 encryption. You will find the encryption key in the "Deployments" tab under "Security Code". Each backup set will be named 'Destination Name-Engine Name' to ensure the separate Storage Groups do not use the same destination path.
The latest versions of Retrospect Backup and Retrospect Virtual are compatible with Retrospect Management Console. See the following list for backwards compatibility. If your version is not listed, it is not compatible with Retrospect Management Console.
Retrospect Backup 15.5: Basic monitoring.
Retrospect Backup 16.0: Shared scripts.
Retrospect Backup 16.1: Management abilities with pause/unpause stop support.
Retrospect Backup 16.5: Remote granular management.
Retrospect Backup 17: Full compatibility.
Retrospect Virtual 2020: Monitoring compatibility via Automatic Onboarding.

