Cloud Backup
title: Cloud Backup - How to Set Up Zenko CloudServer for Cloud Backup created_at: 2018.05.17 updated_at: 2018.05.17 category: Cloud Backup --- :toc: macro :toc-title:

Zenko CloudServer (formerly S3 Server) provides a free, open source, scalable cloud storage location for secure on-site data protection. Retrospect 15.1 for Windows and Mac are certified for Zenko CloudServer. Follow these step-by-step instructions for configuring Retrospect to integrate with Zenko CloudServer.

Zenko provides a single unifying interface using the Amazon S3 API, supporting multi-cloud backend data storage both on-premises and in the Amazon S3 public cloud as well as other services, including: Available now for Amazon S3, Scality RING and Docker. You can deploy it on any hardware you prefer. At the end of the setup, you will receive a path, an access key, and a secret key.
You will need a Synology or QNAP NAS that can host Docker instances.
Install Docker.
Download scality/s3server.
Launch scality/s3server via Image in Docker.
In Docker > Container, highlight scality/s3server1 click on "Details". Local port is what is needed to connect.
Create a bucket (folder) using Cyberduck instructions.
Copy down the default access key and secret key.
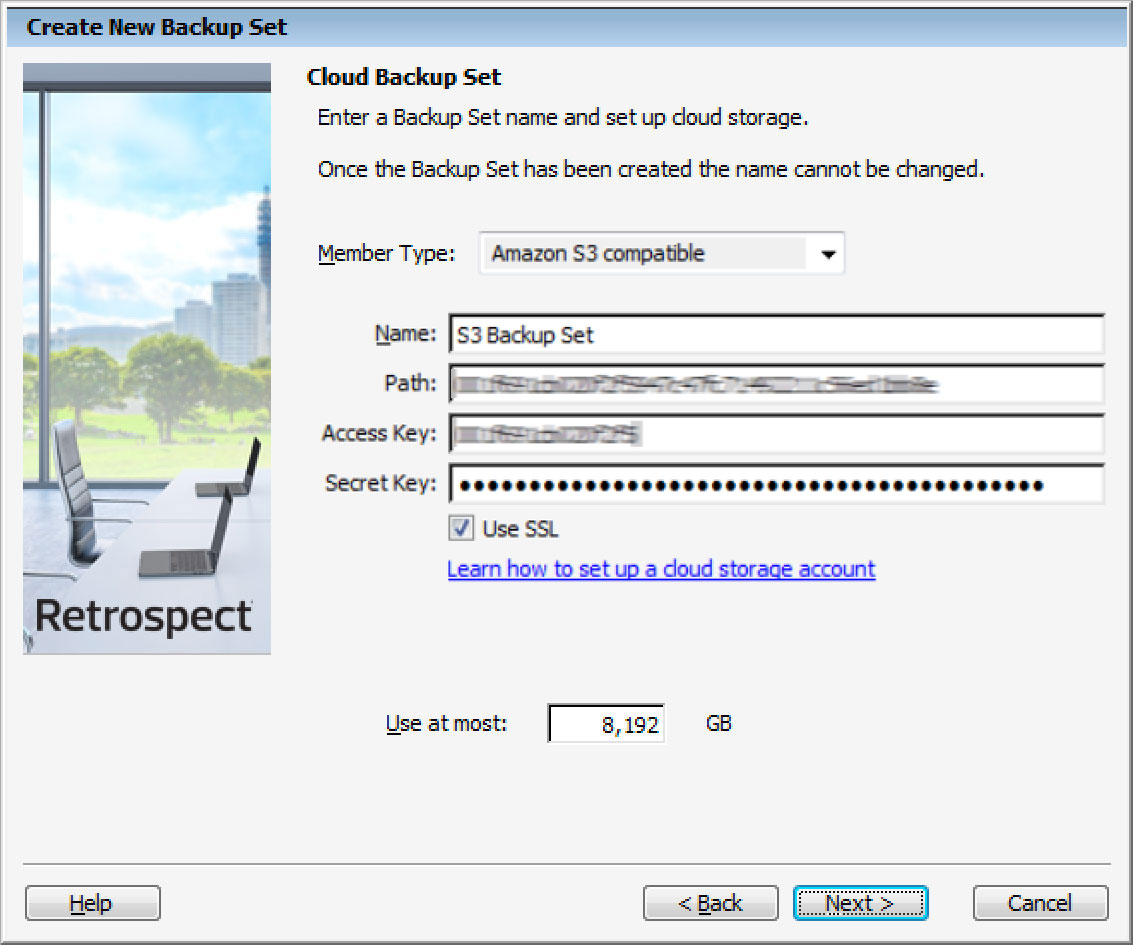
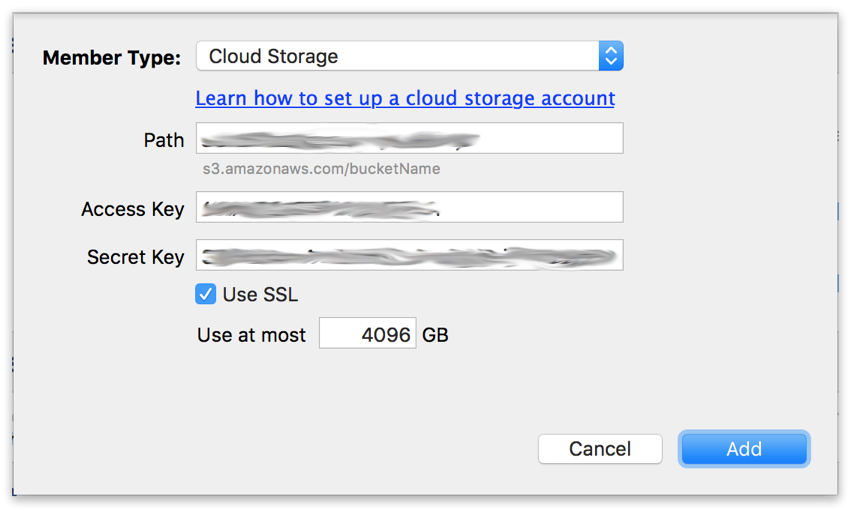
Retrospect needs three pieces of information to access Zenko CloudServer:
Path – url_to_instance:port_number/your_bucket_name
Access Key – Use the Access Key provided by your Zenko CloudServer instance.
Secret Key – Use the Secret Key provided by your Zenko CloudServer instance.
Adding cloud storage as a destination is simple. Retrospect has a new set type called "Cloud". Create a new backup set/media set and select "Cloud" as the type.
Windows Interface

Mac Interface

Next you’ll need to enter your cloud storage credentials.
Windows Interface
Mac Interface
Using cloud storage is simple. After you have created a cloud set, create a new script or add it to an existing one, and click "Run". The backup will begin with the contents of the set being uploaded to your cloud storage location. You can track the progress in the execution/activity.
Windows Interface

Mac Interface

Throttling for cloud backup and cloud restore is available in Preferences.
Windows Interface

Mac Interface

Below are a number of tips for using cloud storage in Retrospect:
Bandwidth Measurement Tool – Measure your upload and download bandwidth with this free tool: <a target="_blank" href="http://speedtest.net">Speedtest.net</a>.
Disable Backup Verification – Verification will download all of the data that you upload. See more details about why you should disable it for cloud backups in <a href="/uk/support/kb/best_practices_for_cloud_storage#notes">Cloud Backup - Best Practices for Data Protection with Cloud Storage</a>.
Last Update: 17 May, 2018

